
In this article, I show you how to add and display dynamic metadata in your Divi Builder Theme templates. This is possible thanks to a native WordPress feature (no need for complex extension such as ACF): Custom fields.
After reading this article, if you do not already know, you will wonder how you could have missed it, believe me!
- 1 - What is WordPress custom fields?
- 2 - Enable custom WordPress fields
- 3 - Create custom fields
- 4 - Add custom fields within a publication
- 5 - Show custom fields within a theme template
- 6 - Skinning the appearance of fields
- 7 - Custom fields appear on the model
- 9 - Custom fields in Divi: in conclusion...
1 - What is WordPress custom fields?
The custom WordPress fields, also known as meta-boxes in the context of the development of themes and extensions, are features that allow users add, edit and customize additional information to articles, pages or types of personalized content.
This additional information is stored as metadata and can be used to extend the functionality and customization of your WordPress site beyond the basic content offered by WordPress.
In other words, custom fields allow to add specific information that is not covered by standard WordPress fields, such as title, article content, extracts, publication date, author, etc. For example, if you manage a book review site, you could create custom fields for the book author, publisher, year of publication, etc.
Values stored in custom fields can be recovered and used in WordPress themes to display additional information about articles or pages.
In the past, this required some knowledge of PHP to modify theme files in a child theme in order to make these fields appear in front-end... But thanks to Divi Theme BuilderIt's a play, no need to know how to code!
Note: default, WordPress allows to add custom fields via the administration interface in the section of the editor of articles or pages. However, this interface is quite basic. This is why extensions such as Advanced Custom Fields (ACF), Custom Post Type UI or Meta Box - which offer a more user-friendly user interface - are much more popular.
2 - Enable custom WordPress fields
Custom fields are native, you will understand. However, by default, they are disabled. It is up to you, as a user, to activate them. Here is how to proceed:
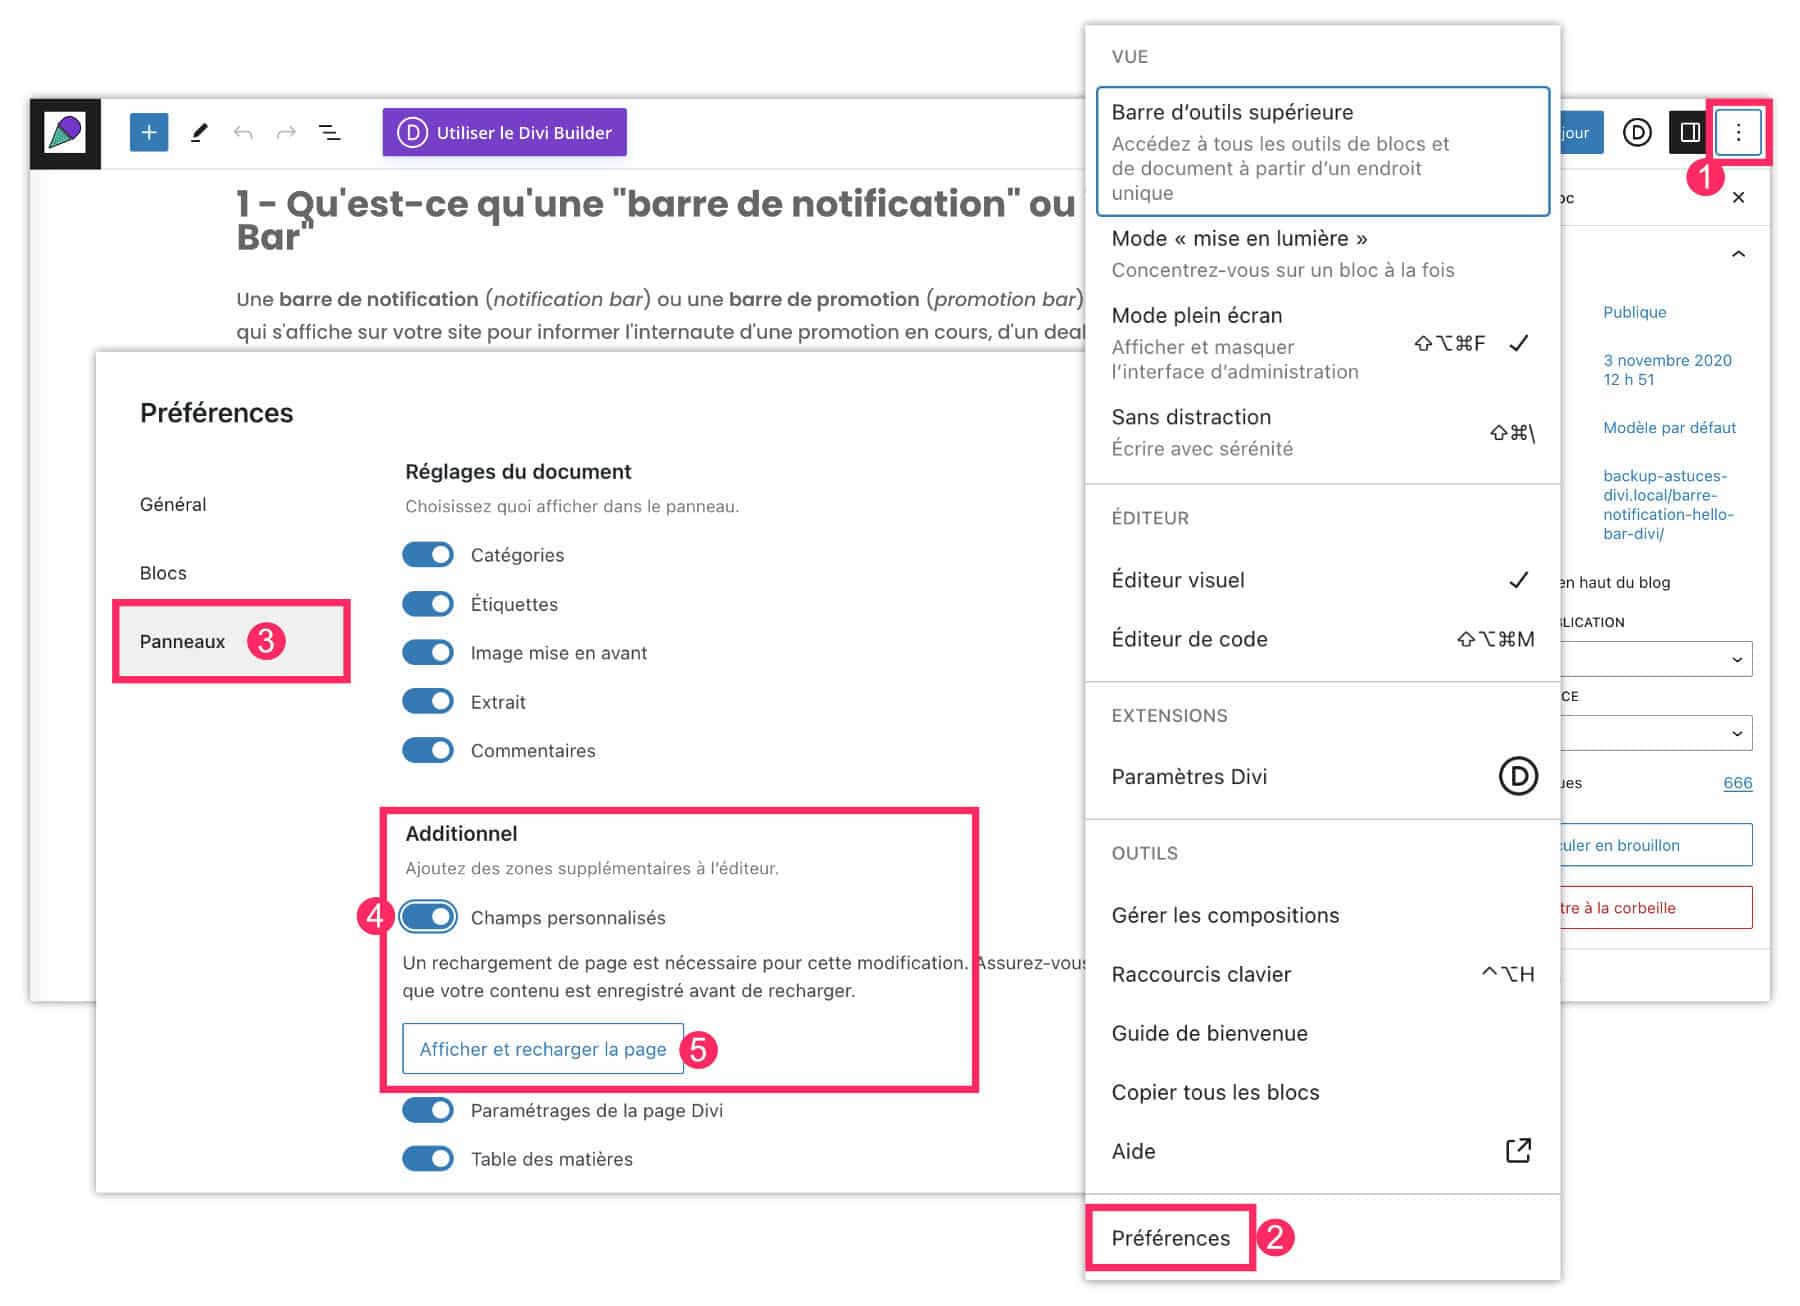
- Open the WordPress editor, on a page or article, no matter. Click on the 3 small points at the top right to open the editor's options.
- At the bottom of the list, click Preferences.
- Open the tab Panels.
- Enable custom fields.
- Validate with the button Show and reload page.
- When the page reloads, scroll it down, you will see a new box named Custom Fields.
3 - Create custom fields
Now that the custom fields are active, you will be able to create them in this way:
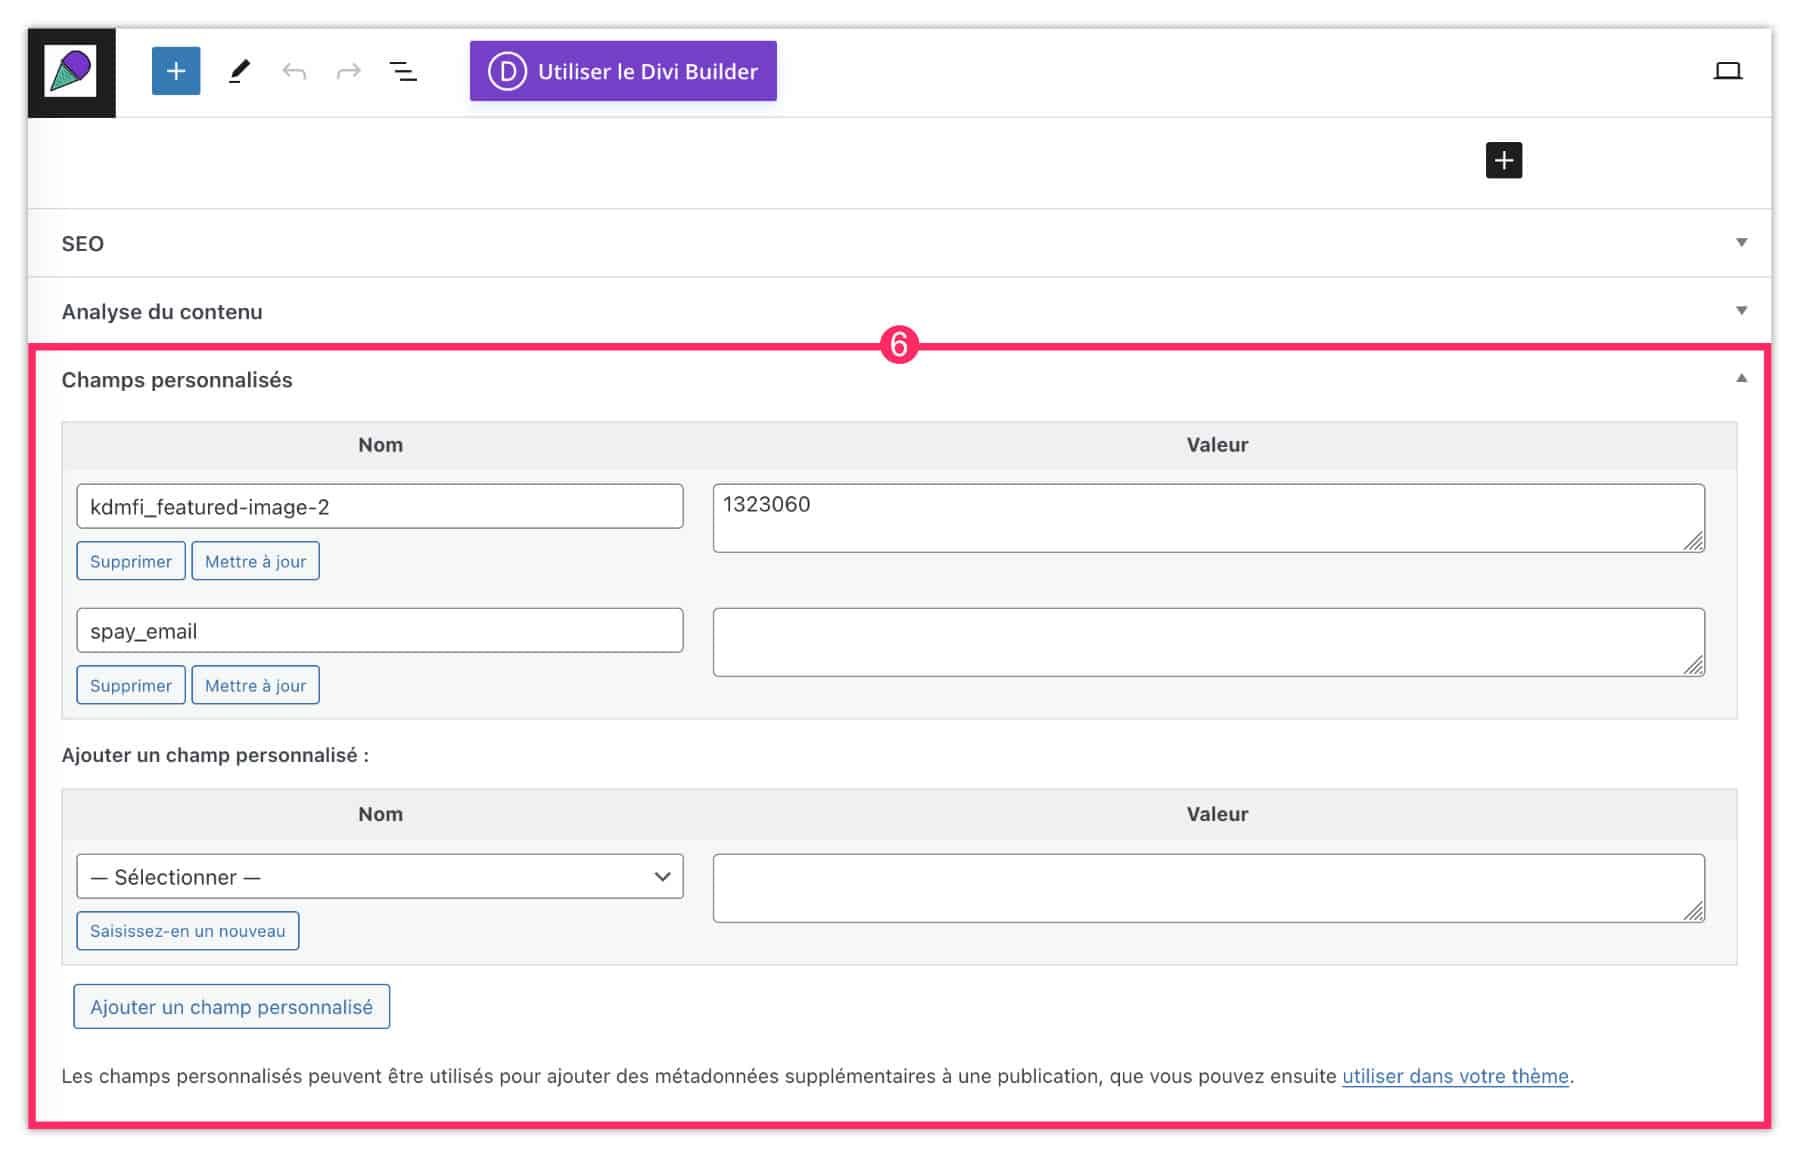
- Go down to the bottom of the editor, within the publication to access the box of fields.
- Click Add Custom Field.
- Give your field a name: without accent, space or special character. It is even recommended to prefix them, for example:
ld_difficulte. - Add a value for this field, for example
Facile. - Finish with Add Custom Field.
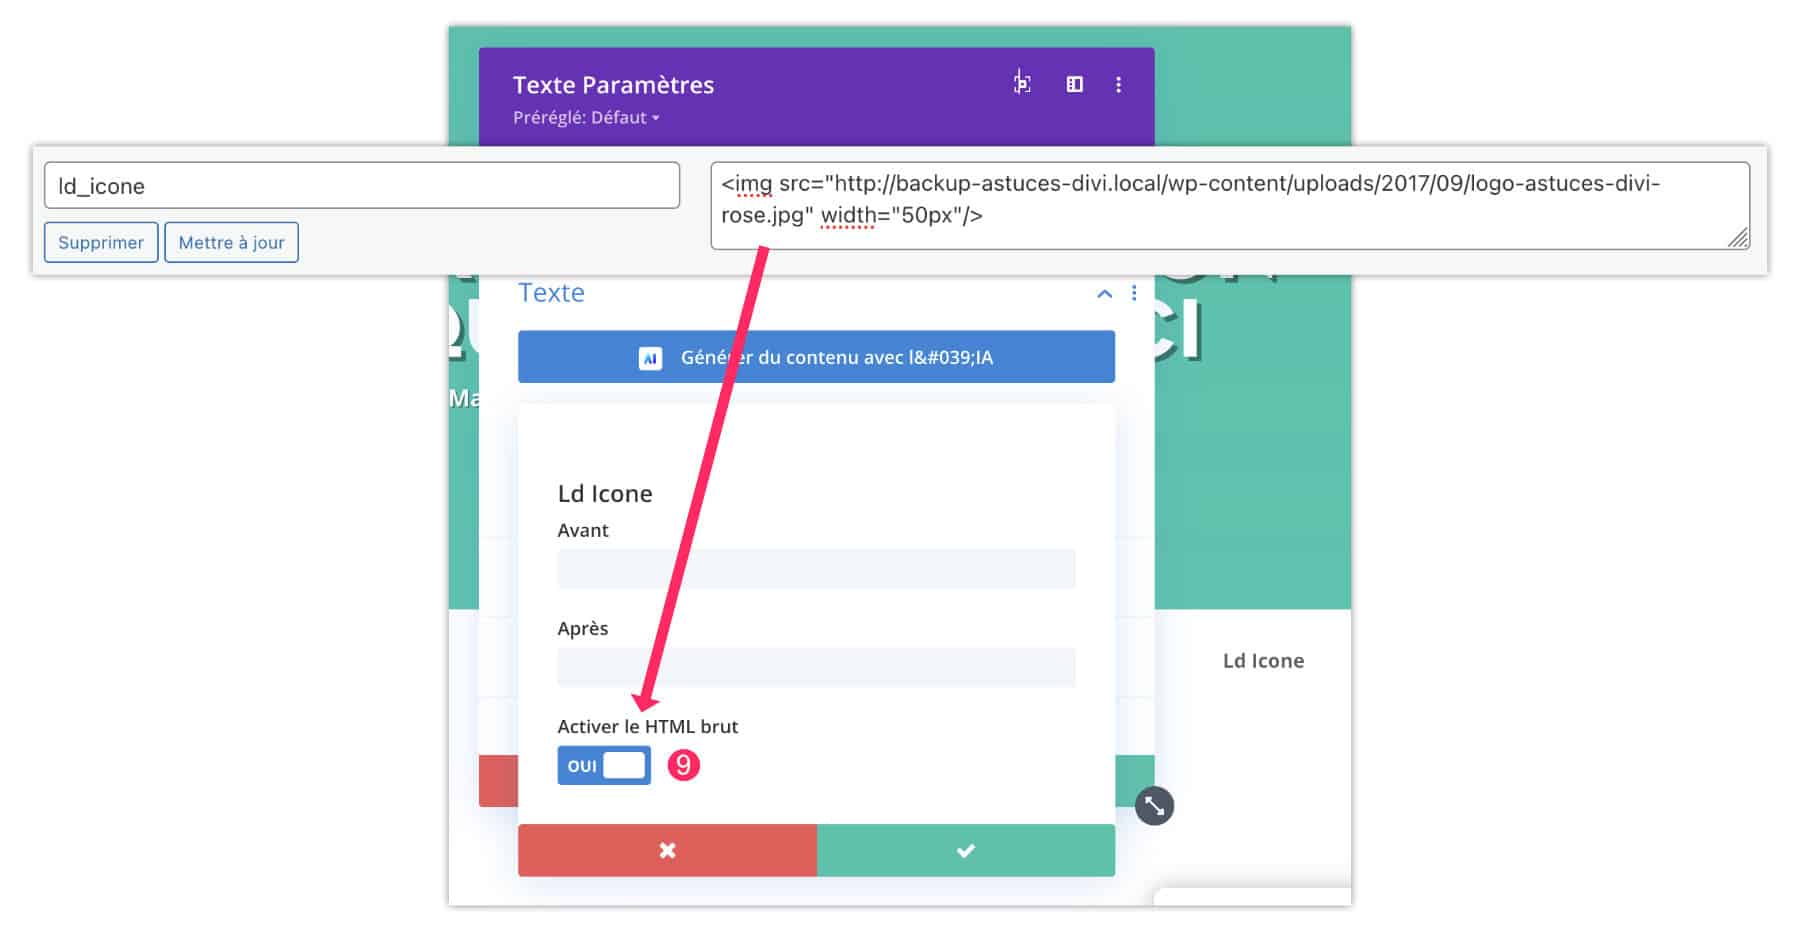
- Note that these values can use HTML. For example, to insert an image, you can enter a value of this type:
<img src="https://example.com/wp-content/uploads/2024/09/image.jpg" width="50px"/>There you go. your publication now has new metadata. For my example, I added:
- time
- difficulty
- price
- the opinion
- icon
But everything depends on your project of course!
4 - Add custom fields within a publication
Then the idea is to enter values for your metadata at each new publication. It's a habit to take.
For example, if you publish movie reviews, then you will not forget to enter every time all the fields you need, within the publisher itself.
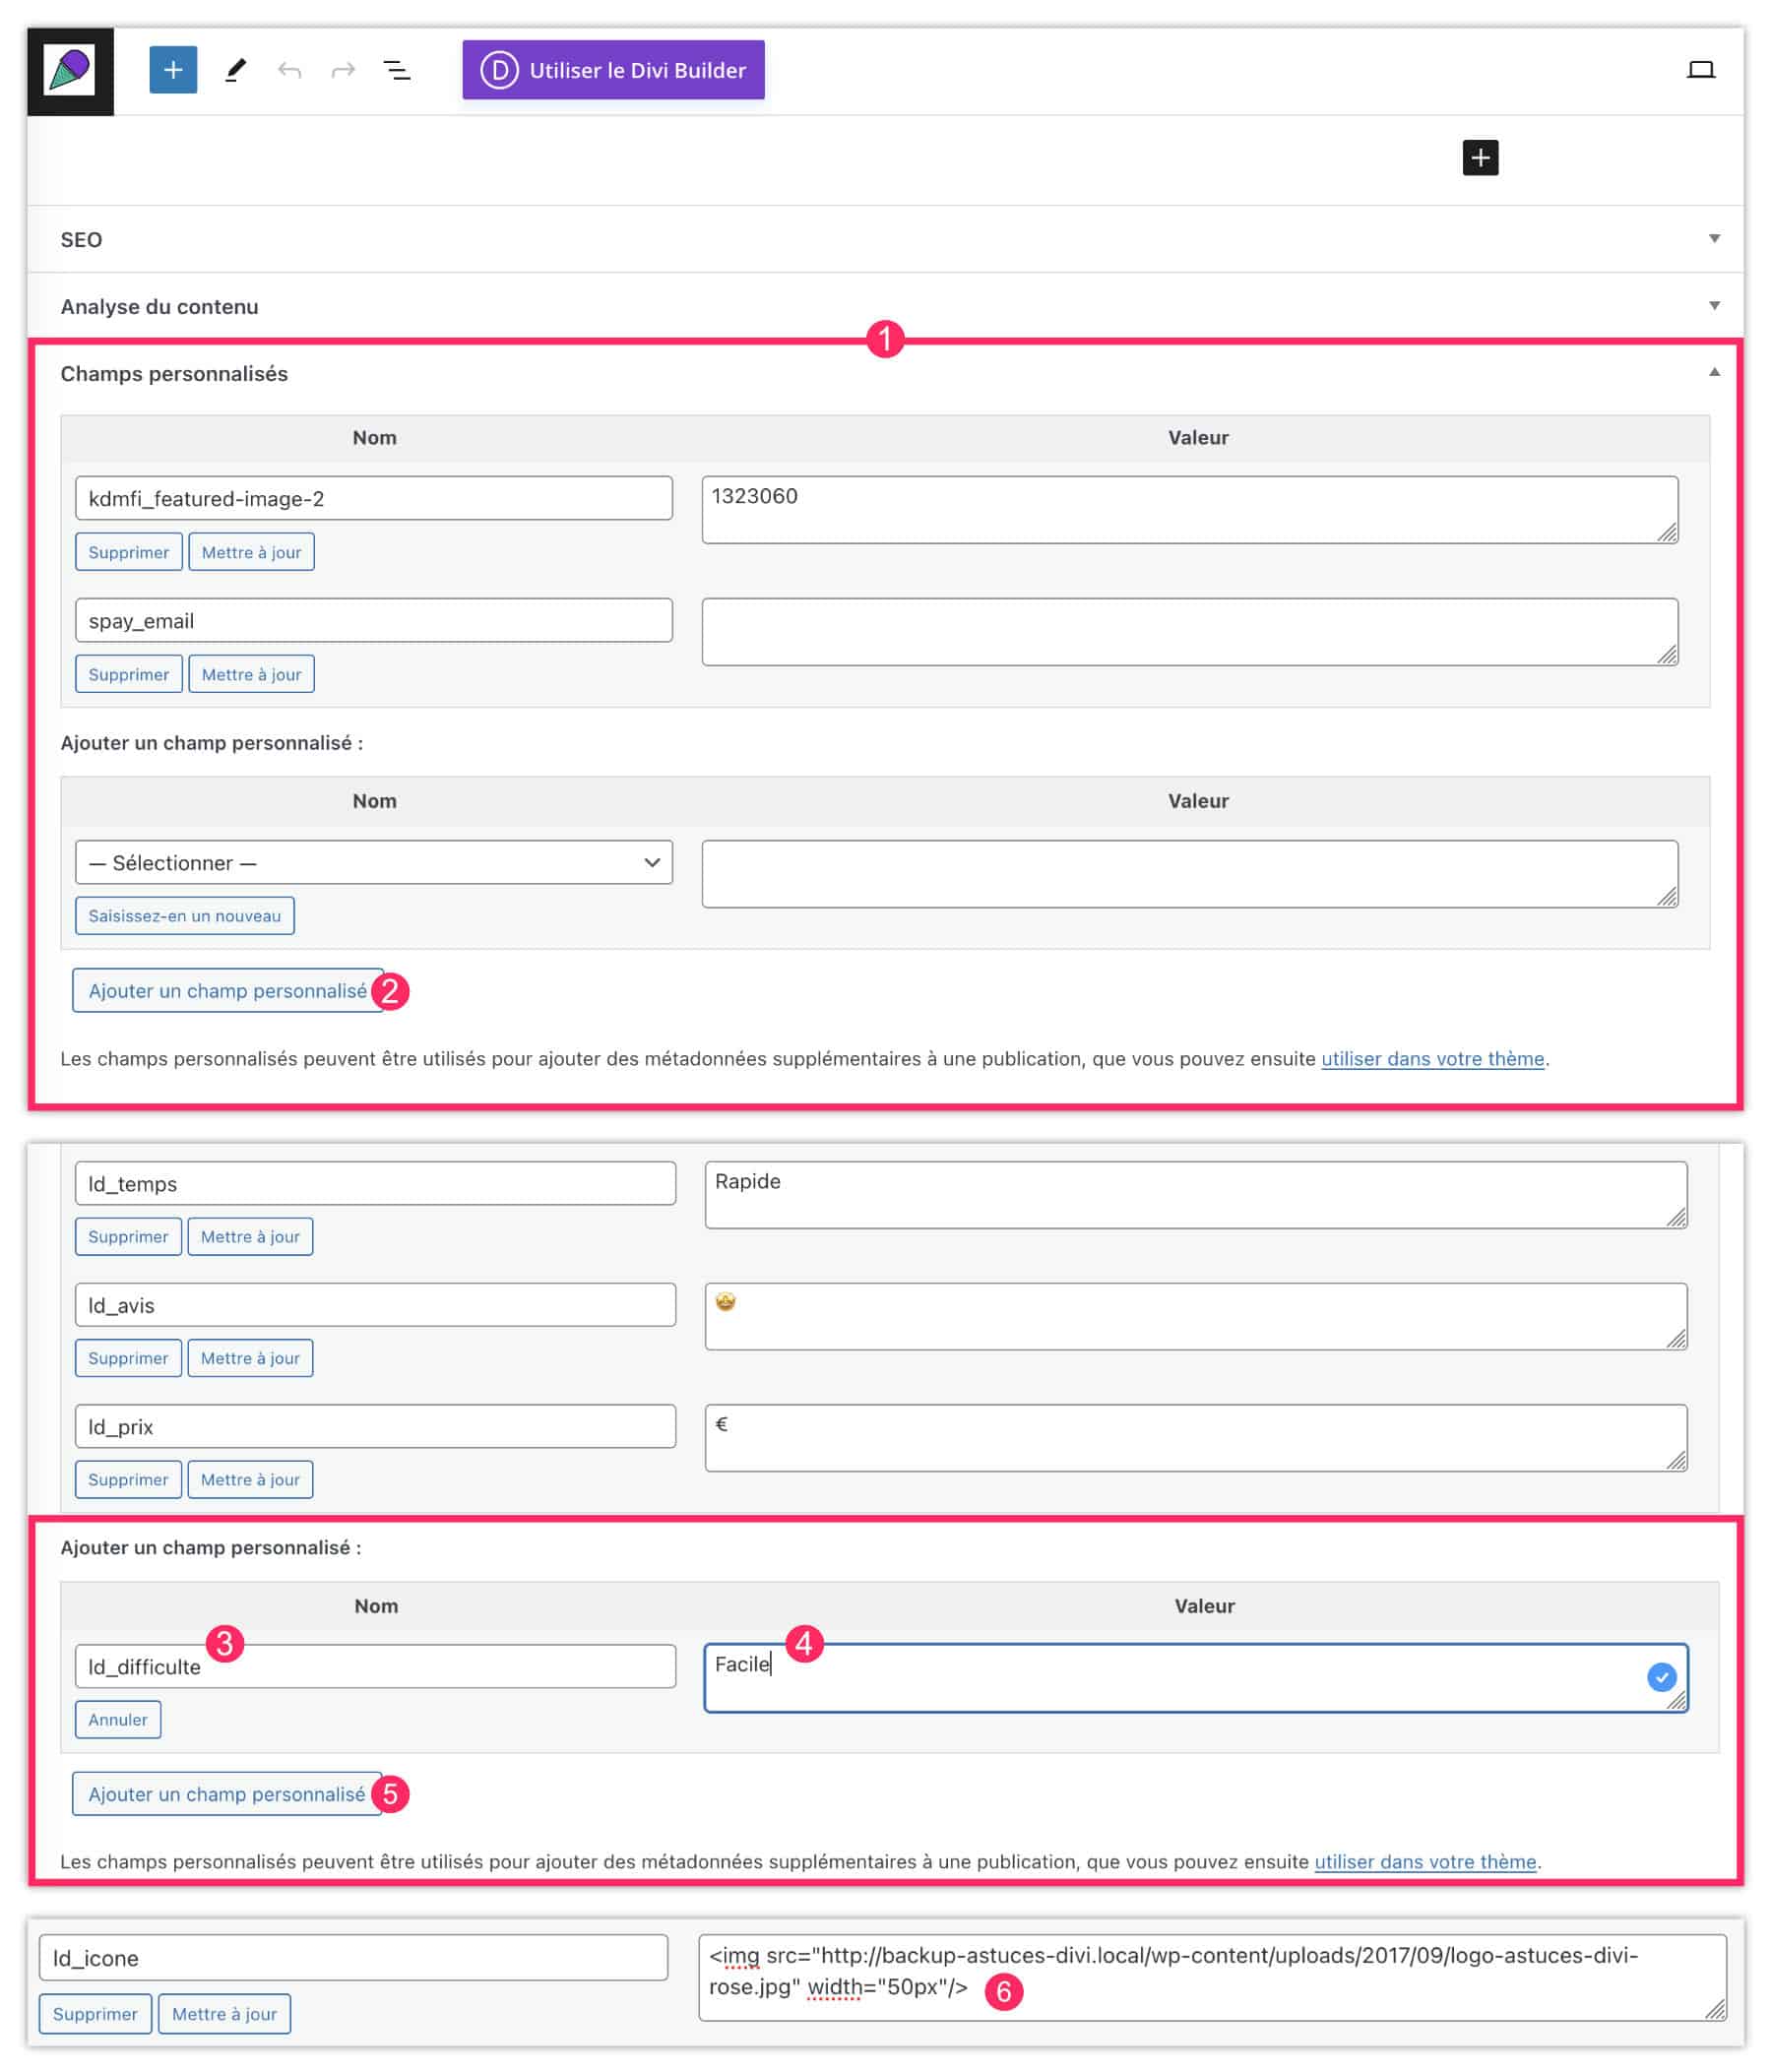
This happens the same way as when you created these custom fields, except now, All you have to do is call them from the drop-down list.
At the bottom of your publication, open the drop-down list to choose the custom field. For my example, you notice that my 5 fields appear in this list.
For values: text, HTML and emojis are accepted.
Don't forget to update your publication.
Did you know that? You can test Divi for free by visiting on this page and by clicking on "TRY IT FOR FREE"
5 - Show custom fields within a theme template
Of course, after updating your publication, you will notice that these custom fields are invisible to your publication. It's normal, you have to show them! And that's where the Divi Theme Builder :
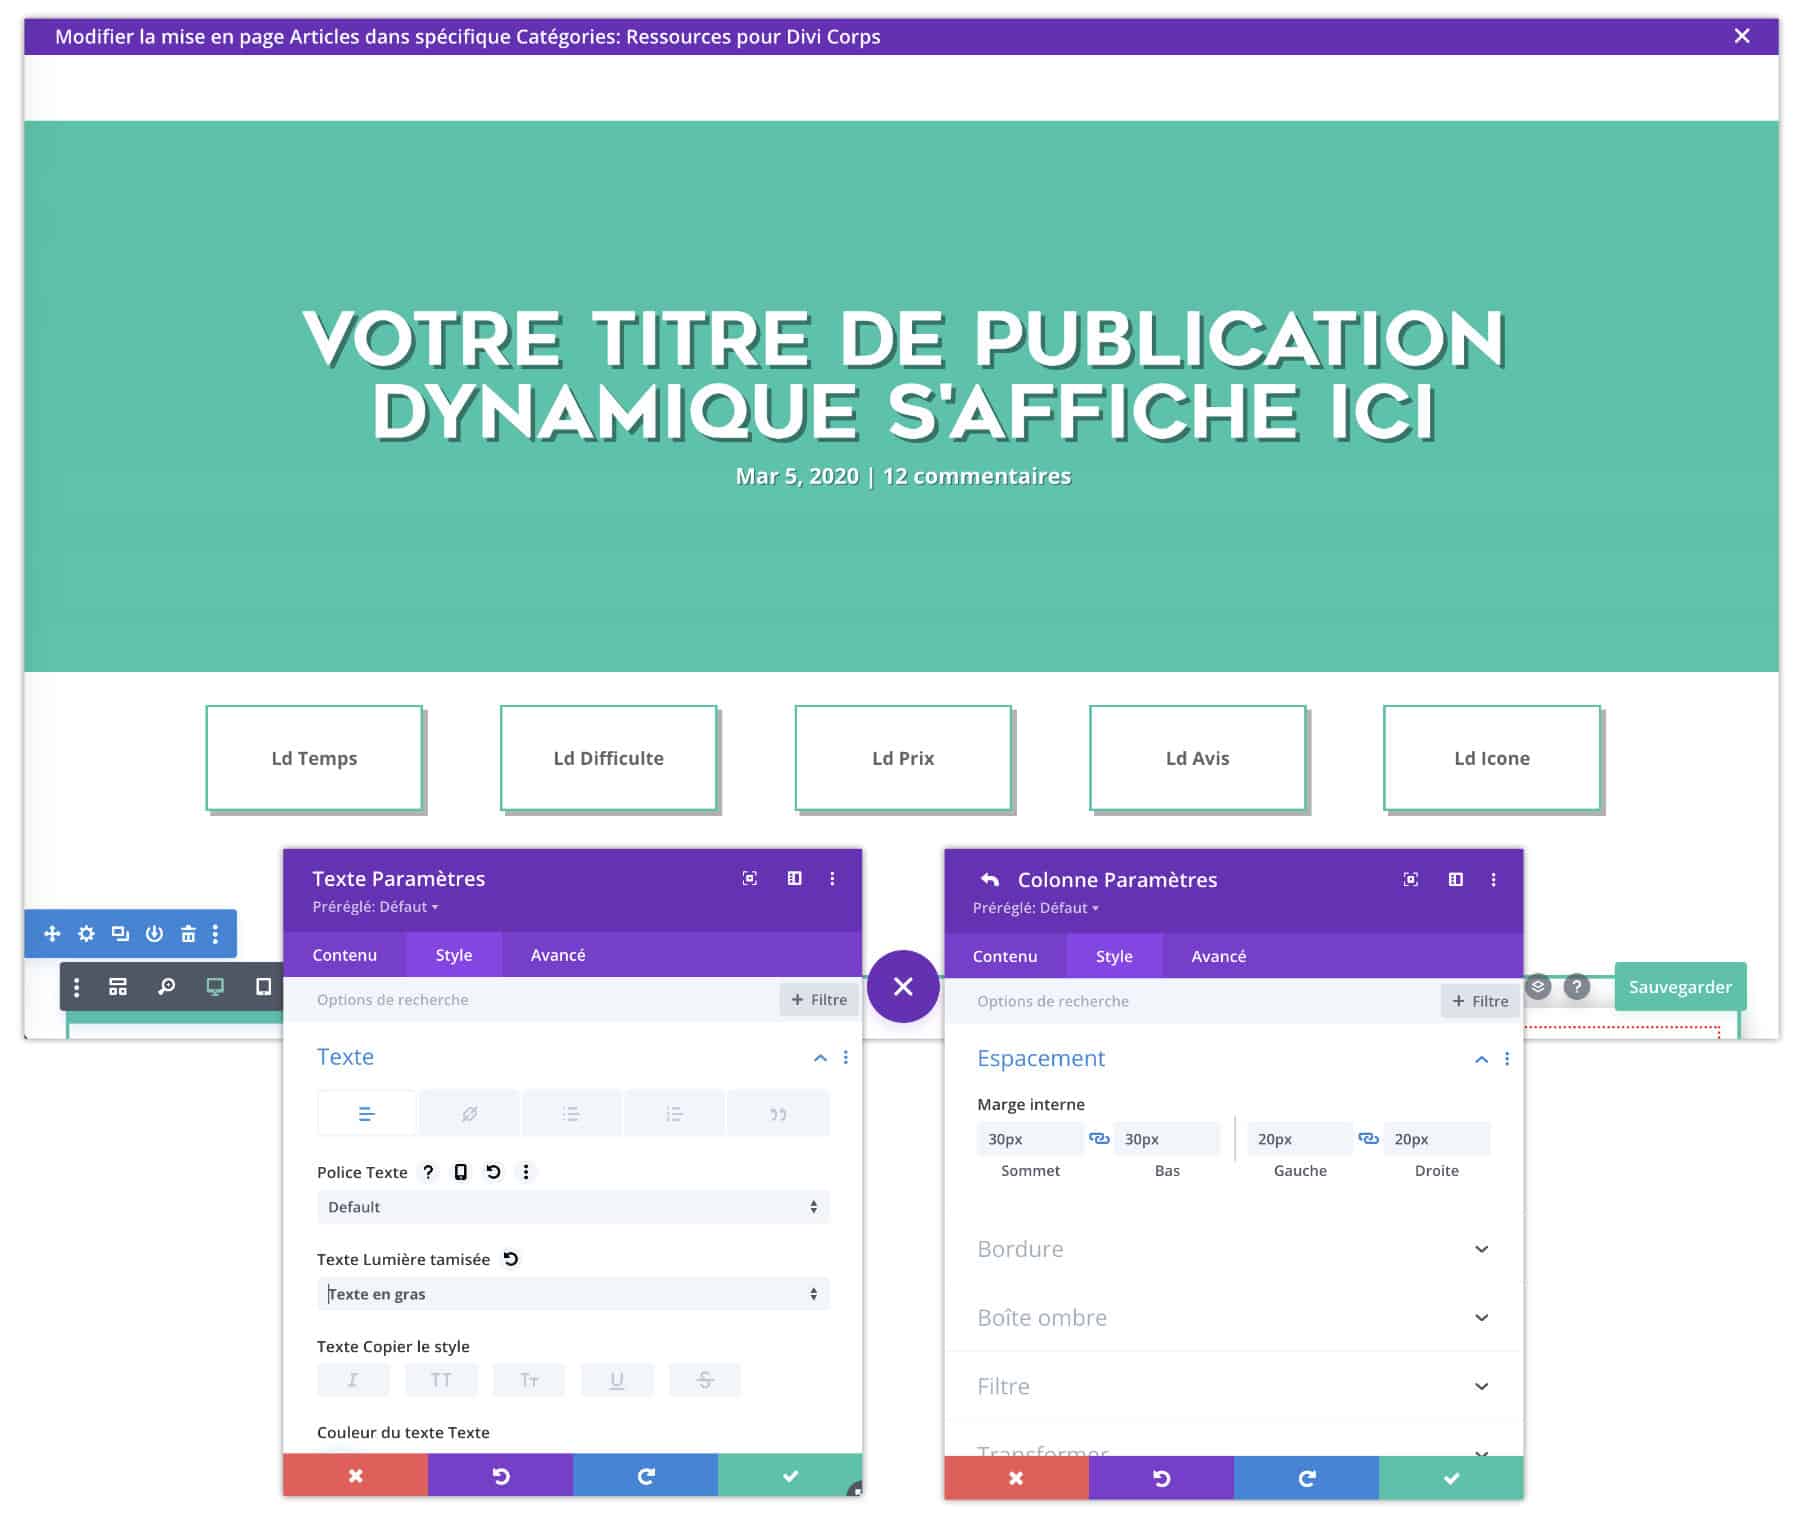
- Go to the tab Divi > Theme Builder and add or modify the template where you want to show the custom fields. For my example, I edit the model All articles (from the blog).
- Also for my example, I will add a row (one line) cut in 5, since I have 5 custom fields to display. You can choose another arrangement.

- In each column, I will add a Text module.
- Remove the waiting text and click database icon.
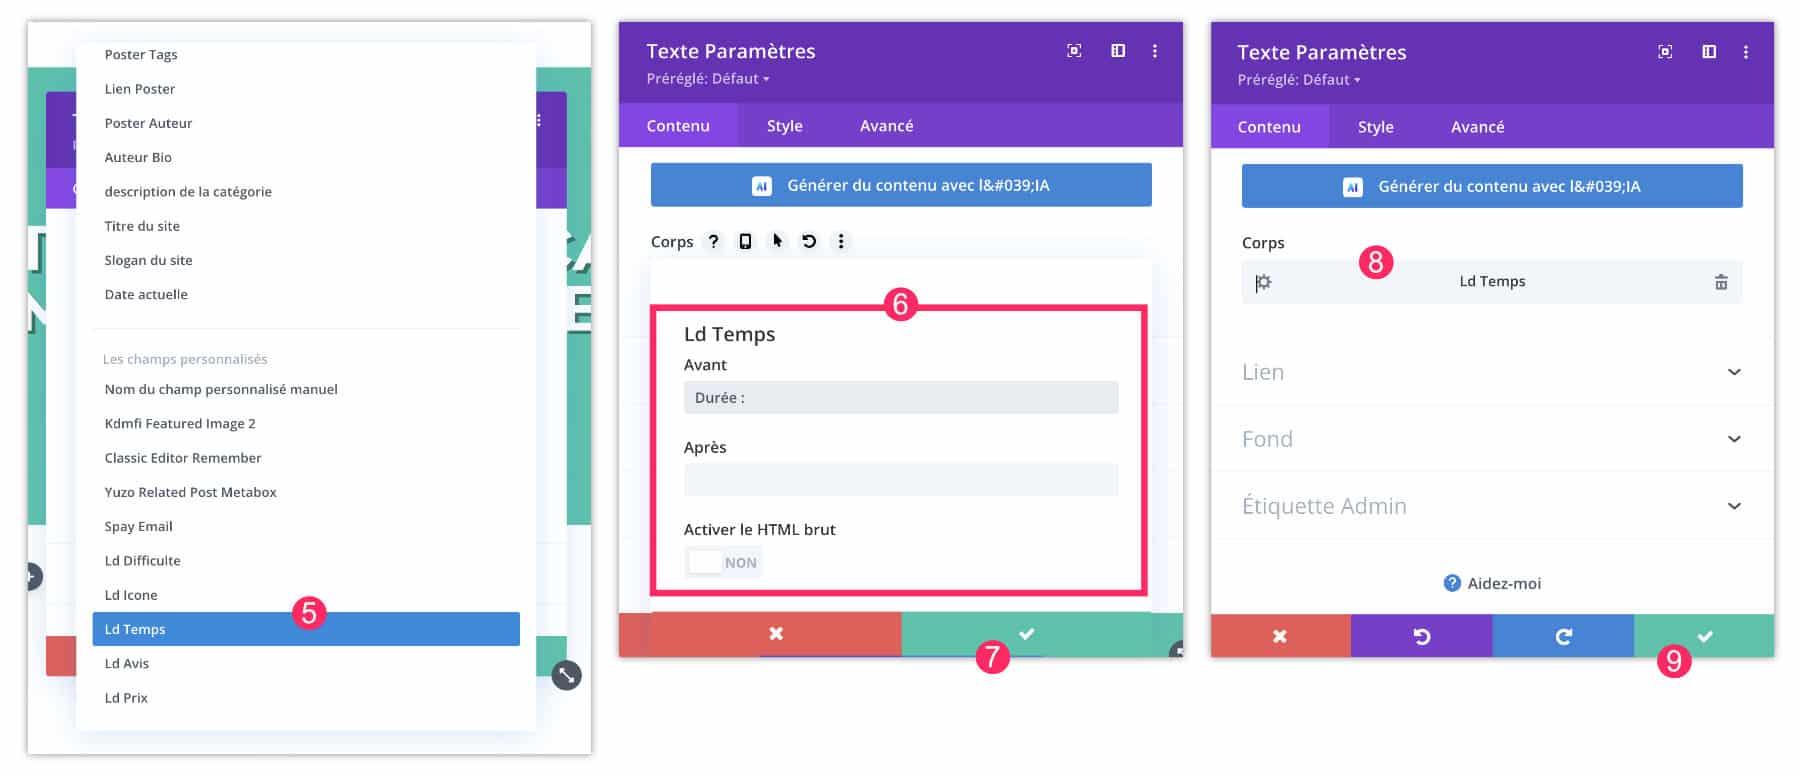
- From the drop-down list, choose the field to display. For example,
ld_temps. - In the insert, you can enter what will be displayed before and after the value of the custom field (optional). For example,
Durée : - Validate the field and its value.
- Validate again.
- Note that if the field value uses HTML, you will need to choose Enable raw HTML.
6 - Skinning the appearance of fields
Of course, do not hesitate to improve the design of the display of custom fields:
- In the tab Style of the text module, you can customize everything -> alignment, grease, color, etc. Even if you don't see it, these styles will be applied.
- You can do the same for columns, row, etc.
7 - Custom fields appear on the model
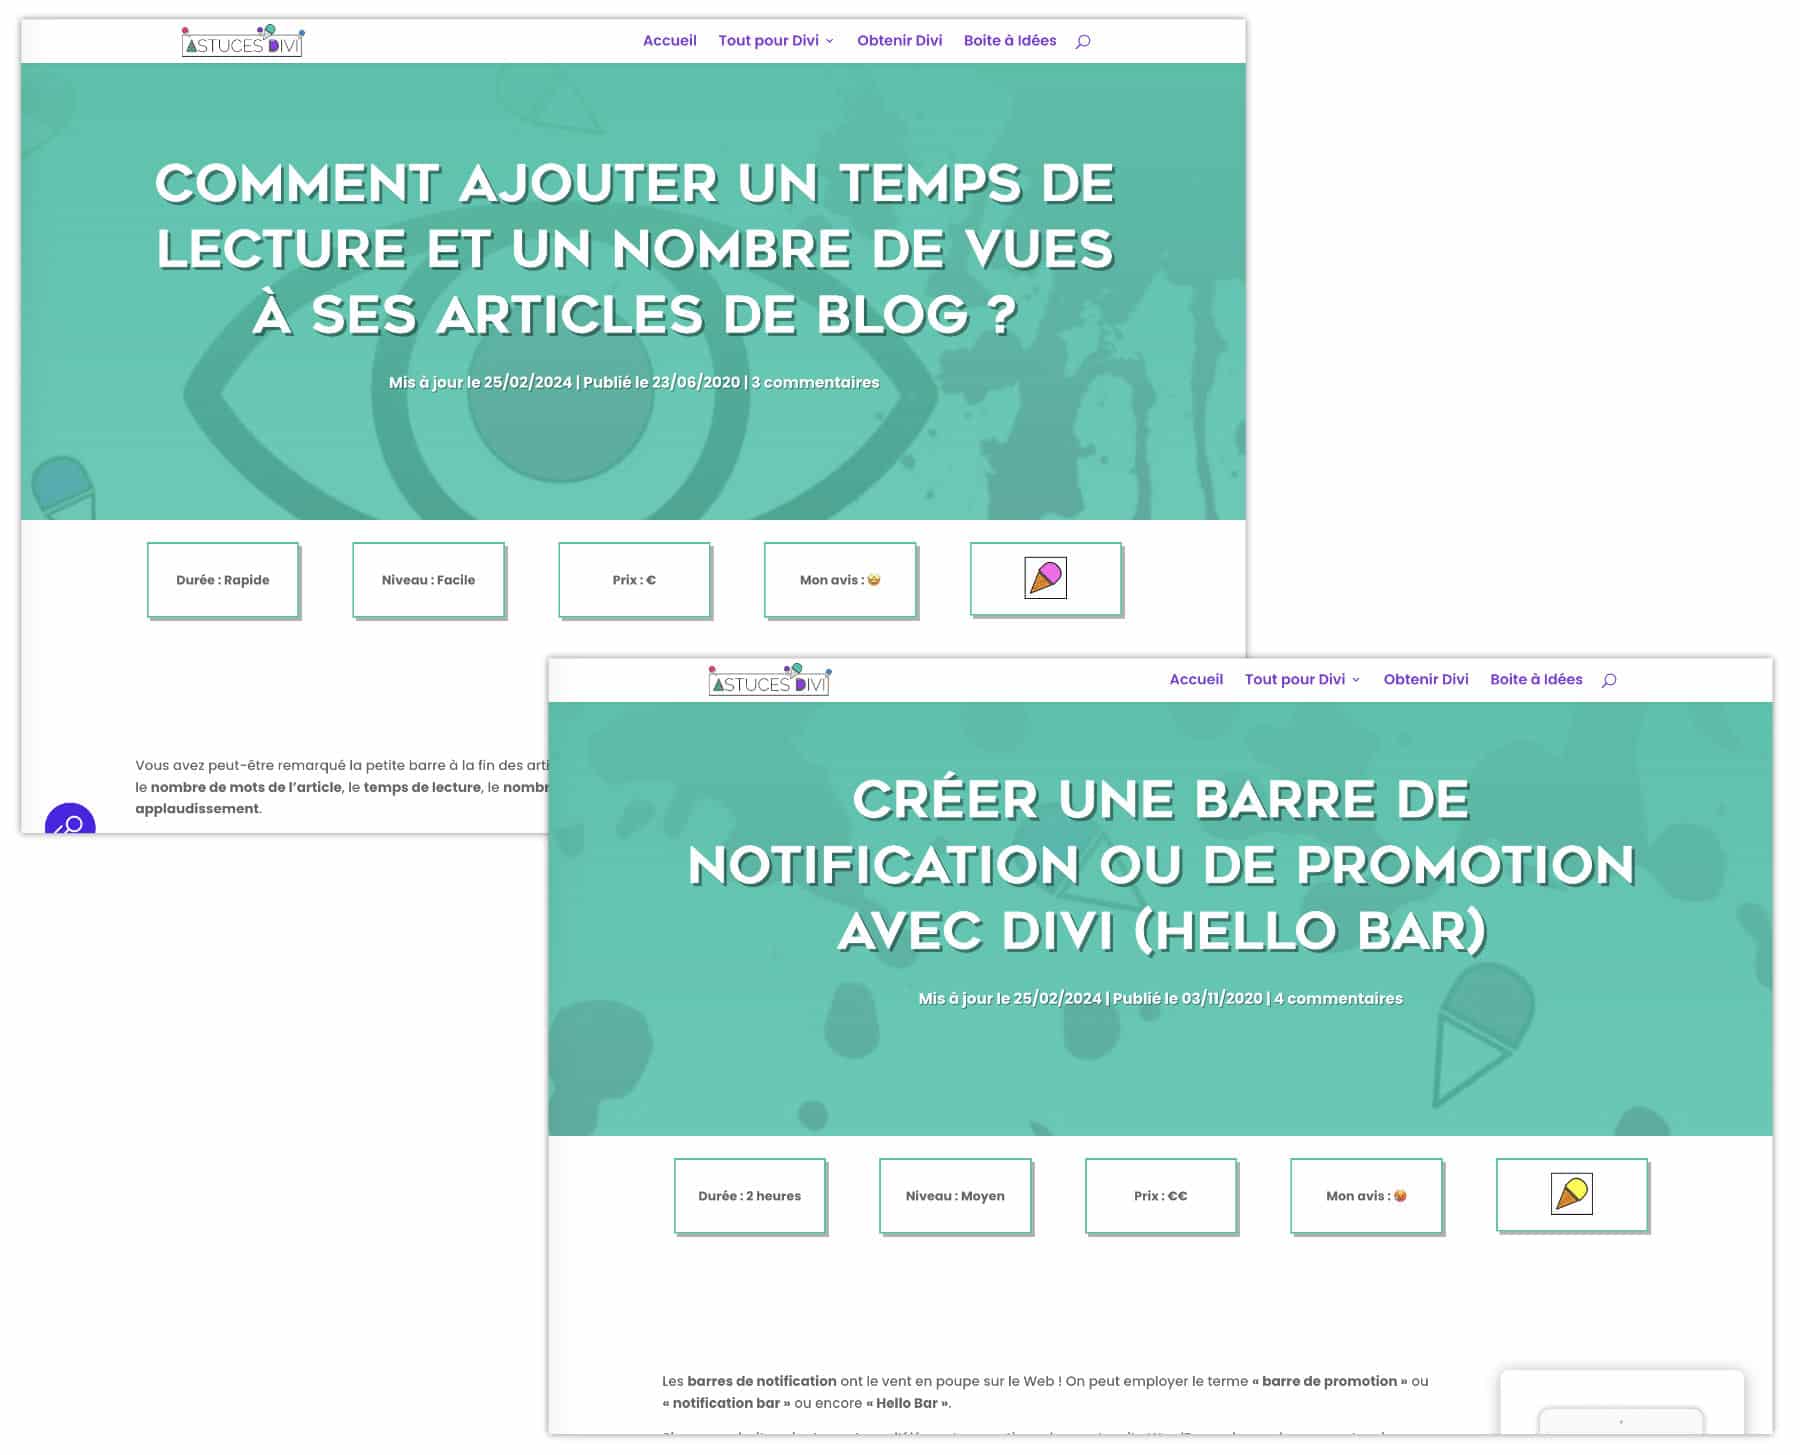
Once completed, you can visit your site to view your changes. For my example, you notice that each item displays the custom fields dynamically... This is all the point of this tutorial.
9 - Custom fields in Divi: in conclusion...
Imagine all you can do with custom fields within a theme template Hey! It's time to win, clearly! But also, it is very useful to standardize the design of a site.
Often, these metadata will be useful in blog articles, but not only! They can also be used on pages.
For example, that's what I used on my training site where all training pages must display a uniform design, only data changes. So, we create the design once only thanks to a theme model, the rest is just data to change, you see the idea?
Besides, I'd be curious if you were using the custom native WordPress fields with Divi ? Tell me in comment...
To continue, I propose a playlist:


Bonsoir
J’ai un soucis sur mon Blog. Mes articles n’apparaissent plus . Aurais tu une idée de quoi cela pourrai venir stp?
Super tuto comme toujours ! Et surtout très utile ! Ces champs personnalisés (Les fameux CPT) sont devenus indispensables !
Merci Jérôme.
Ah mince ! As-tu trouvé d’où ça venait pour le coup ? (désolée du retard de réponse)