
You can easily play with overflight options offered by Divi. It is called the "hover" Webdesign... For example, one can make a zoom over image as we had seen in a previous tutorial. You can change the color of a text or background... But today I show you how changing an image over the mouse.
- Difficulty: zero!
👉 Duration: time for a coffee!
1 - What is "hover" or "surpass mouse"?
Is it really necessary to explain what HOVER is? If you are a webdesigner, you know and master... But if you come straight from the ice age, here's a little definition:
The "Hover" or "surrounding the mouse" display a different status or status to an element when the user passes the mouse over it.
It is very common to create original layouts: change color, change size, change position, etc.
Did you know that? You can test Divi for free by visiting on this page and by clicking on "TRY IT FOR FREE"
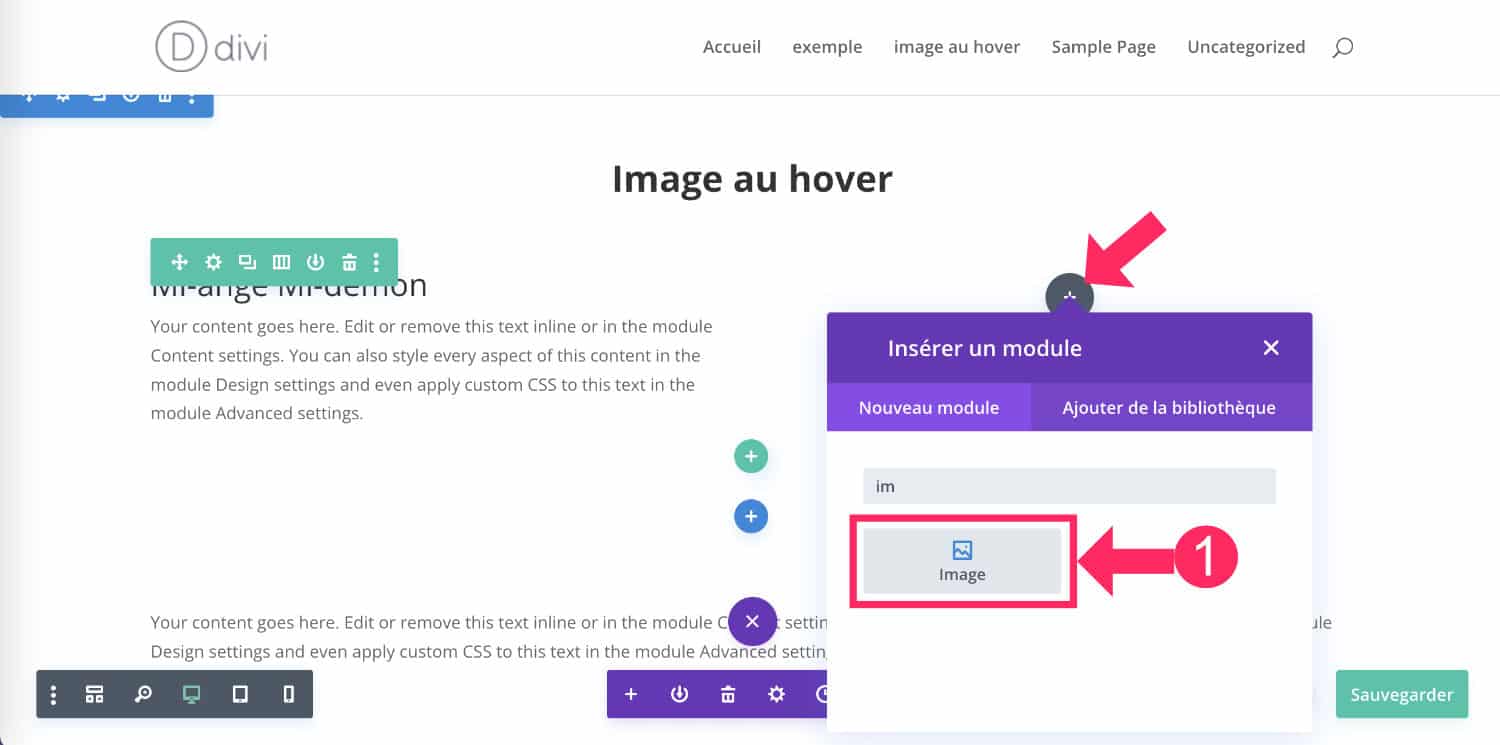
2 - Change an image on the flyover in 3 clicks
The advantage is that Divi offers overflight options in each module and the Image module Don't deviate from the rule, of course!
So, have you ever thought about changing a picture squarely when you pass the mouse? It is possible and very easy:
- Add an image module within your layout with Visual Builder
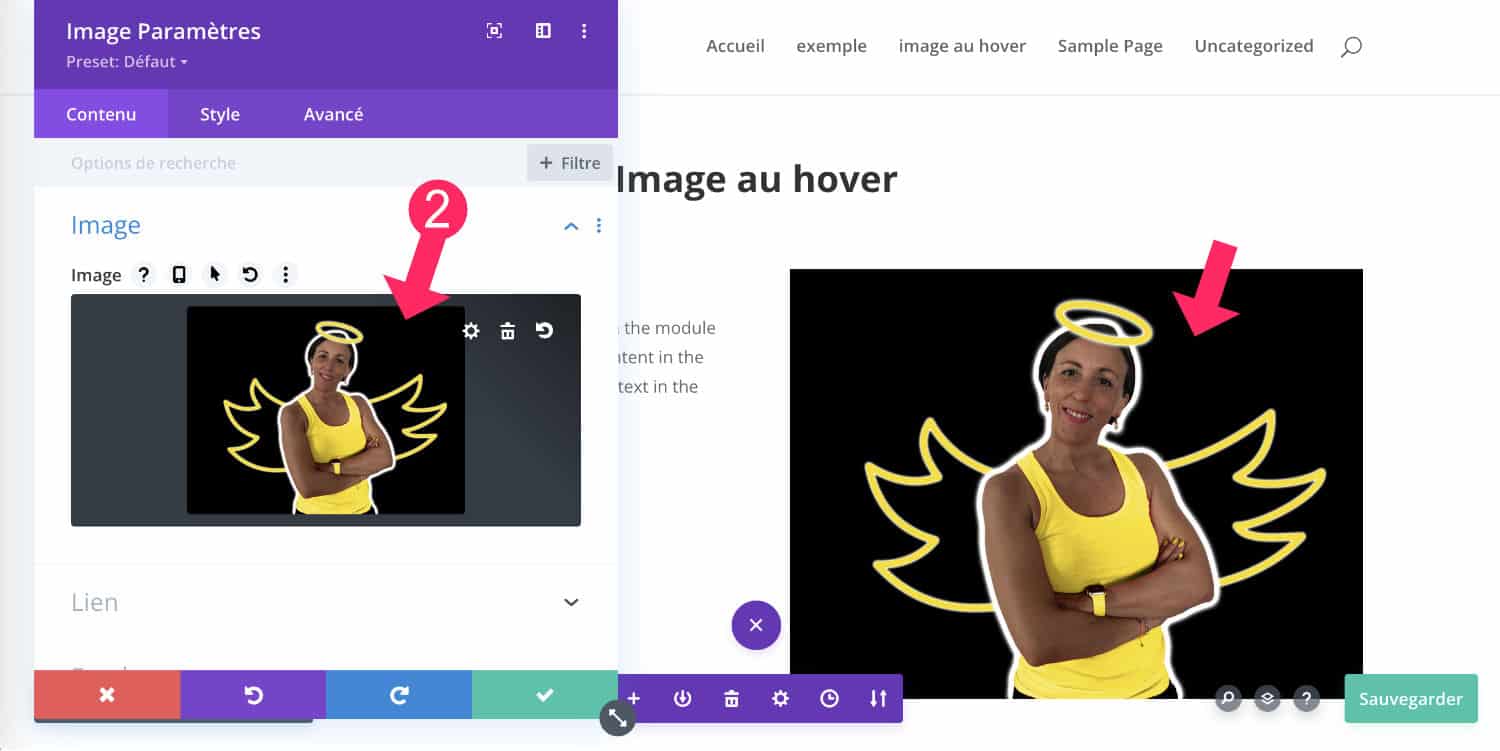
- Import your first image, we will call it the image "A"
- Activate the hover option by clicking on the arrow icon.
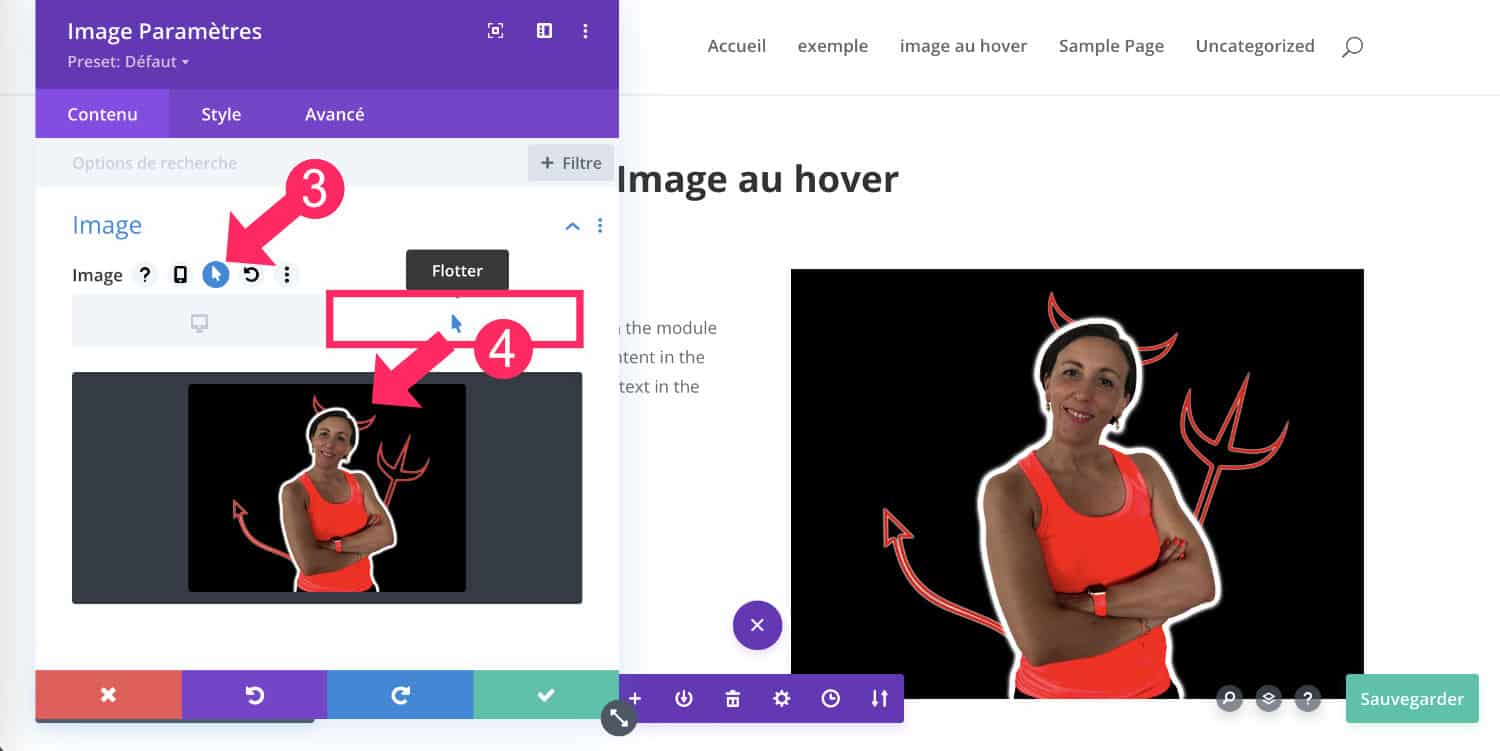
- Select Hover tab (Flotter tab, mistranslated) and import your second image, image "B".
That's it!
Nothing simpler, right?
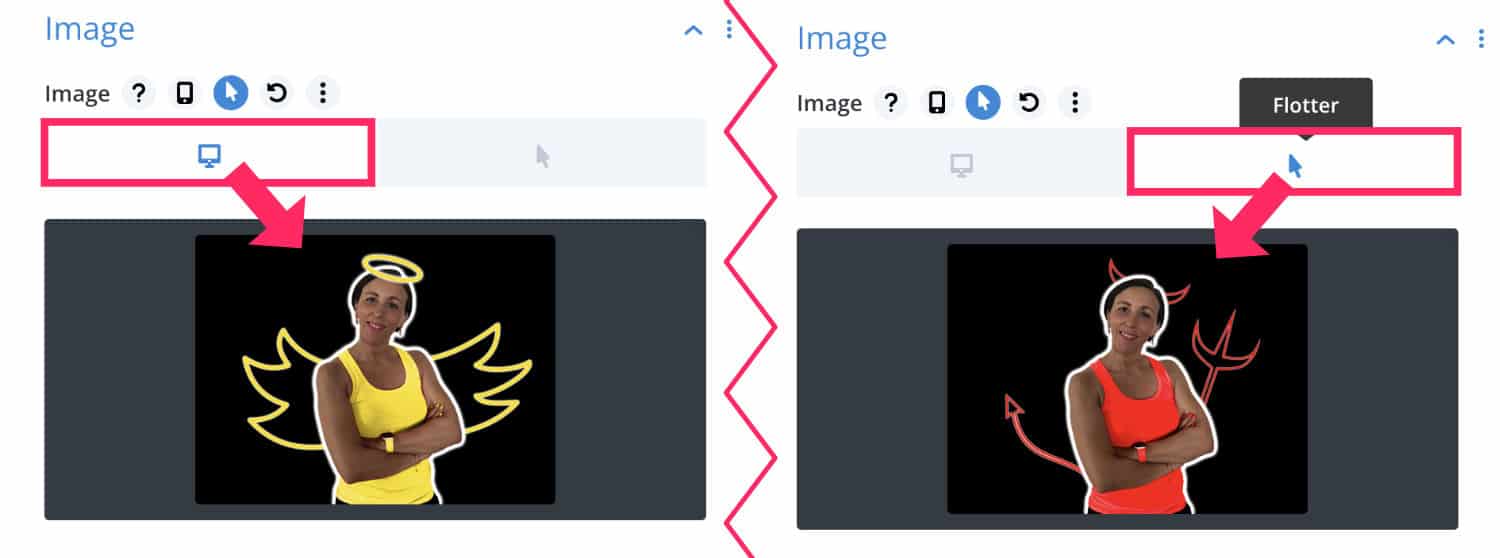
Do not hesitate to check the two tabs (the "Bureau" tab and the "Flotter" tab) to check that both images are in the right places.
3 - Tips for a successful effect
You will notice that for the effect to be successful, it is better to use two images that overlap perfectly.
For my example, I duplicated the same image twice and then changed the color and added graphic elements. I realized this using two software programs:
- Affinity Photo to turn the image and change the color
- Affinity Designer to add graphical elements
As I explain in the following video, it took me more time to make these images than to integrate them into Divi.
This reminds us that a good layout and good site design does not rely exclusively on the technique to create the site... On the contrary: your content - your texts and images - Will make all the difference! Then, Divi will allow you to integrate them easily...
4 - Changing the image over the mouse: the tutorial in video
Here's the little video recap... Since this is a very short Divi tutorial, I took the opportunity to add, as a bonus, the design of these two images at the end of the video... So if you're curious, watch the entire video!
Don't delay! Discover the theme Divi here !
5 - The overflight options available in all Divi modules
As a reminder, The overflight options are available in each Divi module! Simply pass the mouse next to the title of the module to see the hover icons and other options... So don't hesitate to use it!
Besides, it is also here that you can activate the phone icon that allows you to handle pixel near responsive of each module. I will never repeat it enough: look well, all the options are there, in front of your eyes,
Want to customize Divi as a pro? Discover all the tutorials!
6 - To go further
To go further with Divi's Hover feature, here is a small list of tutorials:
- Another way of change image overfly
- How to scroll an image over the mouse
- How to add a Tilt effect to the flyover (Wow, I love it!)
- How to display an article's summary on the flyer
- How do I create a zoom effect on an image with a text clickable above?
- How do I replace a customer's logo with a customer's testimony on the mouse?
Hello Licia, voilà tu as fait un nouveau adepte 😉 en tous cas c’est chouette ton aide que tu apportes et un grand Merci pour tes nombreux tutos.
Ici sur ce tuto, je pourrais être tenté, sauf ce qui me gène au passage de la souris pour le changement d’image, c’est ce petit « flash » blanc qu’il y à et ça donne un rendu pas du tout fluide entre les deux images. Dommage l’idée est intéressante !
Cordialement
Michel
Finalement ça passe bien avec l’essaie que j’ai fait, la transition est fluide 😉
Oui je vois ce que tu veux dire… tu as certainement raison
Ah super !
Bonjour Lycia,
J’aimerais mettre une image survolée (donc deux images,) dans mon menu entête à la place du mot boutique et dans un de mes menus pied de page, ou si pas possible à côté du menu entête.
L’astuce image Visual Builder module n’est pas applicable dans ce cas.
Avez vous une solution à me proposer svp ?
Oui je vois. Pas d’idées à part bidouiller avec du CSS
Bonjour !
Après quelques années chez shopify, je commence à me familiariser avec Divi que je trouve intéressant au niveau seo. Mais je désespère à ne pas trouver une astuce ou module pour savoir comment afficher une seconde image au survol d’un produit !
Avec le thème Dawn de shopify, cette fonction est proposée naturellement mais là avec Divi, je n’ai rien trouvé sur ce sujet. Auriez-vous une info sur ce sujet ou faudra-t-il retourner à l’âge de glace ? 😉
Merci d’avance pour votre aide.
Eh bien non, il n’y a pas d’option pour ça. D’où ce tutoriel. Peut-être qu’un plugin tiers propose ça ? Peut-être Divi Suprême ? À voir…
J ai un soucis avec mes images sur Divi, mes image sont grisées a 50 % . Que faire
Je ne sais pas, je suppose qui faut inspecter votre site pour mieux comprendre ce qu’il se passe. Il doit y avoir un dégradé de paramétré quelque part.
Bonjour,
Merci pour cette solution très simple (et plus généralement pour vos tutos sur lesquels je tombent régulièrement).
J’ai lu le commentaire de @Meyer Michel et, comme lui, j’aimerai faire disparaître cet effet de flash lors de la transition mais je ne vois pas comment faire cela. Quelqu’un pourrait-il m’aider ?
D’avance merci
Bonjour Elise, malheureusement je n’ai pas trouvé de solution à ce « flash »