
This article will show you that it is not difficult to customize Bloom's popup.
I propose you 5 original ideas for modify the design of your Bloom Optin popups to optimize the conversion rate and get more subscriptions to your newsletter!
1 - What is Bloom?
Maybe it's good to remember what it is. Boom. ? This sometimes unknown plugin is a very good Optin plugin for WordPress !
Indeed, it allows you to link a registration form to your newsletter sender (also called "provide").
In other words, Bloom is a plugin that allows you to retrieve the email addresses of your visitors and store them in your email marketing mailing lists like MailChimp, SendingBlue, MailPoet etc.
It is also necessary to clarify two important things:
- Bloom is a premium plugin included in the Divi license. If you have subscribed to License Elegant Themes, you can download it from your account and you can use it on a unlimited number of sites.
- Bloom is compatible with any WordPress theme! You do not have to use this plugin only on your Divi websites.
2 - Why customize Bloom?
Bloom's settings already offer many design options.
Whether at the level of popup display or at the level of its appearance, Bloom allows you to choose images, colors, type of appearance, animation etc...
But is that still enough? Aren't you tired of seeing these unwanted popups appear when you quietly visit a website? Barely arrived on the site, you were "saute" to sign up for the newsletter. For my part, I click on "close" if I really want to read more, or if the content is not interesting, I leave the site... What if everyone does what I do?
What to do to succeed in getting the email from your readers that you can then convert into prospects and then into customers if you are "good"?
Email marketing still has a long life ahead of him if we believe everything we read about the subject and we find that all current sites do have a newsletter registration form...
How, then, to get this famous "email" so coveted? And why would the Internet user entrust it to another site?
Each site tries to pull its pin from the game: some encourage readers to subscribe in exchange for a Lead Magnetwhile others offer really exciting content and readers can only register!
What if you proposed both? And if, in addition, your Was popup really original, attractive, incentive, pretty? What do you think the Internet user would do? Would he let himself be tempted?
Here's a good idea: customize Bloom popup to increase conversion rate !
3 - Create an optin Bloom form: general case
Before seeing in detail the examples of custom popups, I propose you to quickly return to the creating a Bloom optin form. We will partially need this information when explaining customizations that follow...
3.1. - Step 1: Choose the type of popup

Once you have installed the Bloom plugin, you can start creating your first optin form.
For this, go to the tab Bloom > Optin Form then click "New Optin".
For examples of customizations that will follow, I propose to use the type "POP UP" (top left).
Validate your choice by clicking on "Next: design your choice".
3.2. - Step 2: Connect the form with your "provider"
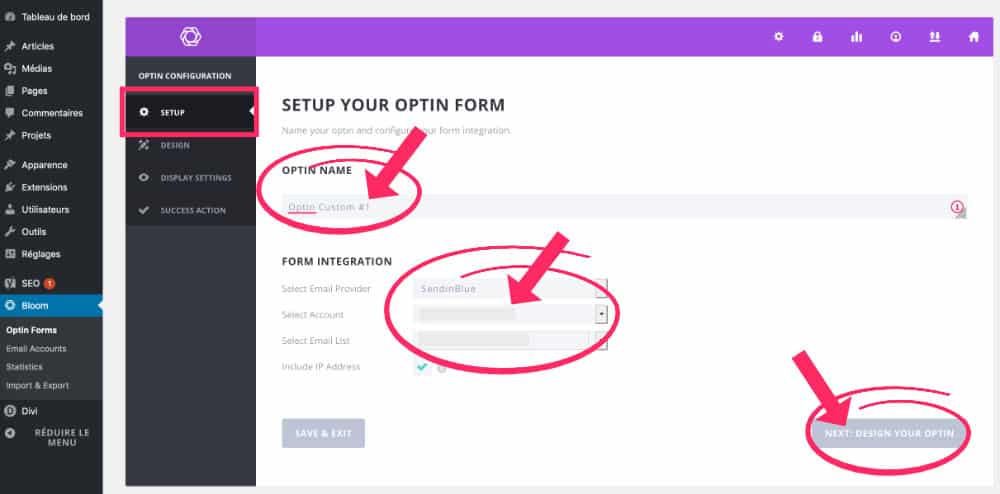
The next step will allow you to connect Bloom's optin form to your "provide", i.e. your "newsletter mailing solution" (MailChimp, Sendinblue, MailPoet etc...).
This step is required to validate your form.
It is thanks to this connection that you can retrieve the email addresses of your visitors in order to store them in your email marketing mailing lists.
Once your connection is established, confirm your choice by clicking "Next: design your choice".
3.3 - Step 3: Choose the popup design
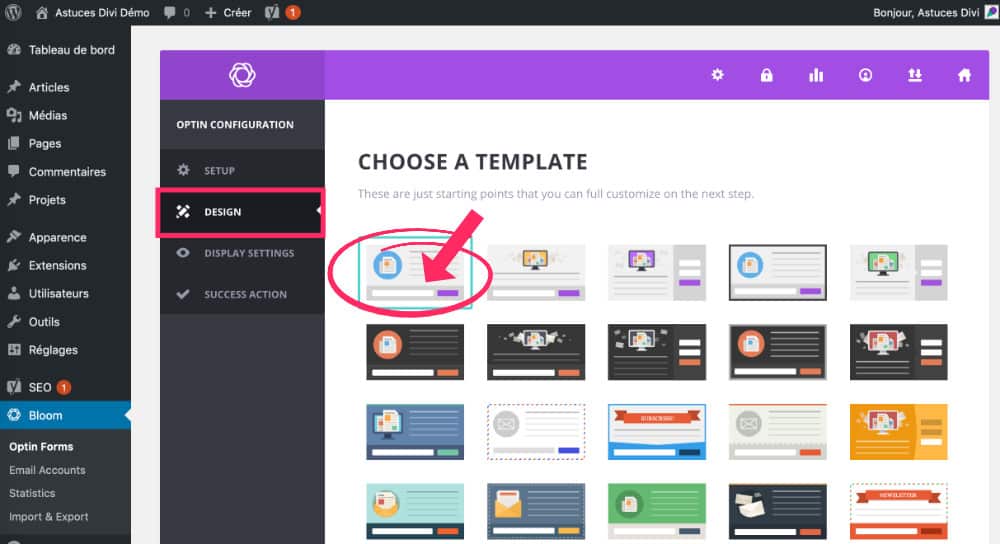
At this stage, Bloom proposes to choose a design "template" for your popup.
Although there are many choices, these popups all look alike... That's exactly why I'm offering you this tutorial, by the way...
For all examples of customizations that follow, choose the first template (top left).
Then confirm your choice by clicking "Next: customize".
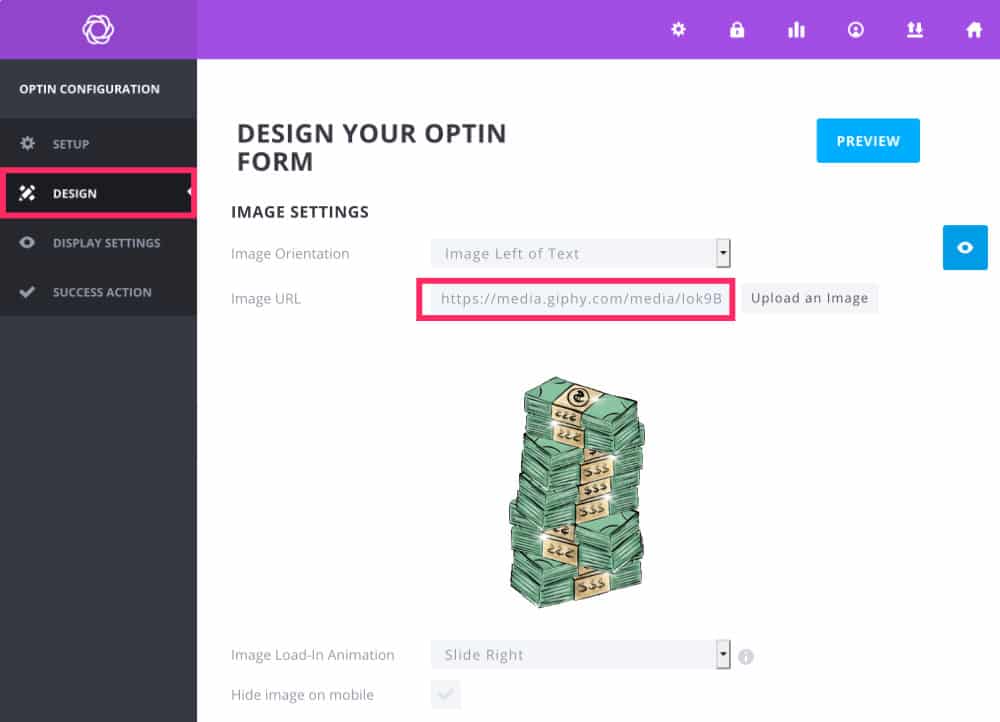
3.4. - Step 4: Set the popup design
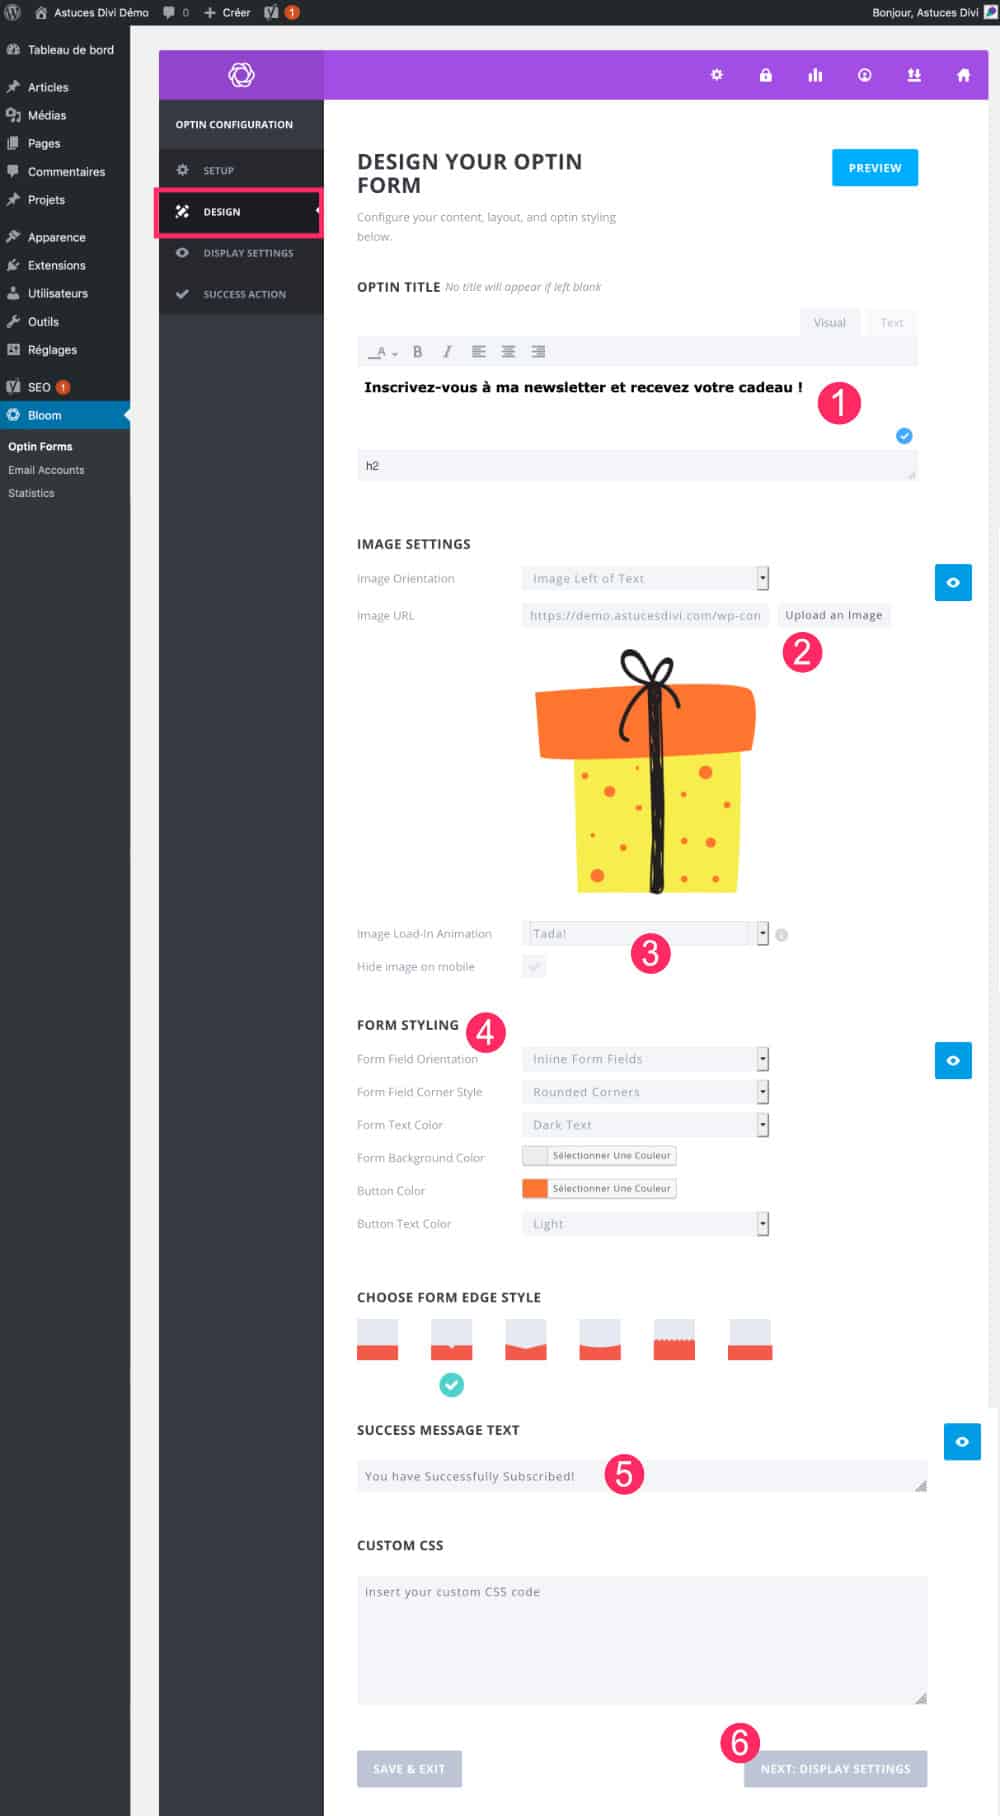
Step 4 allows you to set the "design" tab. Here you will find several parameters that may vary according to your needs and the purpose of customization:
- Enter the "catching" title of your optin.
- Upload your image if necessary (this will not be the case with all the suggested customization suggestions below).
- Add an image animation if needed.
- Set the display of the form fields (colors, layout, etc.).
- Set a "success message": this will appear when the visitor sends the form.
- Validate your choice by clicking on "Next: display settings".
3.5 - Step 5: other settings
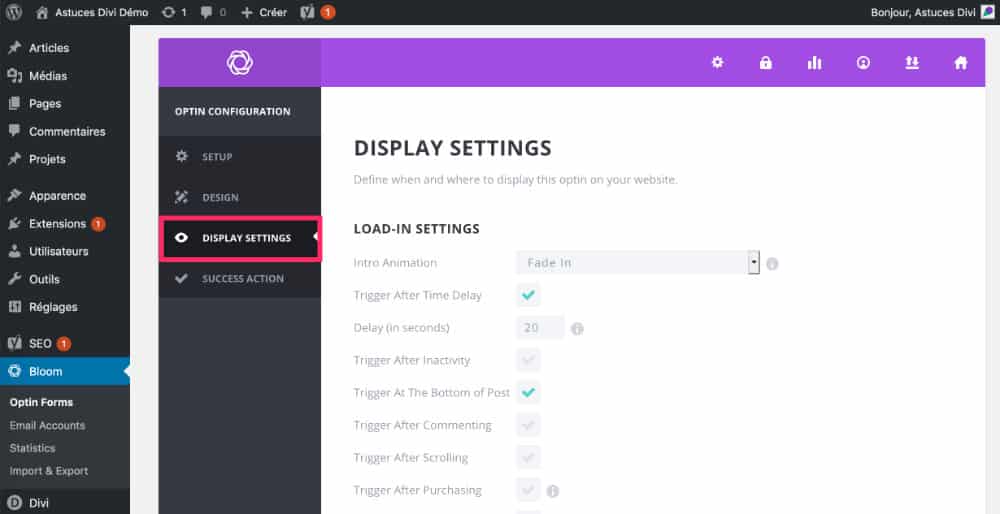
In the tab Display settings, you will find several popup display options.
Read the options carefully and make your choices: you can come back later if you need.
Validate your choice by clicking on "Next: success action".
3.6. - Step 6: success message and popup validation
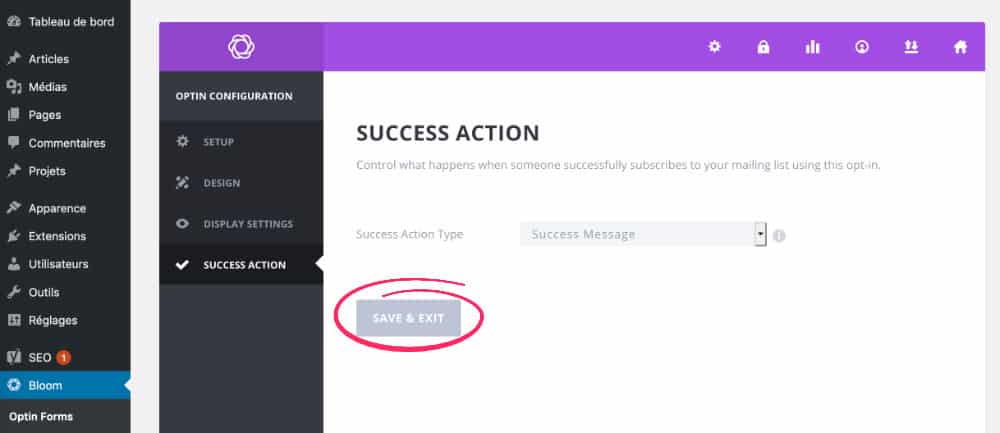
Finally, you will arrive at the last step where you will simply click on "Save & Exit" to save your popup.
4 - Original ideas for customizing Bloom's popup
Now that we have just recalled the steps to create the form, I propose 5 original ways to easily customize the appearance of your Bloom popup with CSS only. This means that a beginner will be able to do so without much code knowledge.
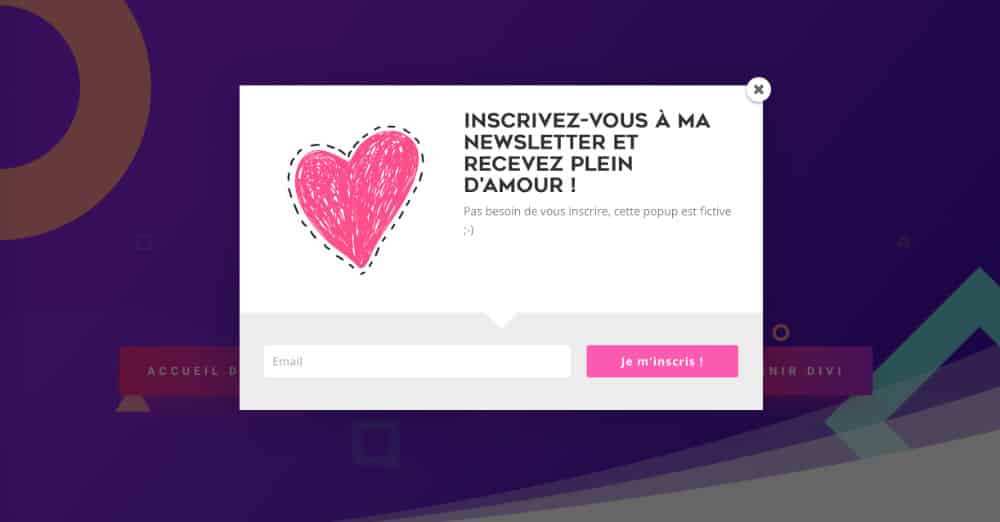
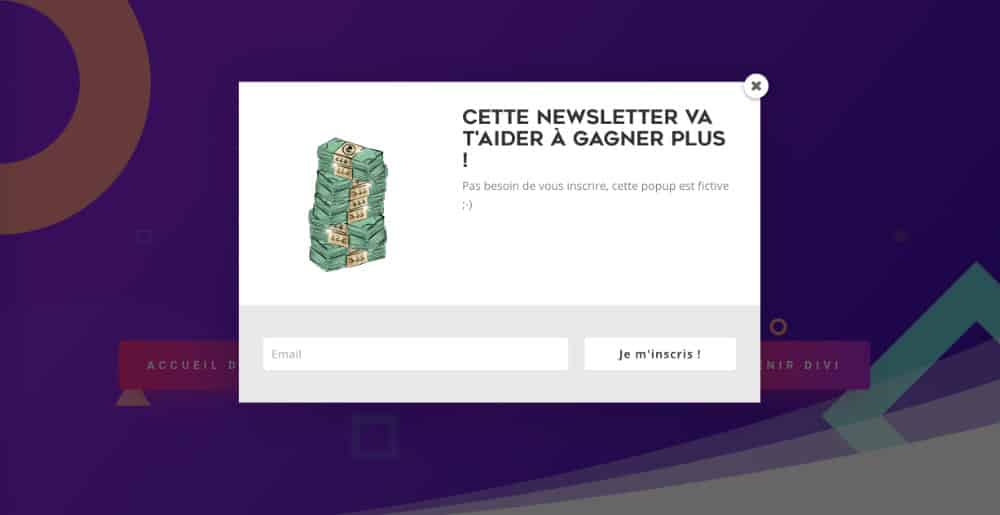
4.1 - Bloom #1 customization: offset image
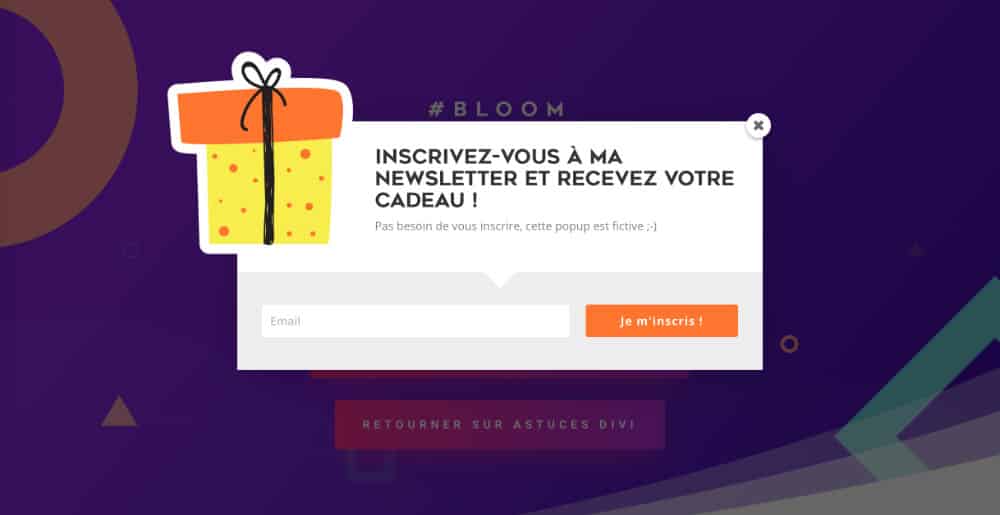
Here's a nice popup...
You're gonna tell me, "I don't really see how this popup is original..."
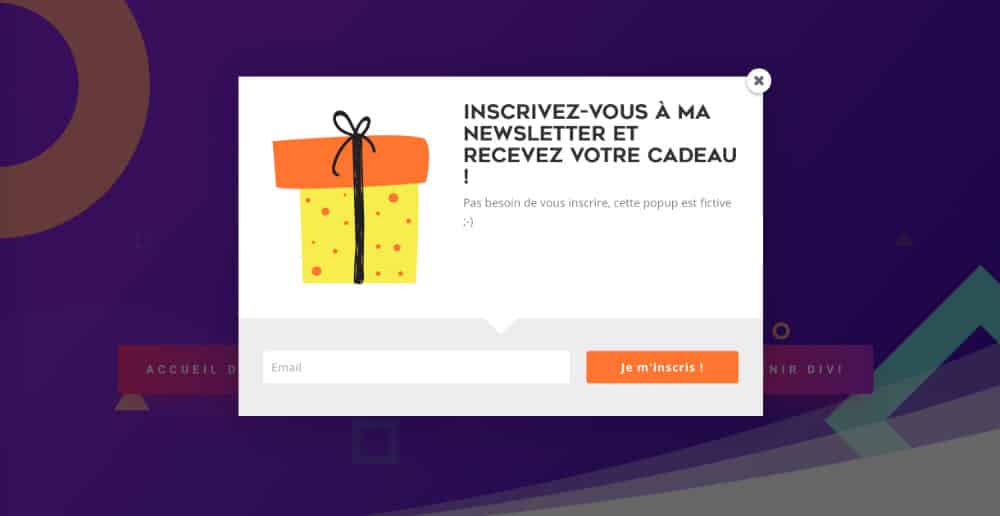
Yet this is what she would look like without customization:
I suggest, then, these few lines of code to allow the image to be shifted and get out of the popup:
1 - CSS to shift the image up and left:
.et_bloom .et_bloom_form_header.split img {
    position: absolute;
    top: -100px;
    left: -100px;
}
2 - Make everything "outside the frame" visible:
.et_bloom .et_bloom_form_container div {
    overflow: visible !important;
}
3 - Add a left margin to shift the text and avoid it being hidden behind the image:
.et_bloom .split .et_bloom_form_text {
    padding-left: 25% !important;
}
4 - Add a little margin at the bottom of the text so that it is not "pasted" to the fields:
.et_bloom .et_bloom_form_container .et_bloom_form_header {
    padding-bottom: 30px;
}
Here is the final code I used to get this result (to copy and paste into your style sheet or directly into the tab Appearance > Customize > Additional CSS) :
.et_bloom .et_bloom_form_header.split img {
    position: absolute;
    top: -100px;
    left: -100px;
}

.et_bloom .et_bloom_form_container div {
    overflow: visible !important;
}

.et_bloom .split .et_bloom_form_text {
    padding-left: 25% !important;
}

.et_bloom .et_bloom_form_container .et_bloom_form_header {
    padding-bottom: 30px;
}
I would point out that the offset image (the gift image) was correctly inserted during the bloom setting (step 3.4 - tablet #2 of this article).
Of course, do not hesitate to modify this code according to your needs and projects...
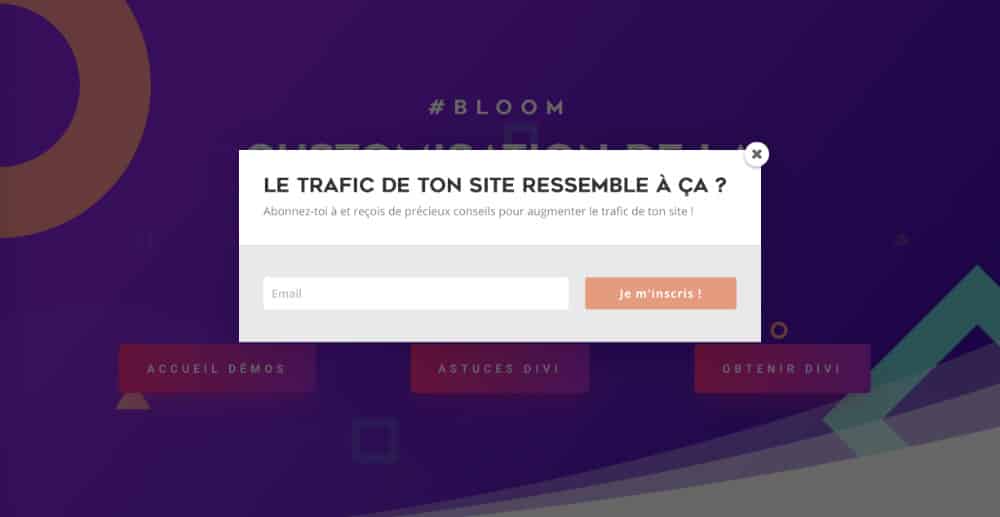
4.2 - Bloom #2 customization: gradient/opacity background
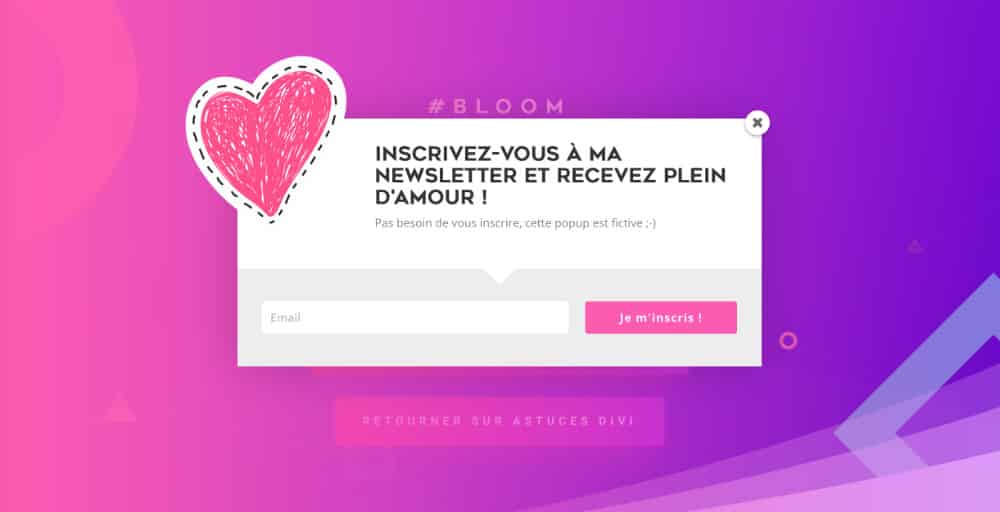
This other customization of bloom looks like the previous one, the difference that I have change the background color with a gradient color... This brings a nice effect that changes the anthracite background you see everywhere...
Here's what popup would look like without these customizations:
To get this result, just get the full CSS code from popup #1 and add a gradient-transparent background:
.et_bloom .et_bloom_popup::after {
background: rgba(255,93,177,1);
    background: -moz-linear-gradient(left, rgba(255,93,177,1) 0%, rgba(167,3,237,0.4) 100%);
    background: -webkit-gradient(left top, right top, color-stop(0%, rgba(255,93,177,1)), color-stop(100%, rgba(167,3,237,0.4)));
    background: -webkit-linear-gradient(left, rgba(255,93,177,1) 0%, rgba(167,3,237,0.4) 100%);
    background: -o-linear-gradient(left, rgba(255,93,177,1) 0%, rgba(167,3,237,0.4) 100%);
    background: -ms-linear-gradient(left, rgba(255,93,177,1) 0%, rgba(167,3,237,0.4) 100%);
    background: linear-gradient(to right, rgba(255,93,177,1) 0%, rgba(167,3,237,0.4) 100%);
    filter: progid:DXImageTransform.Microsoft.gradient( startColorstr='#ff5db1', endColorstr='#a703ed', GradientType=1 );
}
To obtain the appropriate CSS code for your degraded and transparent background, you can help yourself with this site that offers a gradient generator in CSS.
4.3 - Bloom Customization #3 : background image
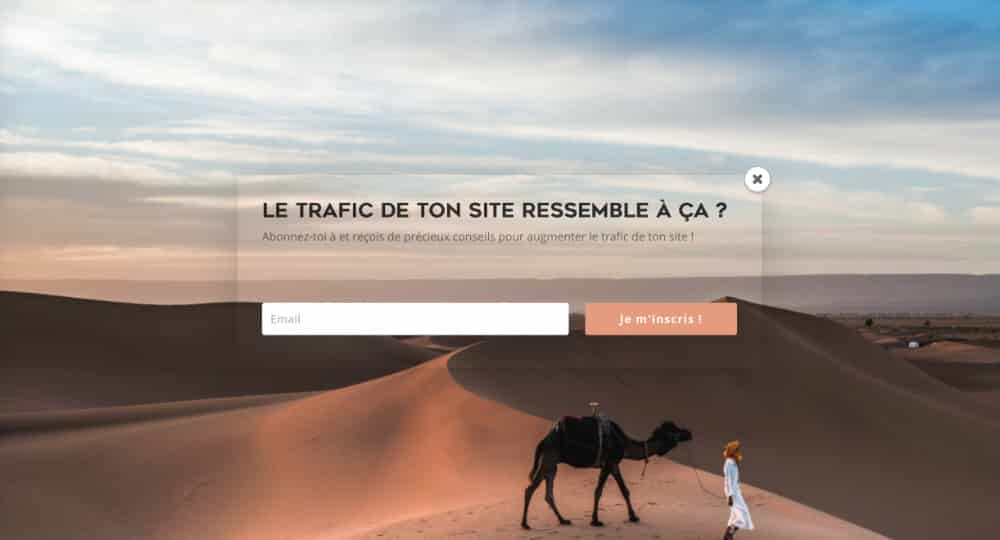
I wonder if this customization of Bloom would not be my favorite... She's changing popups we're used to seeing!
The popup is transparent and the background, usually anthracite-opaque, has been replaced by a background image.
Here is what the popup would look like without the following CSS code:
Here are some explanations:
1 - Add an image in background :
.et_bloom .et_bloom_popup::after {
    background-image: url("placez l'URL de votre image");
}
Note that this image was previously added to my media library and I recovered its URL.
2 - Make the background of Bloom's popup transparent:
.et_bloom .et_bloom_optin div{
    background: transparent !important;
}
Here is the final code I used to get this result (to copy and paste into your style sheet or directly into the tab Appearance > Customize > Additional CSS) :
.et_bloom .et_bloom_popup::after {
    background-image: url("placez l'URL de votre image");
}

.et_bloom .et_bloom_optin div{
    background: transparent !important;
}
I specify that no images have been inserted in the parameters of the boom popup (step 3.4 - tablet #2 of this article).
4.4 - Bloom Customization #4: background image + background image
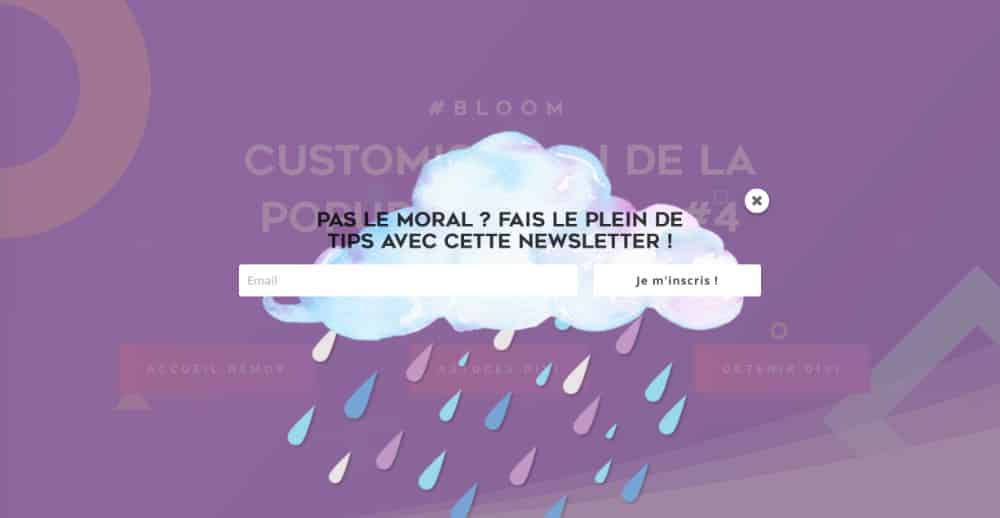
This customization is a variant of the previous ones... Here is what this popup would look like without adding CSS that you will find next:
Explanation:
1 - Add a background image (recover the URL of the previously uploaded image in your media library). In this case, this image is the semi-transparent background with the raindrops.
.et_bloom .et_bloom_popup::after {
    background-image: url("placez l'URL de votre image");
}
2 - Make the background of Bloom's popup completely transparent (and without shadow):
.et_bloom .et_bloom_optin div{
    background: transparent !important;
    box-shadow: none;
}
3 - Make everything "outside the frame" visible:
.et_bloom .et_bloom_form_container div {
    overflow: visible !important;
}
4 - Decal the image (the cloud image) so that it is placed behind the fields:
.et_bloom .et_bloom_form_header.split img {
    position: absolute;
    top: -100px;
    left: 0px;
    z-index: -1;
}
5 - Larger image size (cloud) if needed:
.et_bloom .et_bloom_form_header.split img {
    max-width: 100%;
}
6 - Change the margins and alignments of the text and form:
.et_bloom .et_bloom_form_container .et_bloom_form_content {
    padding: 0px;
}

.et_bloom .et_bloom_form_container .et_bloom_form_header {
    padding: 0px;
}

.et_bloom .et_bloom_form_header h2 {
    text-align: center
    padding-left: 10%;
    padding-right: 10%;
}
Here is the final code I used to get this result (to copy and paste into your style sheet or directly into the tab Appearance > Customize > Additional CSS) :
.et_bloom .et_bloom_popup::after {
background-image: url("placez l'URL de votre image");
}
.et_bloom .et_bloom_optin div{
background: transparent !important;
box-shadow: none;
}
.et_bloom .et_bloom_form_container div {
overflow: visible !important;
}
.et_bloom .et_bloom_form_header.split img {
position: absolute;
top: -100px;
left: 0px;
z-index: -1;
}
.et_bloom .et_bloom_form_header.split img {
max-width: 100%;
}
.et_bloom .et_bloom_form_container .et_bloom_form_content {
padding: 0px;
}
.et_bloom .et_bloom_form_container .et_bloom_form_header {
padding: 0px;
}
.et_bloom .et_bloom_form_header h2 {
text-align: center
padding-left: 10%;
padding-right: 10%;
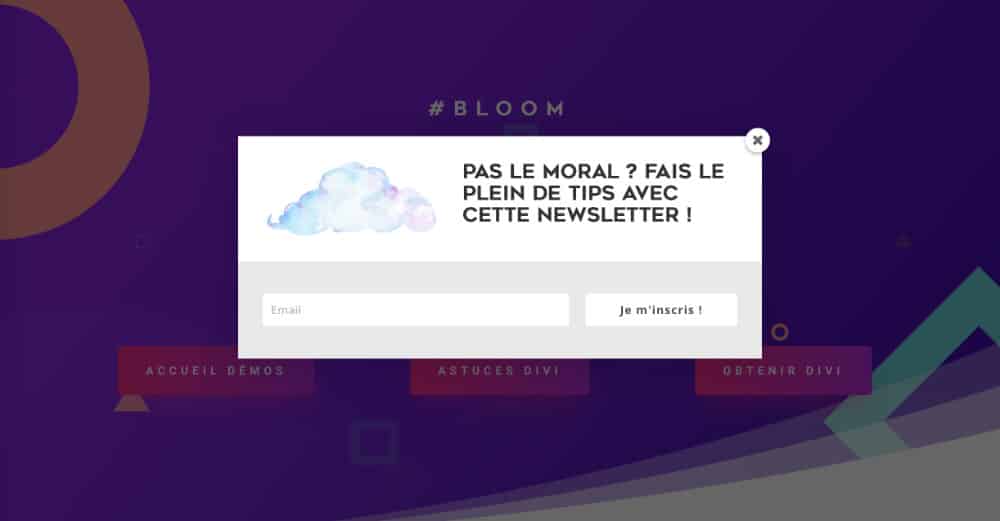
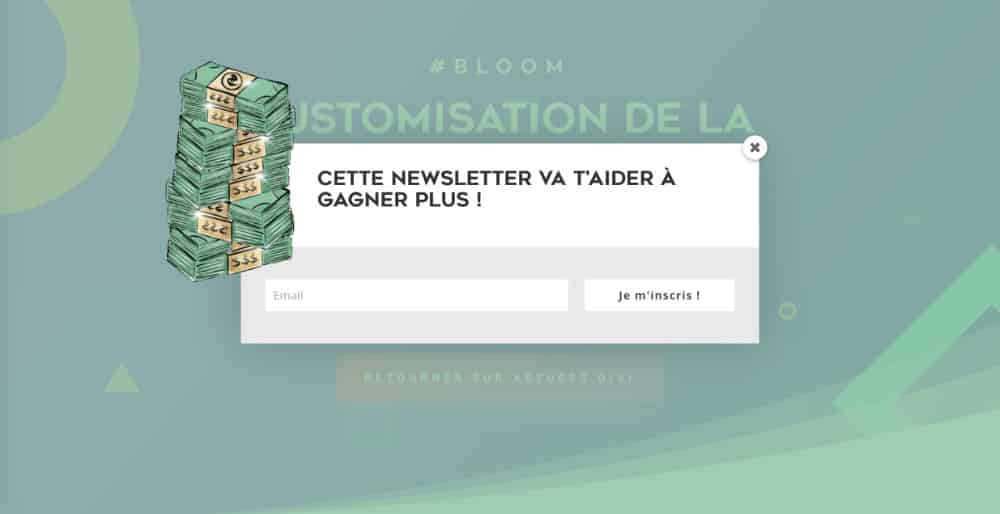
}4.5 - Bloom customization #5 : Gif + background color
I think this popup is great! It's just that I've rarely seen (not to say ever) a popup of subscription to a newsletter with an animated image (GIF)...
It's so easy to do!
Here is what the popup would look like without the customization CSS:
Explanation:
1 - CSS to shift the GIF up and left (+ size change if necessary):
.et_bloom .et_bloom_form_header.split img {
    position: absolute;
    top: -180px;
    left: -200px;
    z-index: 9999;
    max-width: 60%;
}
2 - Make everything "outside the frame" visible:
.et_bloom .et_bloom_form_container div {
    overflow: visible !important;
}
3 - Add margins (padding) if necessary:
.et_bloom .split .et_bloom_form_text {
    padding-left: 13% !important;
}

.et_bloom .et_bloom_form_container .et_bloom_form_header {
    padding-bottom: 30px;
}
4 - Add a background color with opacity:
.et_bloom .et_bloom_popup::after {
    background-color: rgba(140, 196, 162, 0.85);
}
You can help yourself with this site to convert your Hex colors to RGBA.
Here is the final code I used to get this result (to copy and paste into your style sheet or directly into the tab Appearance > Customize > Additional CSS) :
.et_bloom .et_bloom_form_header.split img {
    position: absolute;
    top: -180px;
    left: -200px;
    z-index: 9999;
    max-width: 60%;
}

.et_bloom .et_bloom_form_container div {
    overflow: visible !important;
}

.et_bloom .split .et_bloom_form_text {
    padding-left: 13% !important;
}

.et_bloom .et_bloom_form_container .et_bloom_form_header {
    padding-bottom: 30px;
}

.et_bloom .et_bloom_popup::after {
    background-color: rgba(140, 196, 162, 0.85);
}
Note that to achieve this result, I inserted a GIF using a URL obtained on Giphy (see: Gif with transparent bottom) when designing my popup :
5 - In conclusion...
Are these 5 personalization ideas from Bloom Have you been inspired? Do you have any other ideas?
Any CSS customization is really personal: here, I give you leads to explore!
It's up to you to own them so that it fits the needs of your project.
Note also that you will have to check the rendering in mobile version, you may need (or surely) to optimize the Divi media queries...
Also read: how to make Bloom compatible with GDPR
Merci pour les différents articles 🙂
Je souhaite rajouter une pop up tout en haut du site, on parle de divibar mais c’est payant. Est qu’il existe une autre solution :)?
Bonne journée
Salut Marion, en gratuit tu as le plugin « Hello Bar » que tu pourras trouver ici : https://fr.wordpress.org/plugins/hellobar/
Bonsoir,
Mon formulaire via bouton s’affiche mal, j’ai les champs mais l’image et la couleur de fond qui n’est pas centré dans le cadre du popup, je n’arrive pas à l’agrandir pour qu’il prenne l’ensemble des champs.
Je n’arrive pas à ajouter une checkbox pour le RGPD, si vous avez une idée ou via un autre plugin.
Merci,
Depuis deja 03 mois qu je vous suis, je ne cesse d’acquerir des compétences effrayantes. Merci beaucoup.
Comment faire si je veux enlever juste le contenu « Email » de mon popup et garder « inscription » pour rediriger les internautes vers un autre site.
Bonne journée.
Salut Harry ! Suis-je si effrayante? 😉 Blague à part, pour tes besoin, je pense que ce n’est pas Bloom dont tu as besoin. Ce plugin est justement fait pour récupérer les emails des internautes. Je pense que tu as plus besoin d’une Popup dans laquelle tu places un bouton qui renvoie vers un autre lien (un autre site)… Pour cela, un simple plugin de popup fera l’affaire. Lis cet article, il devrais t’intéresser : https://astucesdivi.com/popups-for-divi/
Salut Alain, pour ton souci d’affichage, je ne sais pas… Mais pour le RGPD : https://astucesdivi.com/comment-rendre-bloom-rgpd-friendly/
My client is using bloom and I am trying to do version no. 3 with full background image. I can get the image to work but not the transparent box. We are not using Divi either. IS there different code for non divi theme to make this work
Bonjour Lycia,
Déjà merci beaucoup pour tout tes articles et astuces, je me suis mis sur Divi il y a 6 mois et je ne le regrette pas !
Dans Bloom, il y a un encart pour du custom css. Je voulais changer la couleur du background derrière la pop-up, ça marche très bien avec la preview dans le plugin, mais pas d’effet sur le site.
Une idée du pourquoi du comment ?!
P. S. : bon, j’y suis arrivé en indiquant le code dans le style.css de mon thème enfant, mais ça fait quelques lignes en plus déclarées sur tout le site alors que je n’utilise la pop-up que sur une page.
Hey Dan, in fact il could bête different, you have to read the code with inspector
Salut Christophe, tu as raison, Bloom est très difficile à personnaliser avec du CSS, il ne le prend pas toujours en compte.
Bonsoir,
Sincèrement merci Lycia pour toutes les infos que vous nous partagez. Avec Bloom, ce que je souhaiterai, est certes de récupérer des mail mais en permettant, juste après avoir cliqué sur le bouton « envoyer », aux visiteur de télécharger un ebook sans avoir à cliquer sur un autre bouton. Comment faire selon vous ?
Cordialement,
Salut Mamour. Tu n’as qu’à mettre ton Ebook en pièce jointe de l’e-mail de confirmation d’inscription. Sinon Bloom permet de verrouiller une partie de ta page et de la faire apparaître une fois le bouton cliqué.
Bonjour, Je cherchais un tuto pour customiser ma pop up sur bloom et je suis ravie du résultat. J’ai opté pour la première option avec logo en décalé.
Le rendu est top sur Desktop et tablette mais pas du tout sur mobile.
Existe-t-il une possibilité de ne paramétrer la pop up uniquement pour desktop et tablette, quitte à en créer une seconde optimisée pour mobile ?
D’avance merci.
Oui Sandrine tu dois créer un code CSS spécial en fonction de la taille des écrans, ça s’appelle les Media Queries. Il y a un très bon tutoriel sur le blog Alsacreation
Bonjour Lycia, comme toujours, de supers articles ! Dès que j’ai une question, je regarde sur ton blog, franchement bravo !!
Ce n’était apparemment pas le sujet précis de ton article mais j’ai cependant une question sur bloom : lorsque je crée des optins à insérer dans les articles (avec short codes), parfois l’image que je choisis apparait en énorme… J’ai cherché quel bout de code CSS je pourrais insérer pour choisir tout simplement la taille de l’image…
Et sinon, tu aurais une formation pour apprendre les bases du CSS, vraiment simple ? Parce que jusqu’à présent je bidouille avec des copiers-collers mais ça a ses limites 😉 Merci
Hello Paskline. Écoute, Bloom est super difficile à modifier avec du CSS, c’est son code qui est bizarre et qui fait que c’est très difficile d’y mettre une nouvelle couche. Pour apprendre le CSS, tu peux regarder sur AlsaCréation, il y a de très bon tutos