
I'll introduce you to the extension. Monarch and explain how to add the famous Share buttons you see on many sites.
This is ideal if you have a content editor's profile for your website and want to make it more known!
You probably want to maximize your visibility even more and I'm sure that's what prompted you to go on this article.
The interest of opting for such an extension, is to encourage visitors to your site and readers of your content to share your blog pages and articles on their social networks.
This can greatly help you improve your visibility and generate traffic on your website.
In case of need to accompany the design of a website or add extensions, do not hesitate to call on a web development provider.
Guest article proposed by Zakaria from the Baleez site.
Where to get the Monarch extension?
So you're probably looking for a quality extension to be able to add this sharing feature on social networks to your website and let me tell you that Monarch is an excellent choice.
This extension is "free", say it is included when you take a license at Elegant themes (life or year), just like Bloom.
Indeed, Elegant themes offers a package when buying its premium theme Divi and in which you find Monarch, the sharing plugin on social networks.
If you don't have your license yet, don't hesitate to read the article that explains How much does Divi cost based on licences.
Now, for the continuation of this tutorial, I will consider that you are in possession of the extension Monarch installed and then activated on your WordPress site.
I advise you eventually to add a page and an article from your WordPress interface so that you can perform tests without having to touch your existing pages.
In my case, the site being blank, I will settle for a simple home page and a basic article designed by default on WordPress.
Did you know that? You can test Divi for free by visiting on this page and by clicking on "TRY IT FOR FREE"
The features offered by the Monarch plugin
Your extension is now installed and activated?
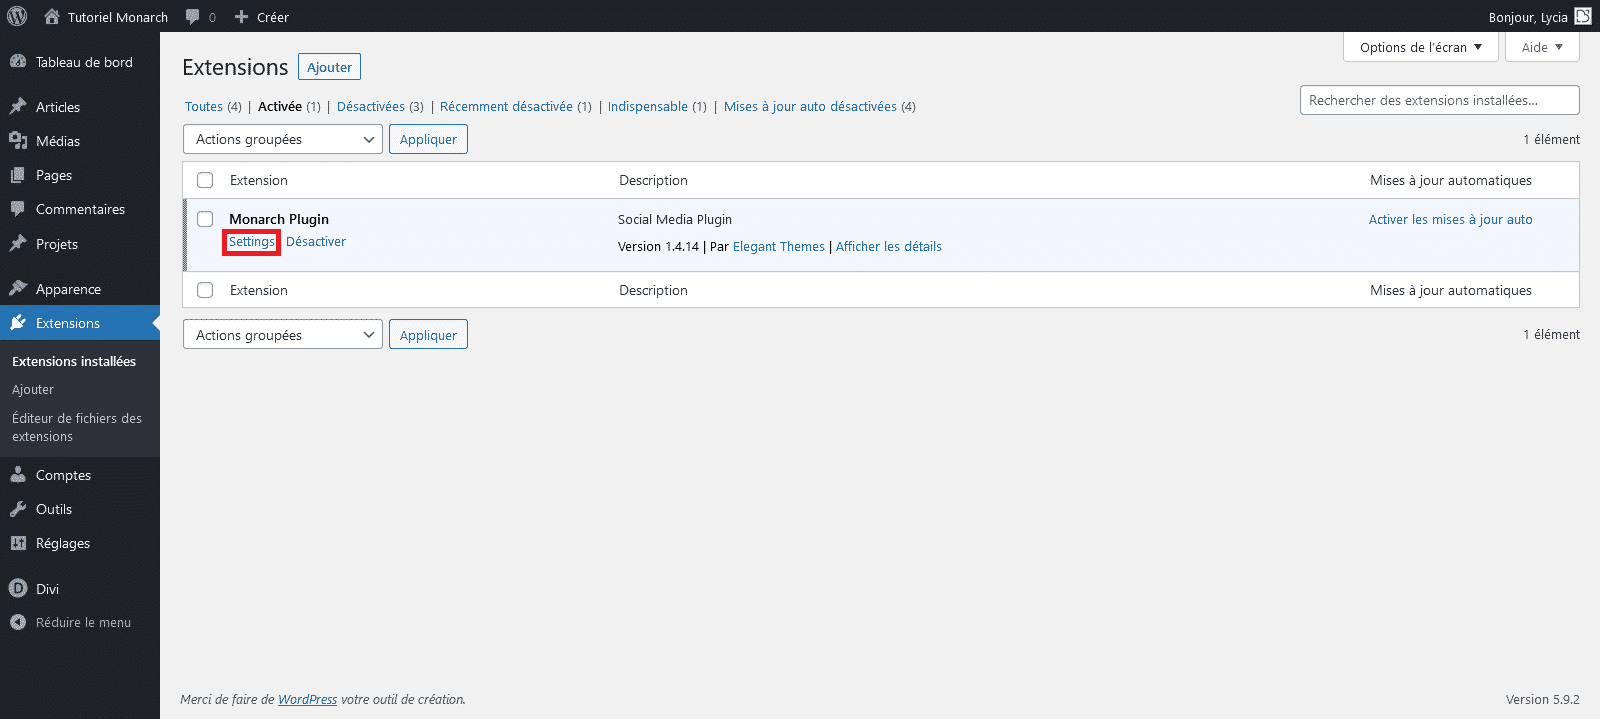
Great, I suggest you go to the settings of this plugin by clicking on "Settings" or from the tab Tools > Monarch Settings your WordPress administration.
You should now be on an orange interface with several settings tabs on the left side:
- Social Sharing
- Rentals
- Networks
- Social follow
- General Settings
- Etc.
Tab Locations (rents)
Let's start this tutorial by reviewing the tab Social Sharing.
This tab is composed of several sections that we will see and I invite you to go on the first which is entitled "Rentals".
So you must first choose the OR position you want (you can select one or more).
Various localization possibilities are therefore available to you such as:
- Sidebar,
- Inline,
- Pop up,
- Fly In,
- Media.
You can have a preview of the display that gives it according to the chosen location.
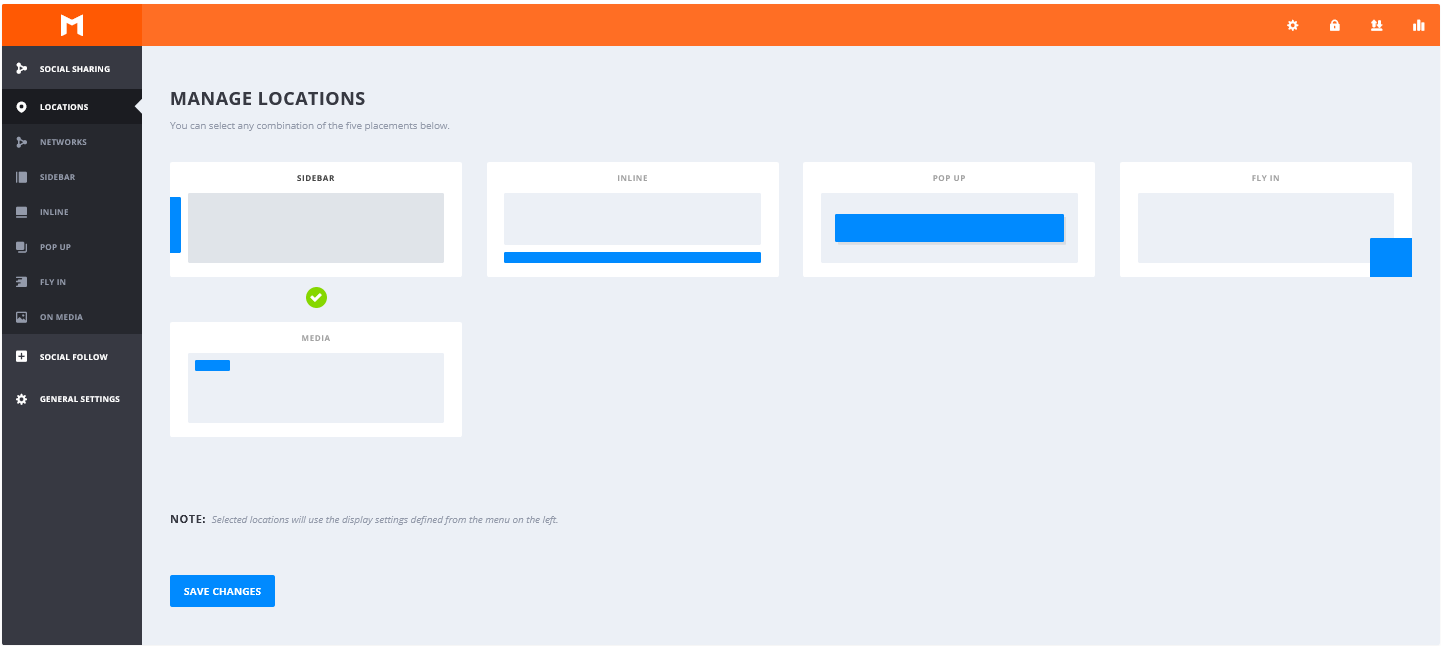
Depending on your site type, graphic or other, you need to make your choice so that the buttons fit best into your pages.
In my case, I'm going to go on something rather simple and classic: the sidebar that I'm going to apply only on my blog articles.
I specify here that this type of feature that is offered by Monarch is still more suitable for blogging, i.e. for integrating buttons on your blog posts.
It is probably less sensible and less interesting for you to predict this on your general pages, but if the need makes you feel that it is quite possible and we will see this together.
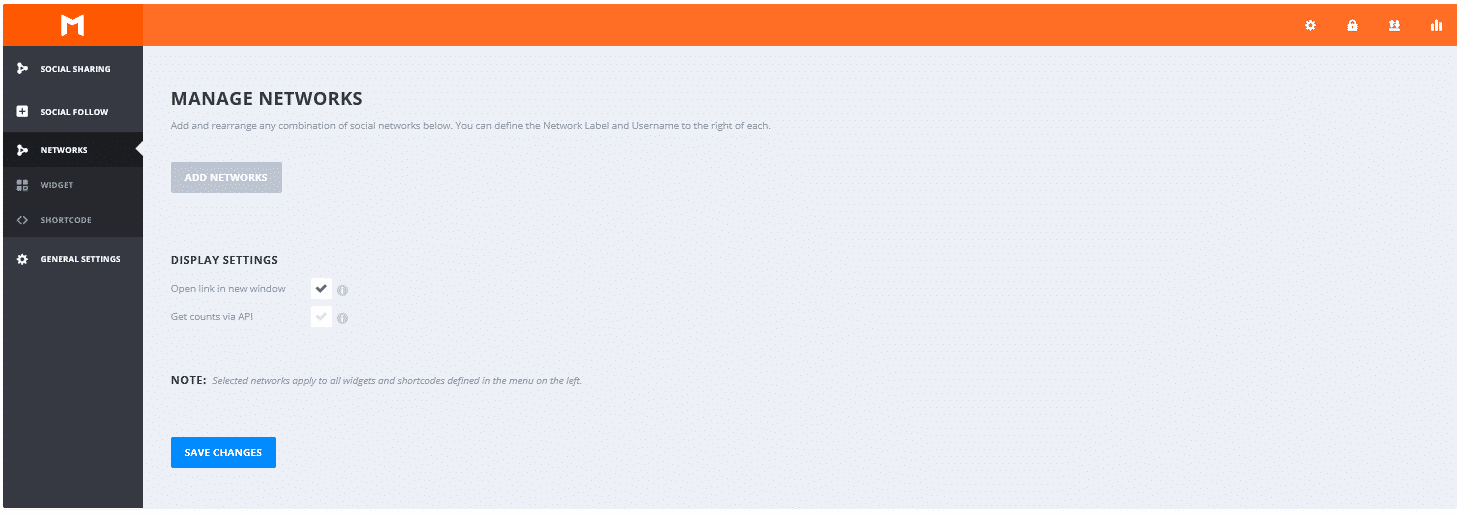
Network tab
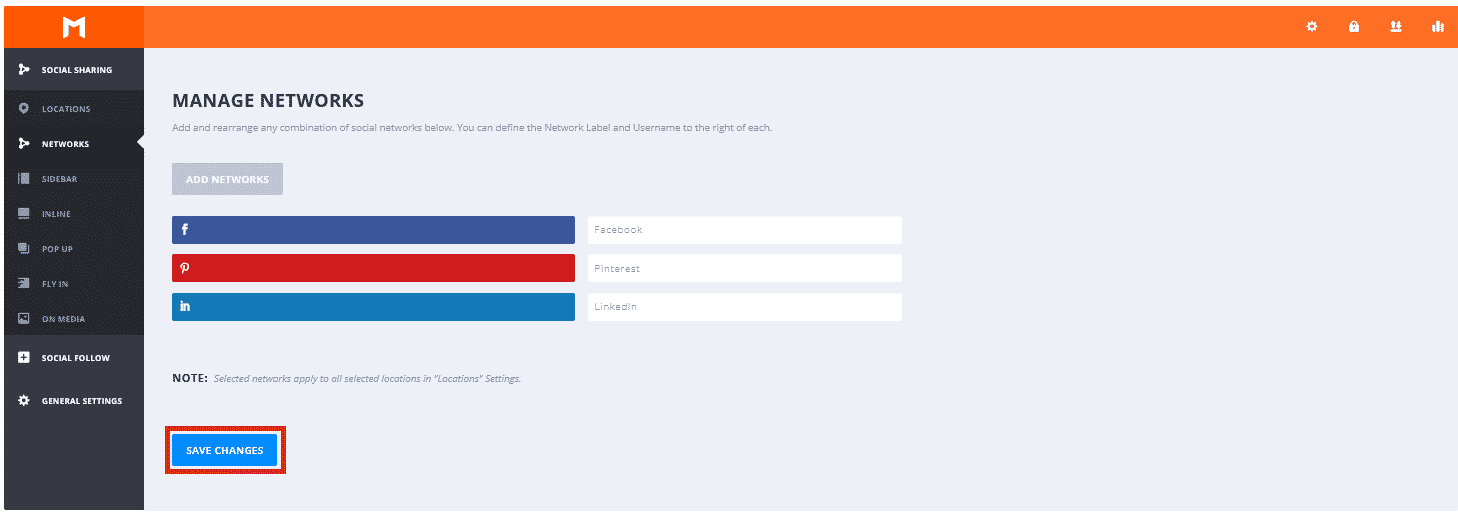
This is the central part and probably one of the most important of the extension, the section "Networks".
This is where you can define which networks you want to add to your button block and let me tell you that you have the embarrassment of choosing on the available networks.
I invite you to click on "Add networks" to add your favorite networks.
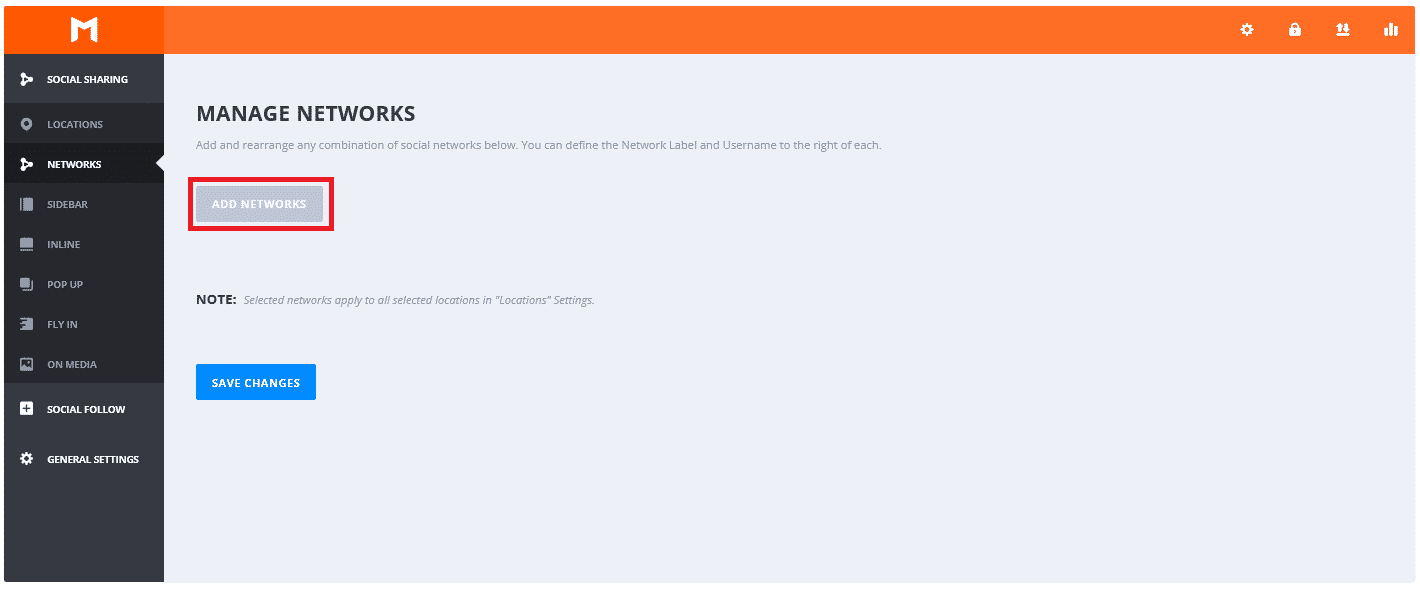
Then you only have to choose the ones you want to add to your social media block.
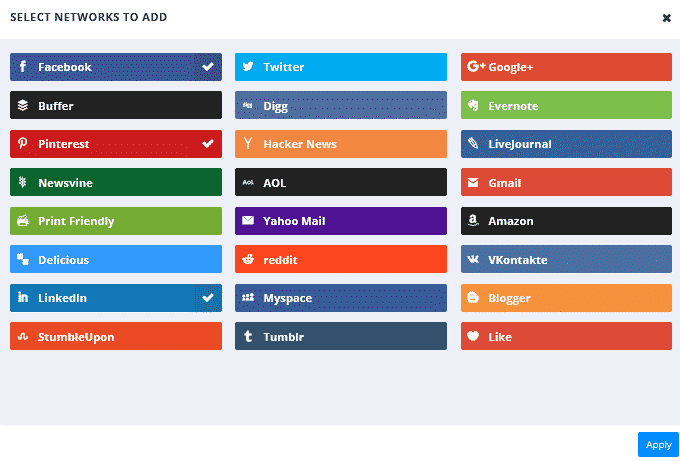
For my part, I chose to add Facebook, Pinterest and LinkedIn. Don't forget to save the editions you do in the extension headings before leaving them, by clicking on "Save changes".
Parameters of Monarch icons
Now let's go to the settings that it is possible to achieve for icons. For the sake of simplification of this tutorial, we will address here only the section "Sidebar", because it is the most common and because the other headings (Inline, Pop up, Fly in, On media) are relatively similar to that of the "Sidebar".
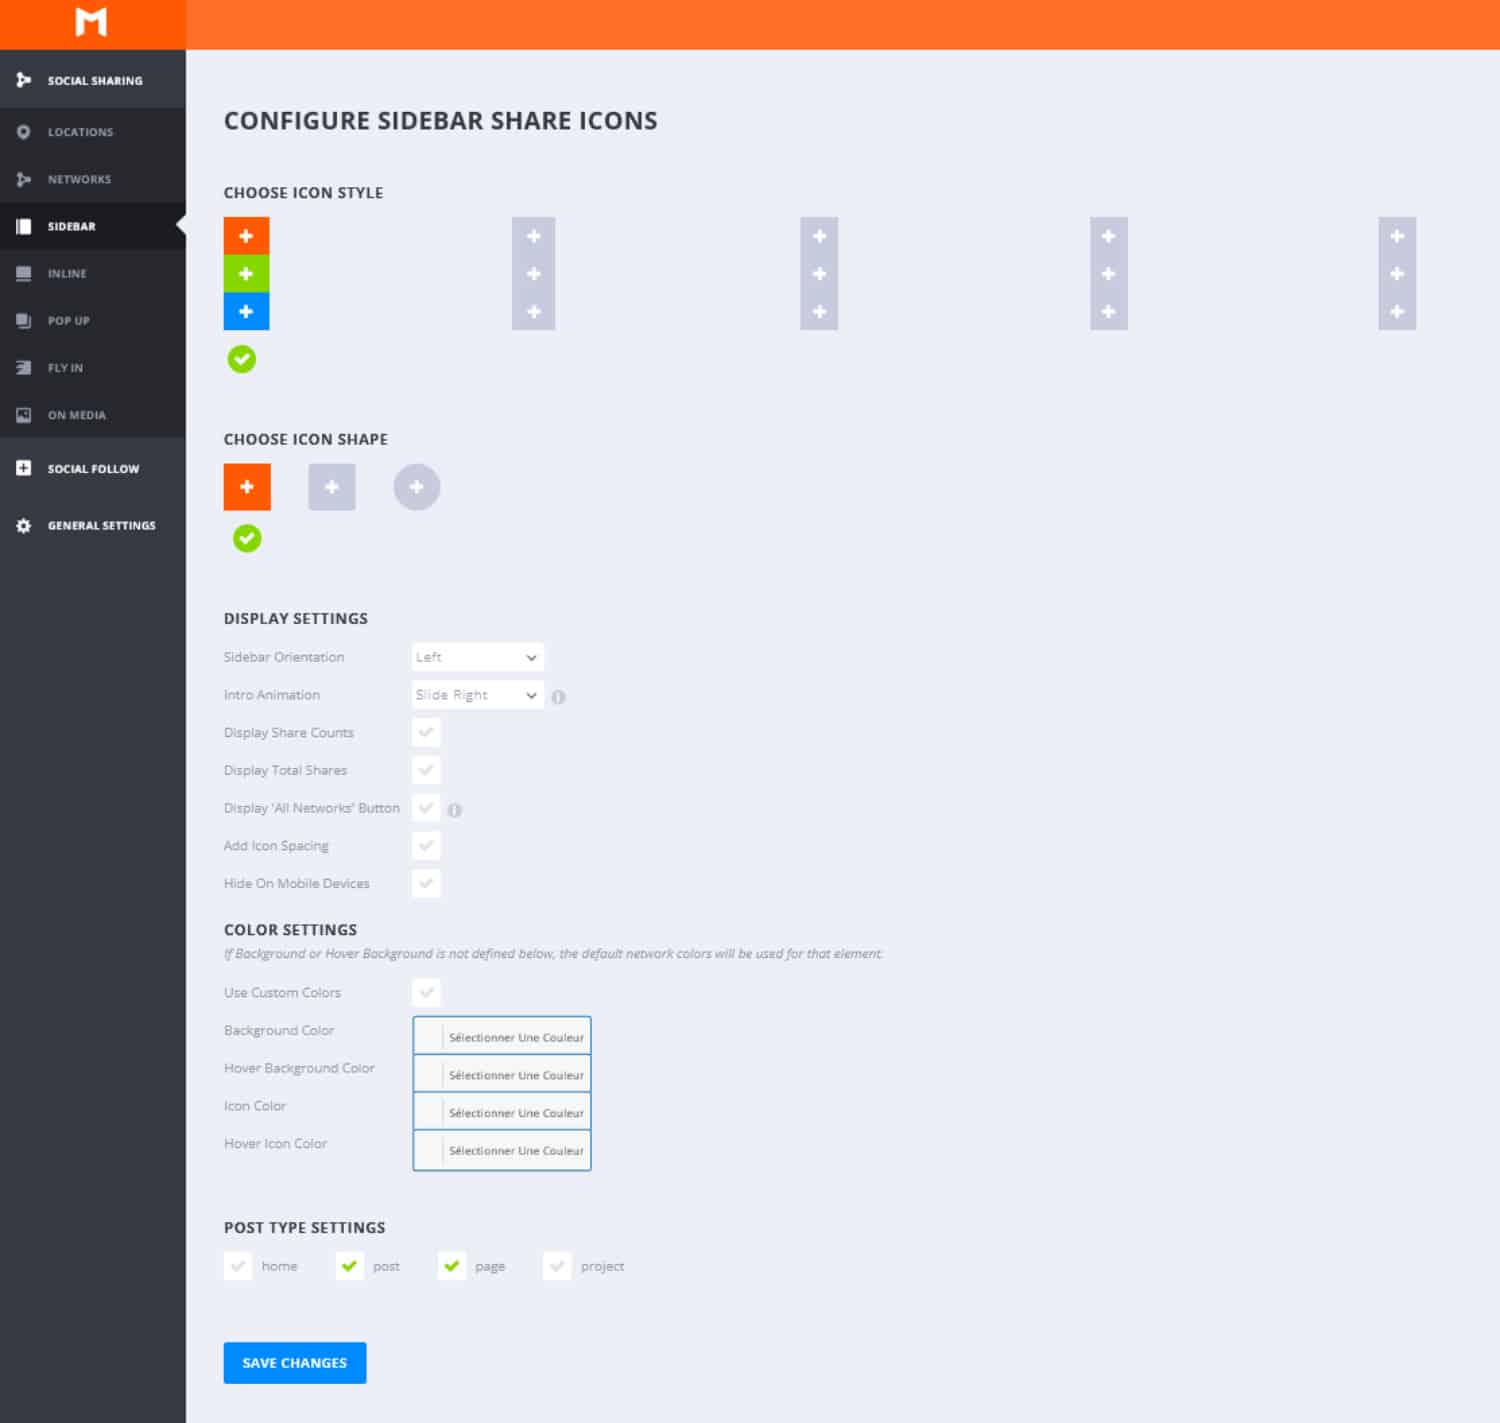
Here are the 5 sub-headings of Sidebar that you can find as main settings:
- Icon Styles
- Choice of icon
- Display settings
- Color settings
- Post type settings
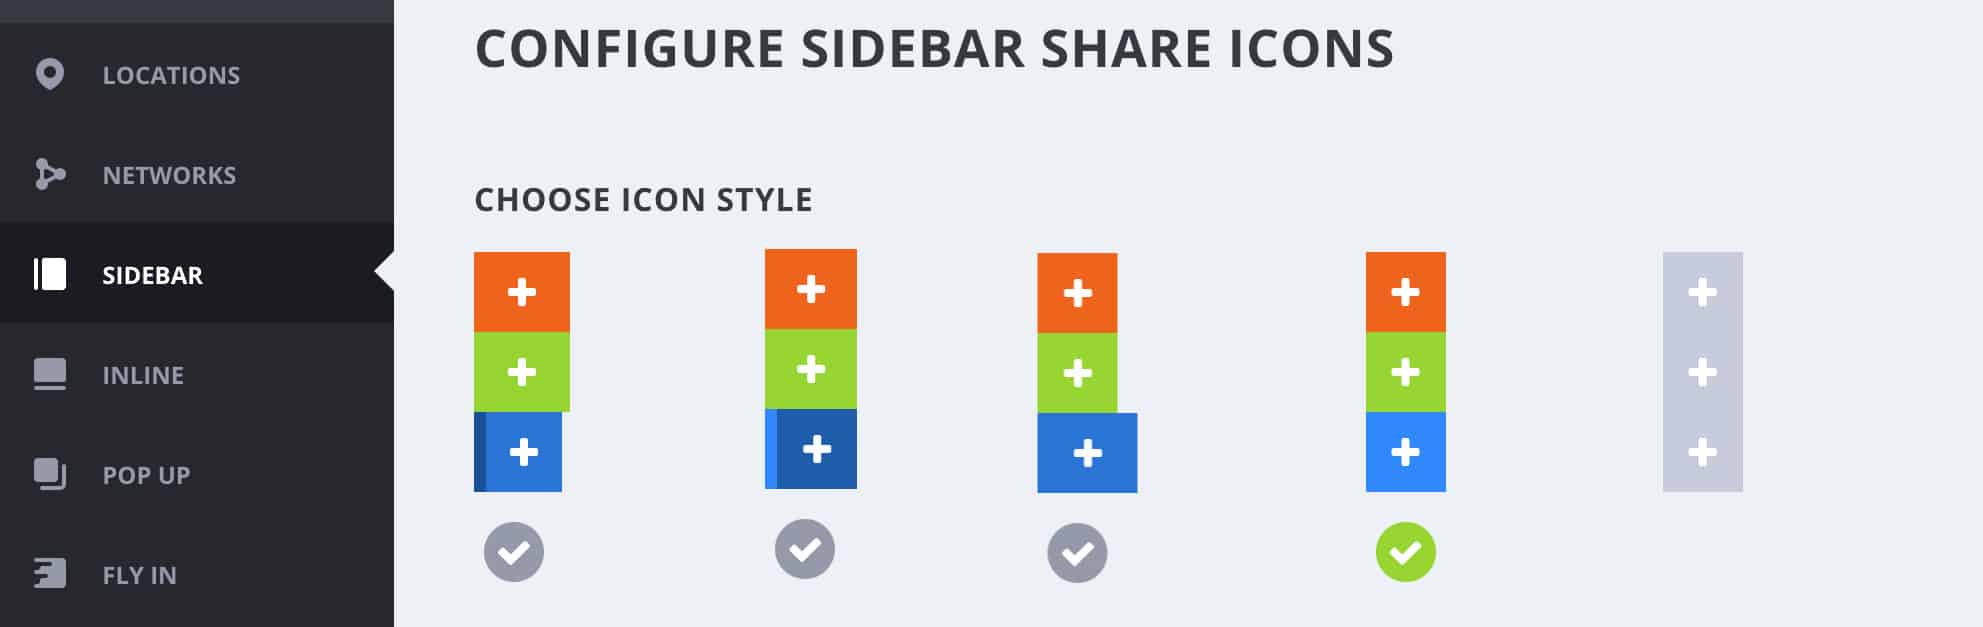
Icon style
Here you have 5 choices to define the style of the icons and their appearance on the flyover.
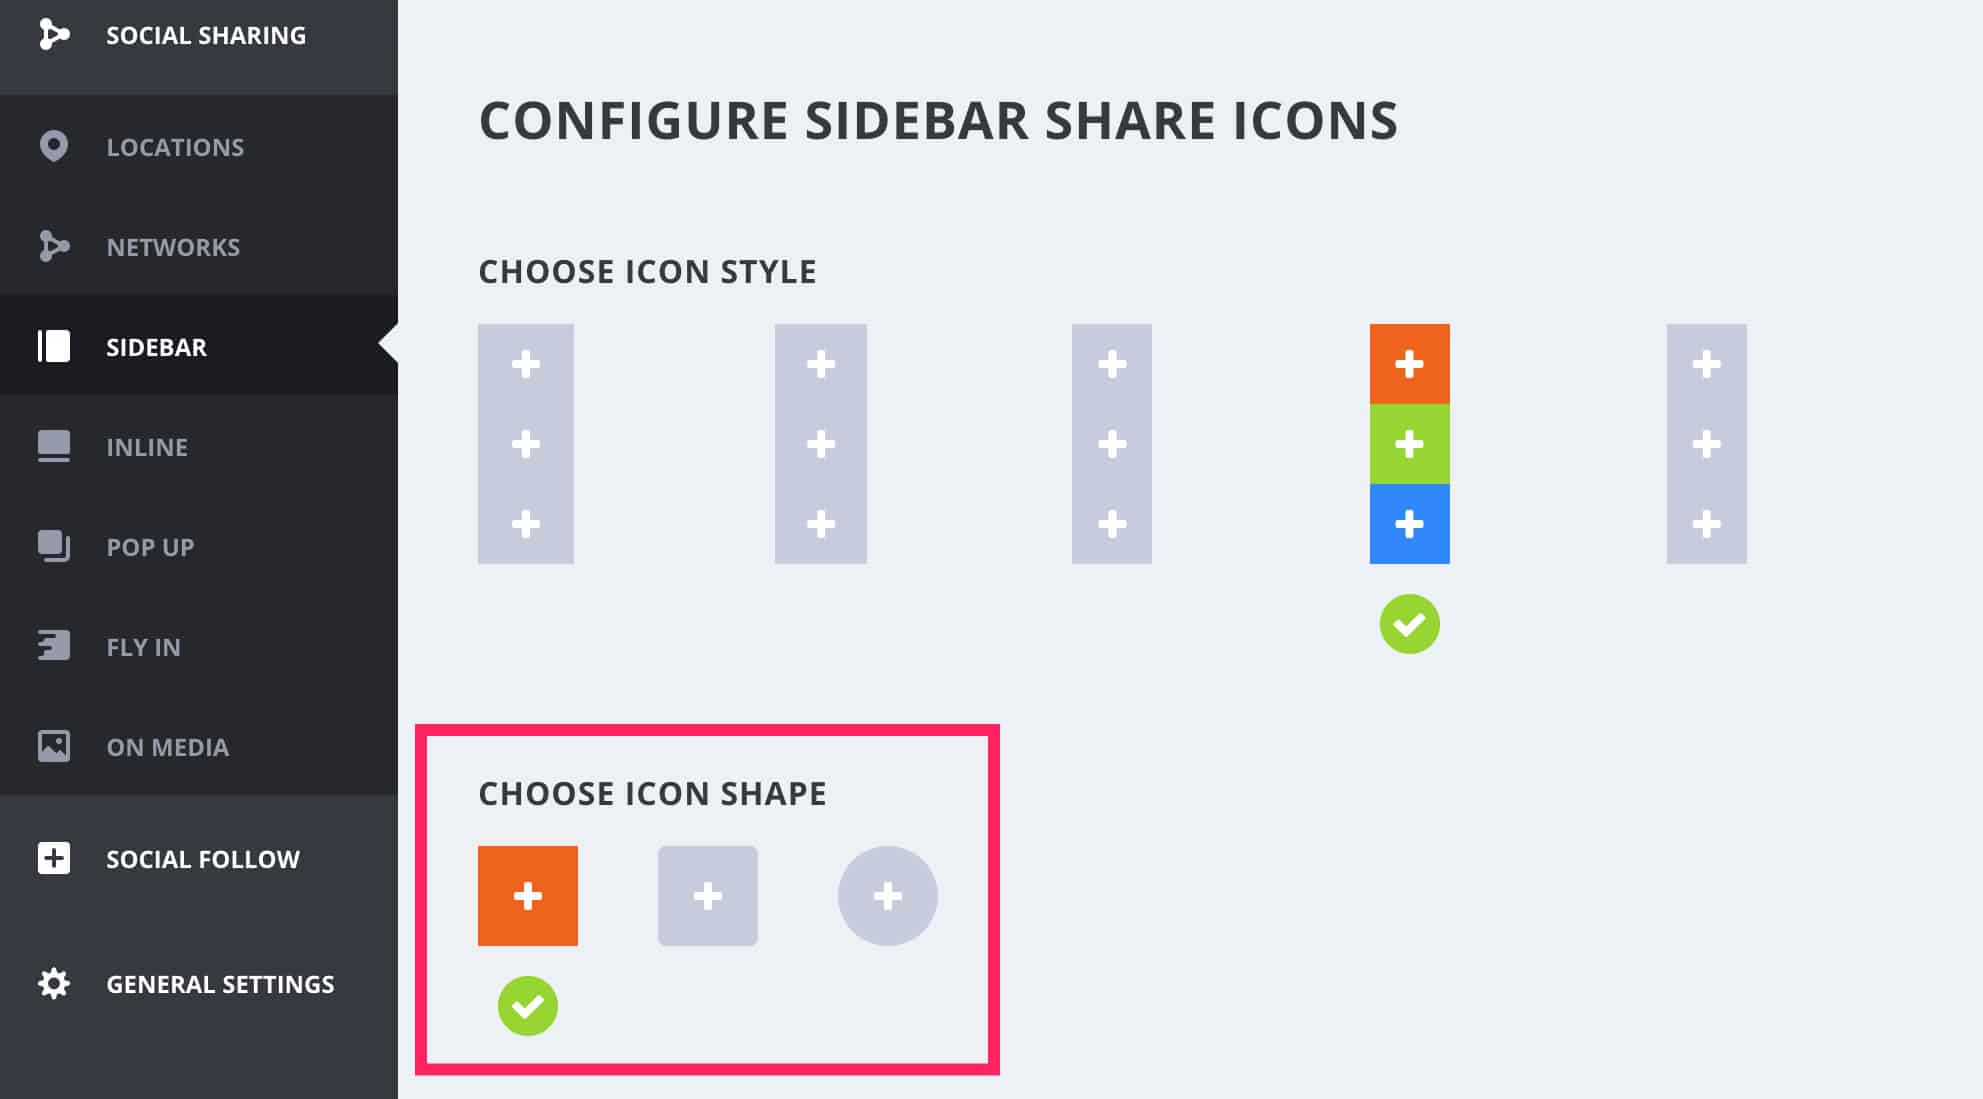
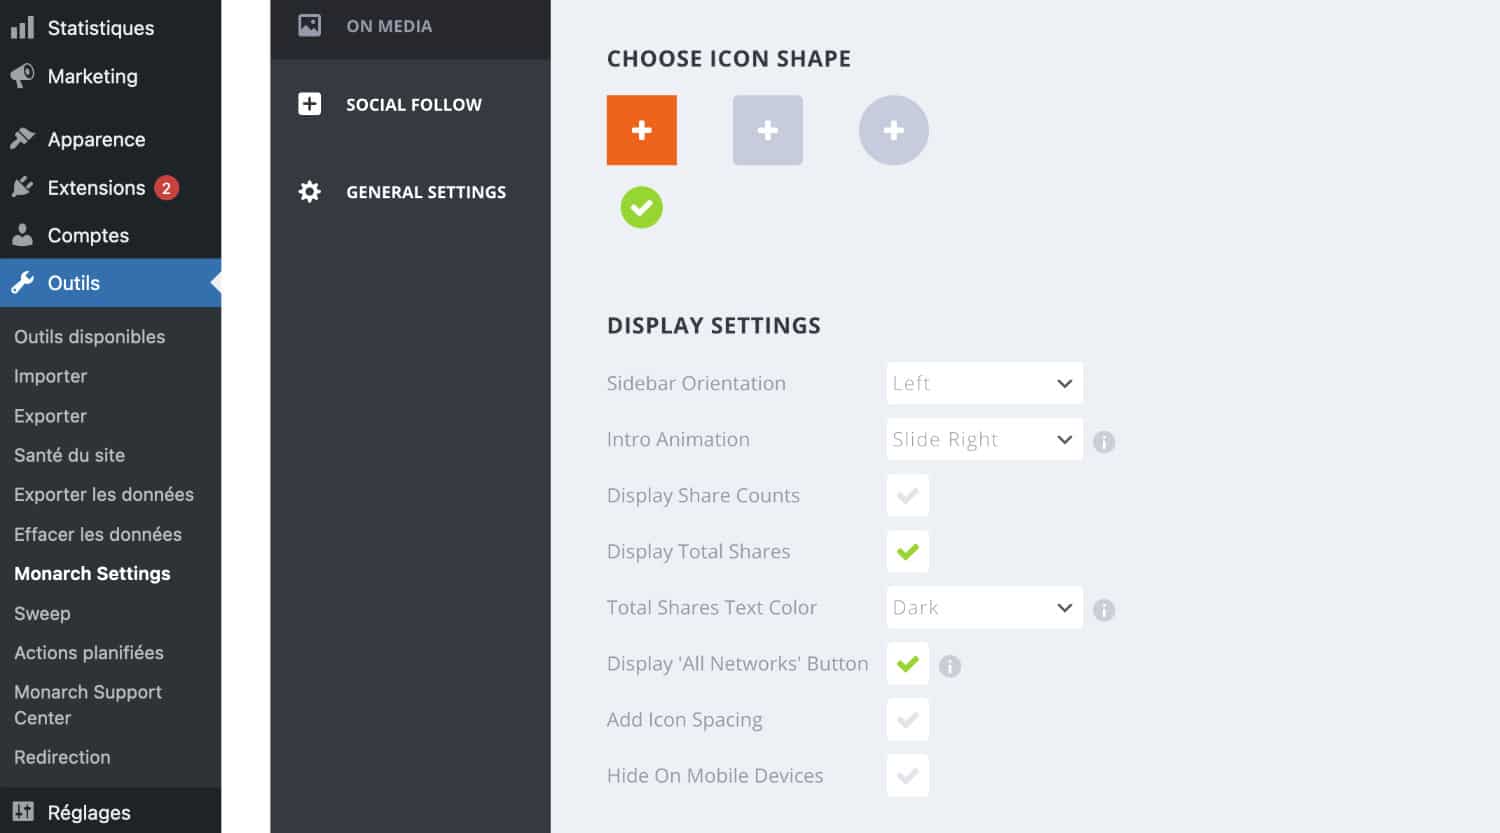
Choice of icon
You can also define your preferred icon among 3 choices: square, square with rounded edges and circle shaped.
By recording my current settings and going to my draft blog post, here's what it gives now.
Monarch Display Settings
You have the possibility to manage several elements in the settings part of the display.
You will have noticed, the extension is currently in English. Hopefully one day the publisher will propose a multilingual version of the extension with French included. For the time being, don't worry, there is, in reality, nothing bad and if you doubt on some terms, a little translation at our friend Google and the case is settled 😉
Let us go back to our subject, the extension proposes to regulate mainly:
- Side of bar display
- Animation
- Show (or hide) meter and total number of shares
- Show an additional button to share on networks other than those originally planned
- Adding spacing
- Hide on mobile
Sub-parameters may appear depending on the boxes you check.
I invite you to explore the various possibilities according to your needs and also to test to see what it gives on your pages.
Color settings
As you must know, here we can make adjustments to the colors of our share buttons.
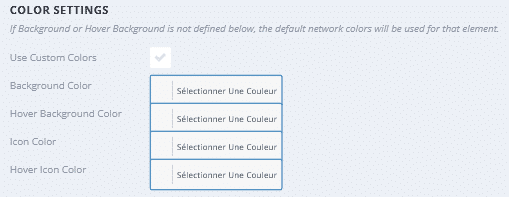
Personally, I advise you to leave the default settings, as visitors are accustomed to seeing the known and widespread colors of social networks such as Facebook dark blue, Twitter sky blue, Pinterest red, etc.
However, you can also use the colors of your graphic chart, as here on Divi Tips, you can then:
- Change the background color and also the one on the flyover
- Change the color of the icon and also the one on the flyover
Post type settings
To finish this part on the various possible settings on the icons, the extension leaves the possibility to define on which pages you want to display your button block on your site.

By default, the extension check "Post" and "Page", but I recommend you only leave "Post" checked. Indeed, as we have seen, this type of extension is actually more suitable for sharing blog posts and it is not necessarily wise for you to post this on your entire site. However, you have the possibility to define on which pages to display your buttons if the need arises.
Need to master Divi? Discover my training that accompanies you step by step in the understanding and use of Divi! Learn more about Divi training.
General settings tab
Last tab proposed by the extension: main settings. Nothing special here.
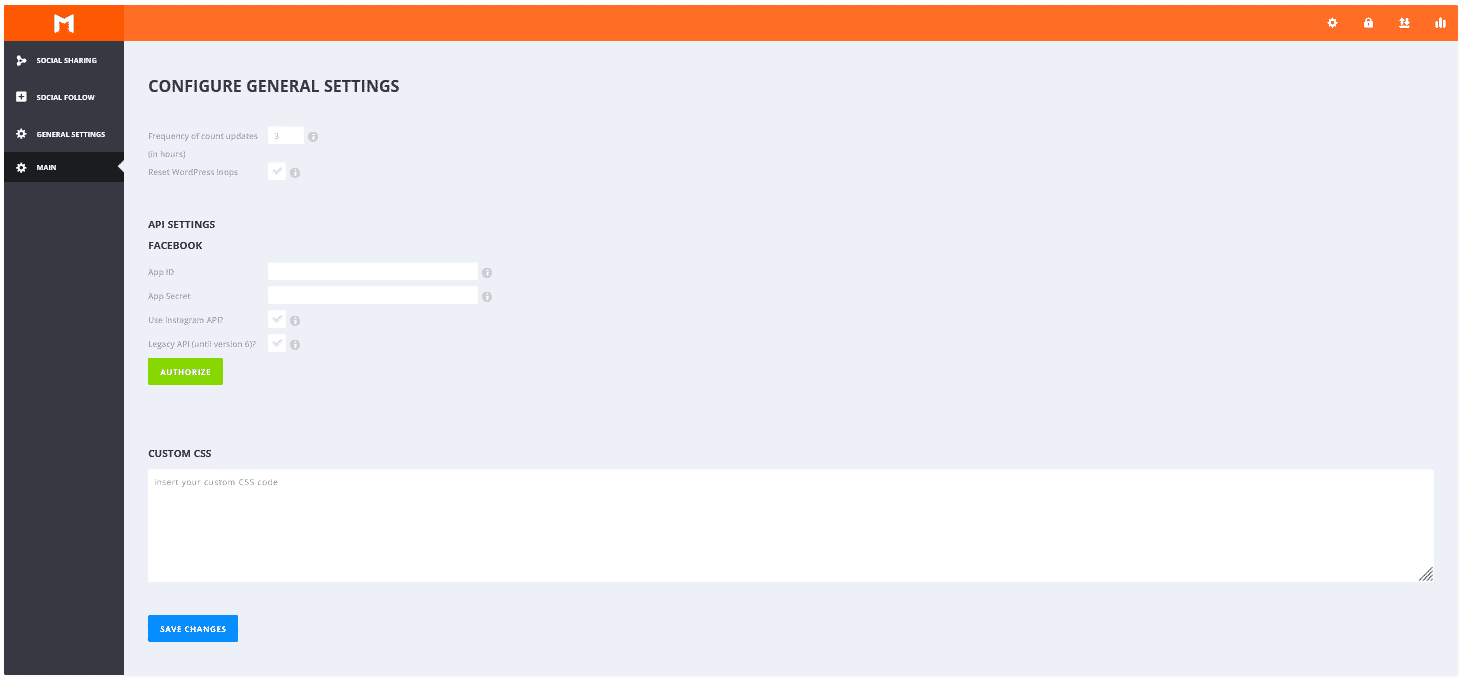
You can manage:
- Frequency of updating meters
- Connect your extension to Facebook API
- Added additional CSS code
Social follow-up tab
To finish this tutorial, know that the extension Monarch Also offers the possibility to add, in addition to your share buttons, icons to follow you on your social networks. You can find this feature in the "Social Follow" tab.
The settings are very similar to the tab "Social Sharing" that we have seen in detail in this tutorial. If you understand what we've seen together so far, the "Social Follow" tab settings should not be a problem for you.
Finally, note that once you have defined your networks for the "Social Follow", there are two possibilities for you to integrate them on your pages:
- As widget (to be added from the Appearance > Widgets tab)
- Via shortcode (code to be entered at the desired locations on your pages)
Don't hesitate to use the comment space if you have any questions on these points, I will be happy to help you.
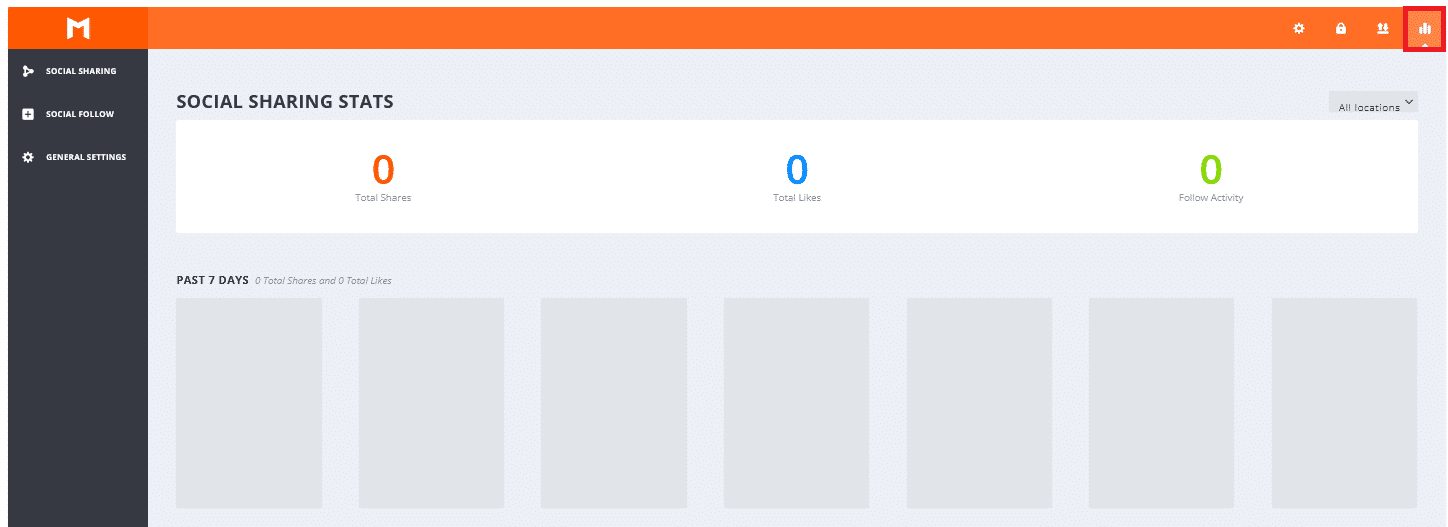
Statistical tab
Once your buttons are installed on your site (shares & tracks), don't forget to check your statistics regularly.
Monarch a practical and easy to configure sharing extension...
To conclude this article, I would like to share with you my impressions on this extension. I personally find it very interesting and if you use the Divi theme (logically yes), you will not be moved.
Indeed, being also developed by Elegant themes, you find a style similar to that of Divi or his cousin, The Bloom extension that manages Opt-In (newsletter).
Moreover, I find it very simple to use which makes it even more accessible.
If necessary, remember that specialized agency WordPress can accompany you in case of need to install a theme like Divi or an extension such as Monarch.


Bonsoir, merci pour cet article!
Lorsque je partage un article/page via Monarch ce n’est pas la photo mise en avant qui apparait sur la vignette de partage mais l’avatar du site (l’icône affichée sur l’onglet de la page web)… comment puis-je ajuster ça?
Merci de votre aide!
Par défaut, il reprend ton icône si tu n’as pas attribué d’image de mise en avant sur ta publication, tu as vérifié cela ?
Bonjour, @Lycia, vous voulez dire de créer un « featured image »? Ca suffit pour regler le problem? Merci
Je ne suis pas sûr me de comprendre ?
Merci pour ce tutoriel, clair et utile.