
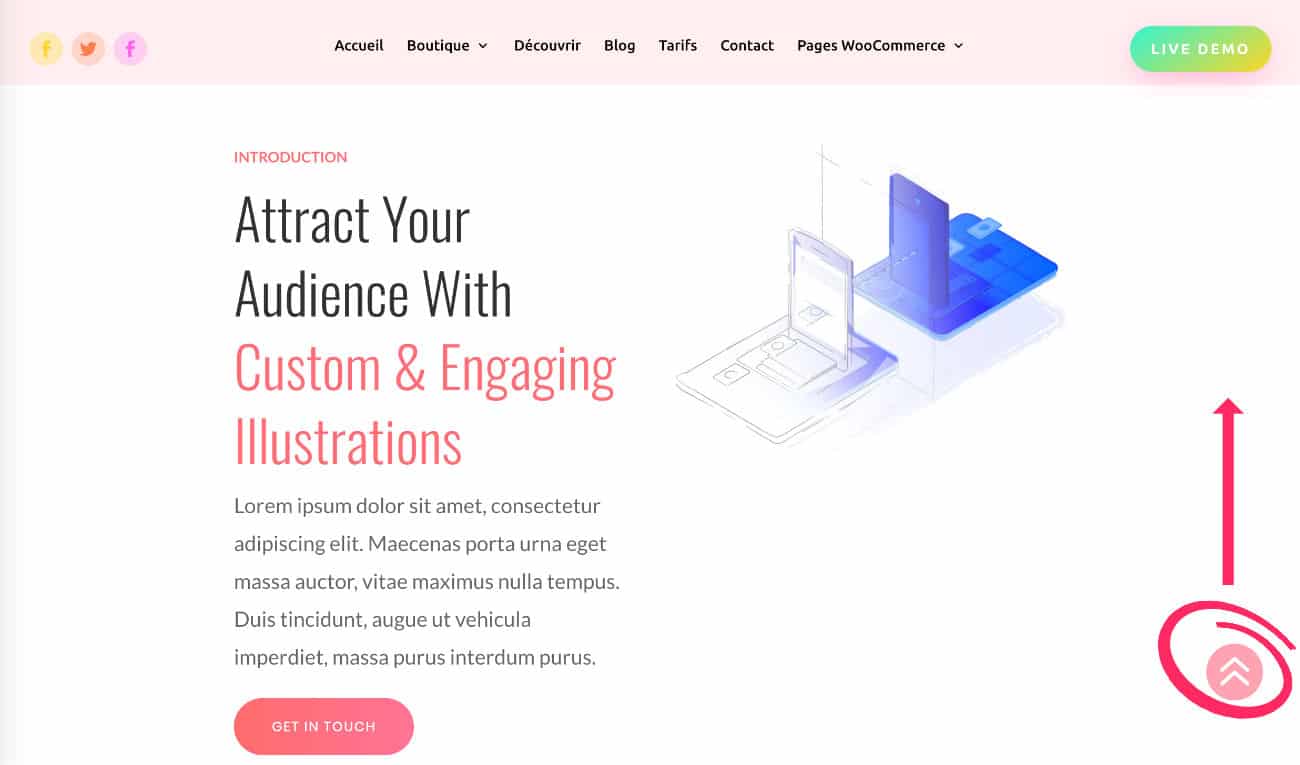
Show a "back up" button (back-to-top button) on its site is a fairly common practice. He's not here to be beautiful, but rather for improve user experience during his visit.
UX (user experience) is very important in the design of sites because this is why users feel good and come back.
What if I told you that we could combine both: UX and DESIGN?
And if I told you that in a few clicks you will be able insert a button back to the custom top and positioned at the desired location? Simply with Divi, without adding any code or plugin!
That's what I suggest in this new tutorial...
1 - Create a button back up using the Summary module
To create your button back up, a Divi module is particularly suitable for this, it is the Summary module (Blurb Module).
This allows you to easily insert an icon or image but also a URL (a link). These are the elements we need to create the famous button!
1.1 - Edit the global footer
I propose this solution because it is the easiest...
If you add your button within your Global Footer, Back button up will be present on all pages of your site. You will then save a lot of time.
But this also means that you must (or will) use the Divi Builder Theme to achieve this...
If this is not your case, it is no big deal, you will be able to adapt this solution within your own Divi layouts. The only constraint will be that you will need to add it manually in all pages of your site...
Another solution: customize your button with a few lines of code or plugins. I have a list of resources at the end of this article.
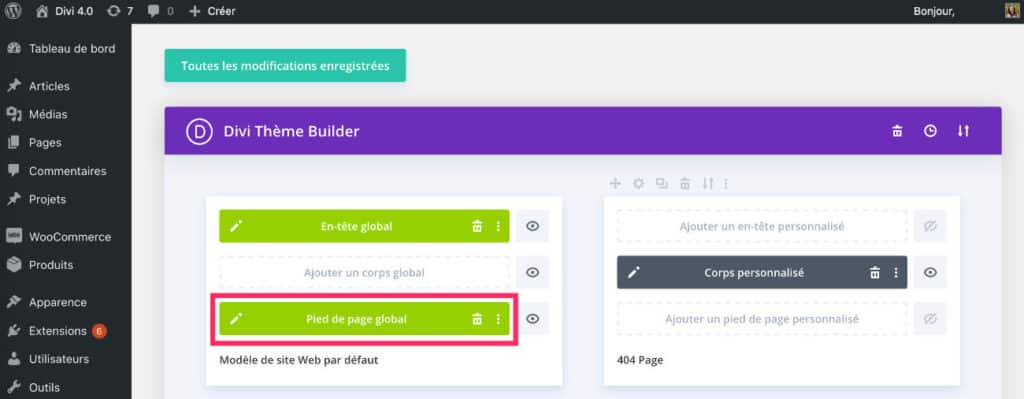
So first, create or edit the Global footer from the tab Divi > Theme Builder.
In the screenshot below, the footer already contains some graphic elements...
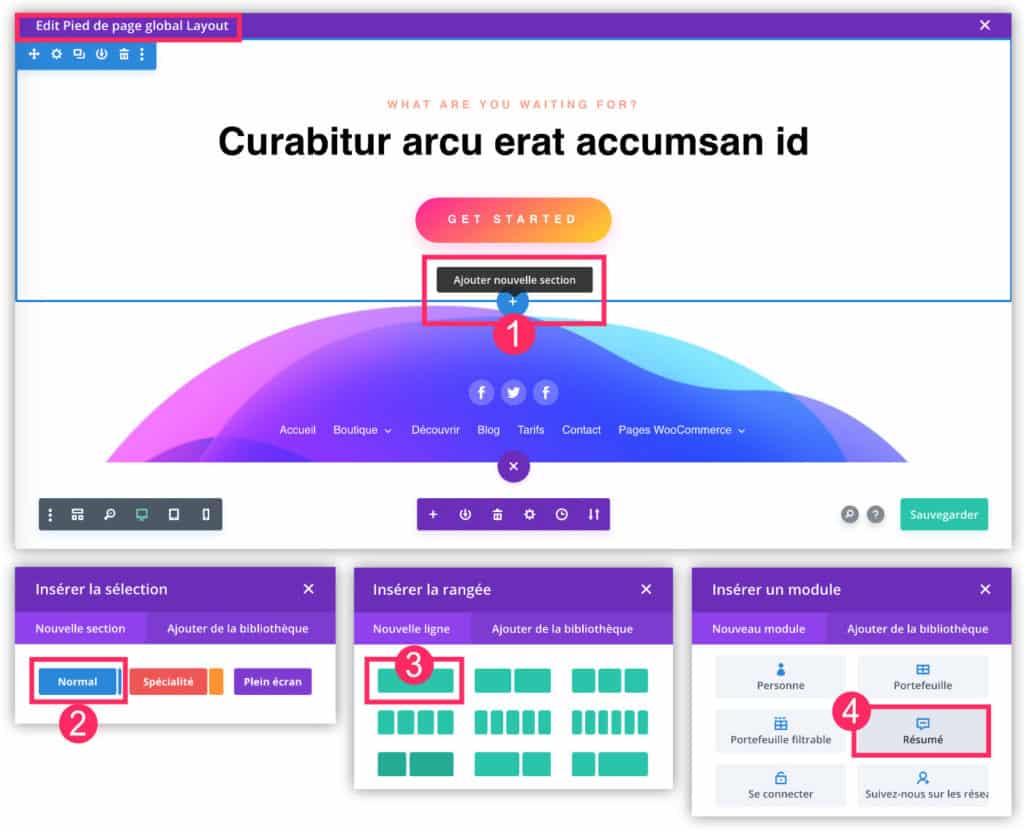
- Add a new section by clicking the "+" button. No matter where you insert it, it will have no visual impact.
- Choose a normal (blue) section.
- Insert a 1/1 line.
- Add it "Summary" module (Blurb Module).
Don't delay! Discover the theme Divi here !
1.2 - Define the contents of the Summary module
Once the Module Summary you can set it up and customise it.
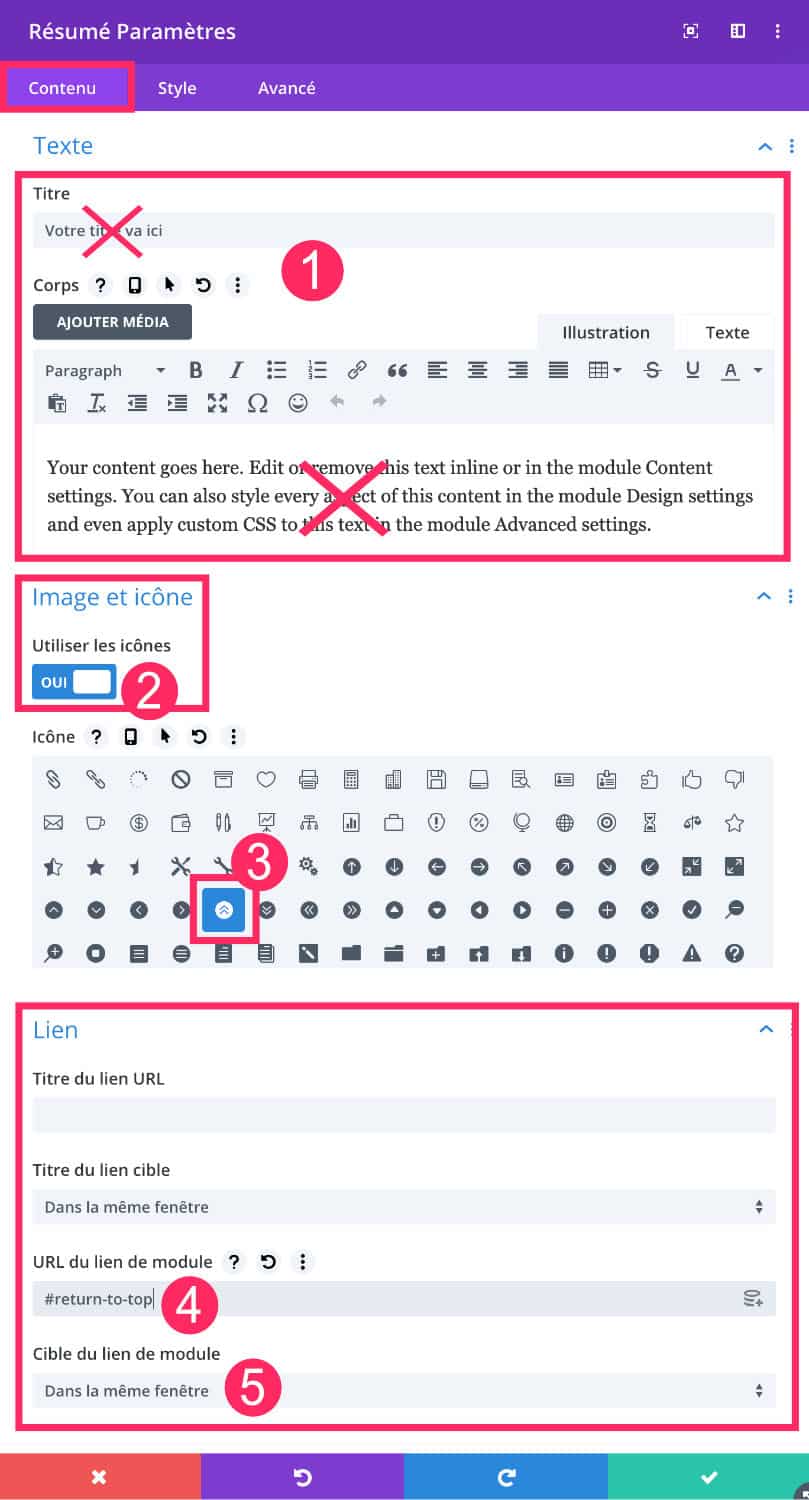
- From tab "Content"delete the title and body of the text.
- Enable option "Use icons".
- Choose your favorite icon.
- In the tab Link, type: #return-to-top
- Set the link target to open in the same window.
2 - Customize the "back up" button
Now that the few adjustment formalities button back up have been done, you will be able to define the design of the button.
Still in Summary module settings, go to the tab STYLE.
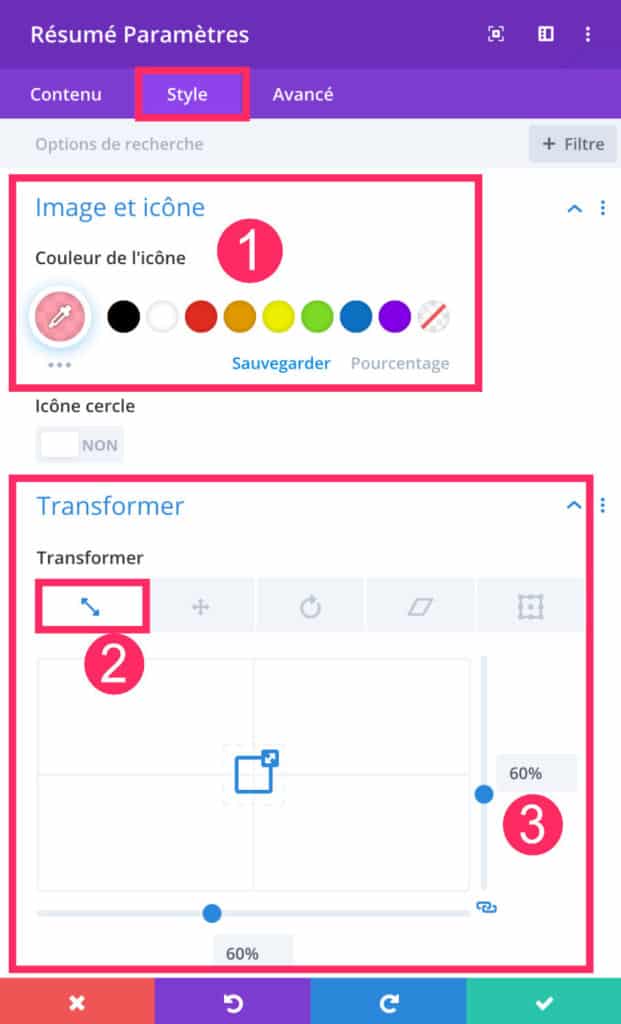
- Set the color of the icon.
- On the tab "Transformer", you can reduce or enlarge the size of the icon if needed.
- Move the rules to change the size.
From tab Style, you can also (in addition to setting the color and changing the size of the icon) add animation, shadow etc...
3 - Set "fixed" position
Here is the mandatory option for a Back button up successful: the fixed positiond.
This is funny because this option is all new in Divi, it has appeared since version 4.2 of Divi and it has gone unnoticed... What a pity, the option position Divi modules have so much to offer! Look at this.
To learn more about this feature that brings additional comfort, Read the official Divi Position article.
Note: these options CSS position are available in all sections, rows and Divi modulesFrom the Advanced tab.
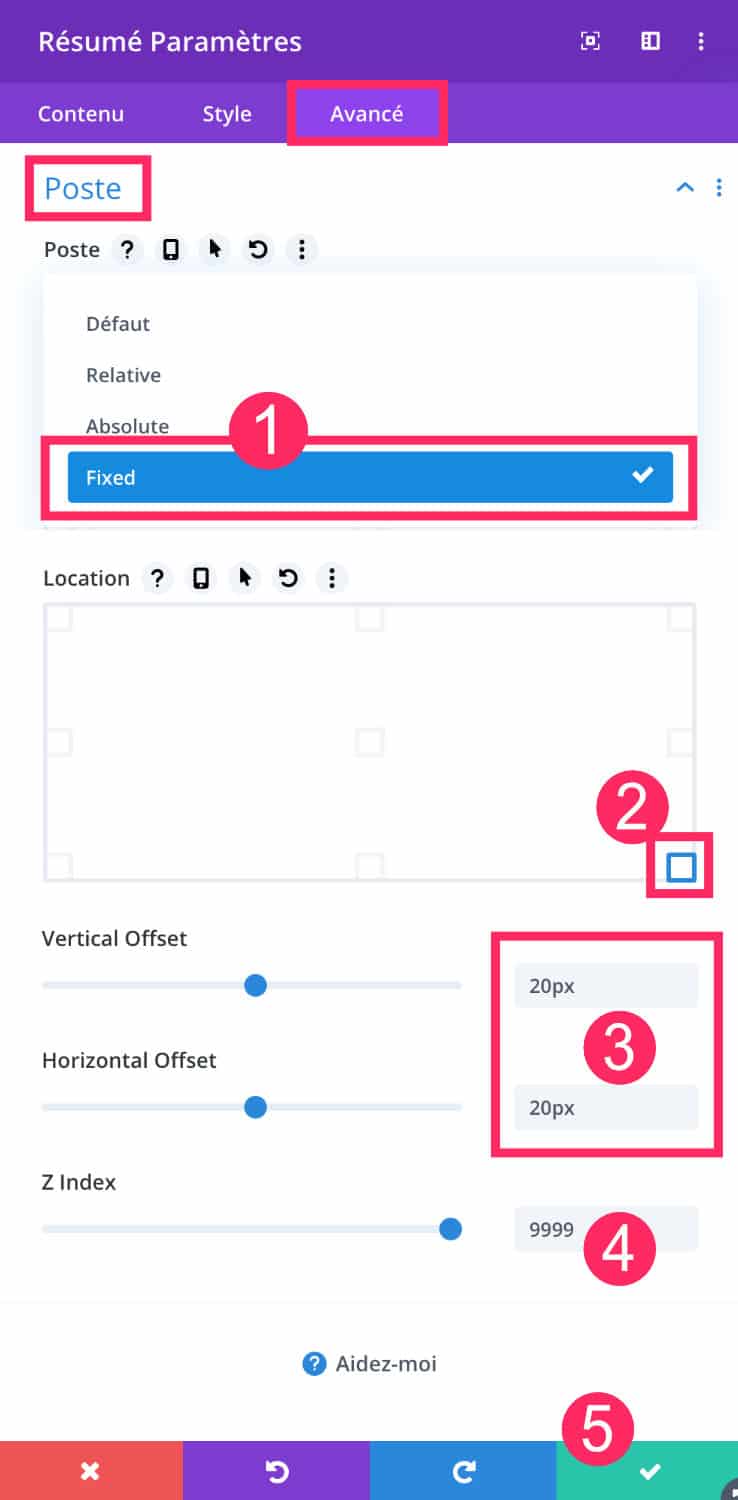
Always in the settings of Module SummaryGo to the tab Advanced and go down to the option "Post" (= Position):
- From the drop-down menu, choose the option Fixed
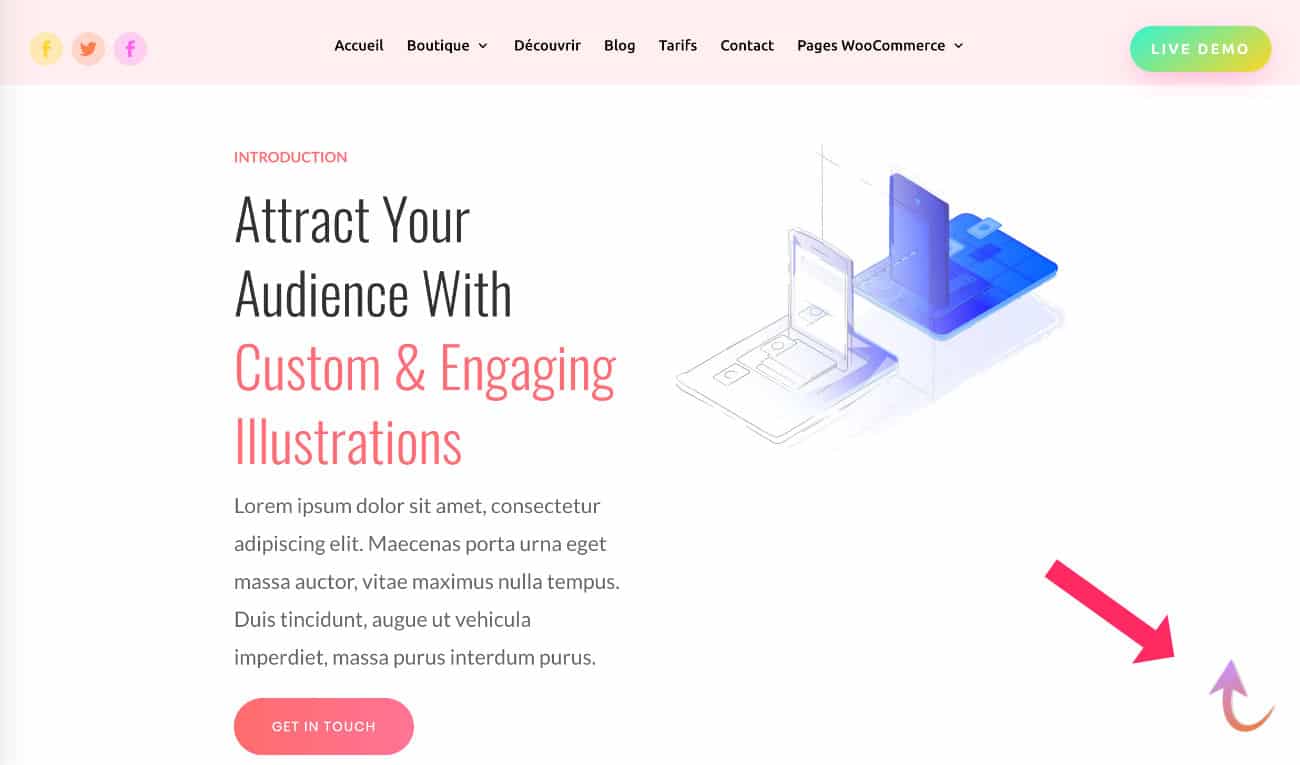
- Determine the position of the button back up. As a general rule, it is placed in the lower right angle.
- Play with margins if necessary.
- Add a Z-Index of 9999.
- Don't forget to validate...
Here's your "Back up" button is created and fixed. We will then make it functional.
4 - Add CSS ID in the site header
When you created your button back up, I advised you to enter the link #return-to-top (in Chapter 1.2 of this Article). This is a anchorage link.
For this link to be fully functional and bring the reader to the top of the page, you must enter a CSS ID at the top of your site.
That's why I recommend that this time you publish the Global Header of your site.
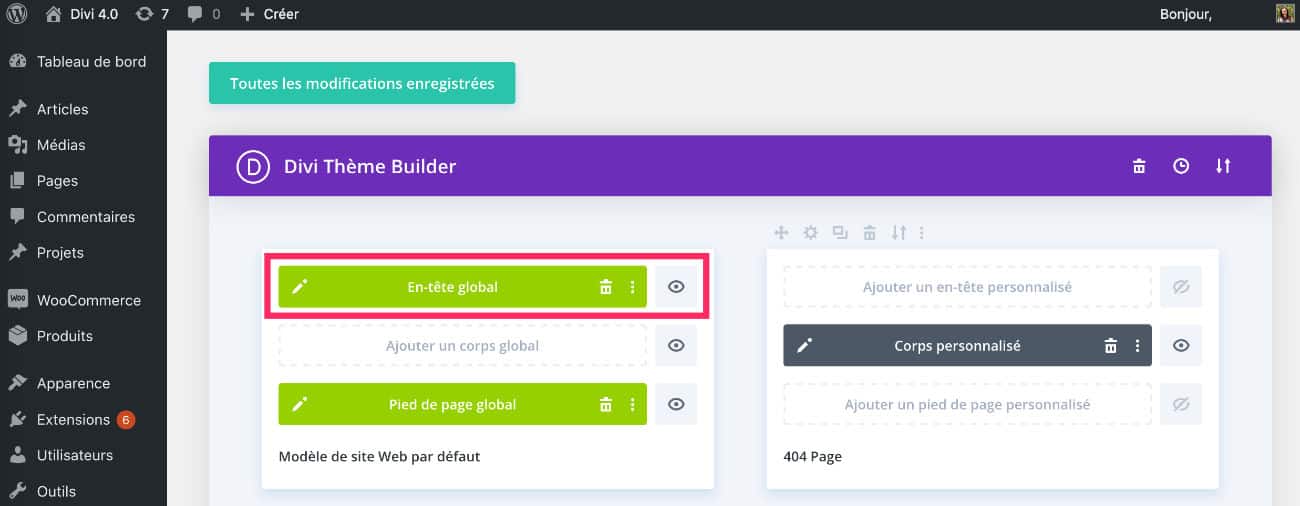
Go back to tab Divi > Theme Builder and create or edit the overall header of your site.
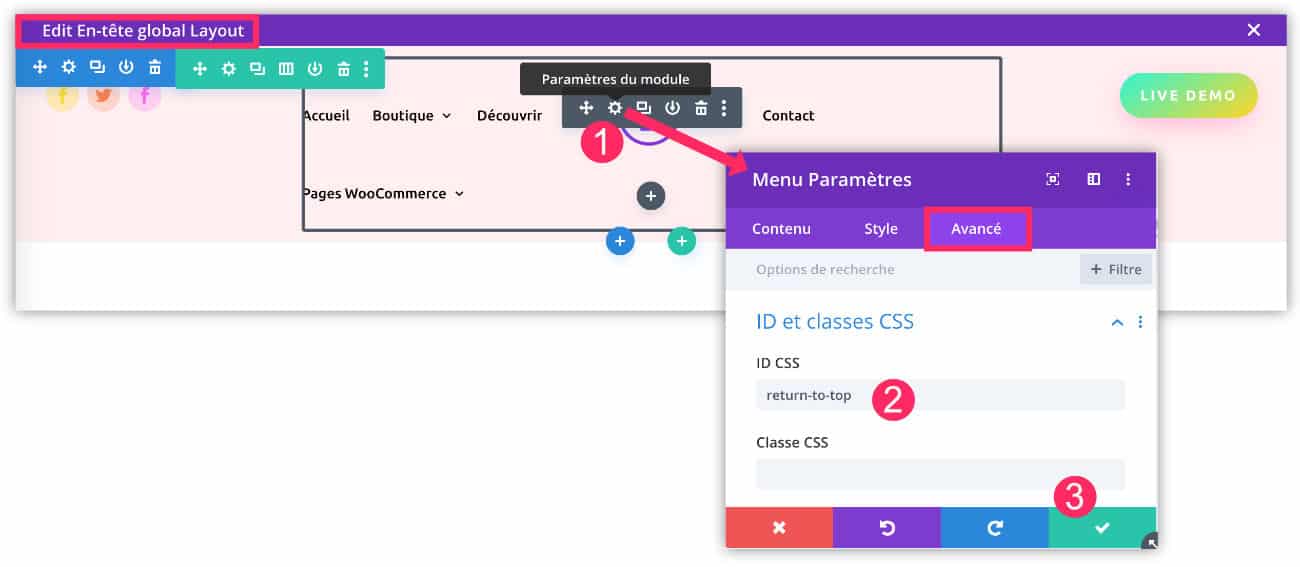
Whatever you have placed in your Header, you will be able to edit it to insert a CSS ID.
In the above screenshot, I made the choice to edit the Divi Menu module but you can very well edit the line or section, the result will be the same.
- Open the settings of your item to change (here is the navigation menu).
- Go to the tab Advanced and insert "return-to-top". Without the "#" this time.
- Save the module and then the Header.
That's it!
Now your site is in possession of a button back up custom and functional.
5 - Variation of the "back up" button with an image
Another even more nice idea: why not use a personalized image instead of a Divi icon ?
5.1. - Create the design of the button
Use your favorite vector software. On the capture below, it is Affinity Designer.
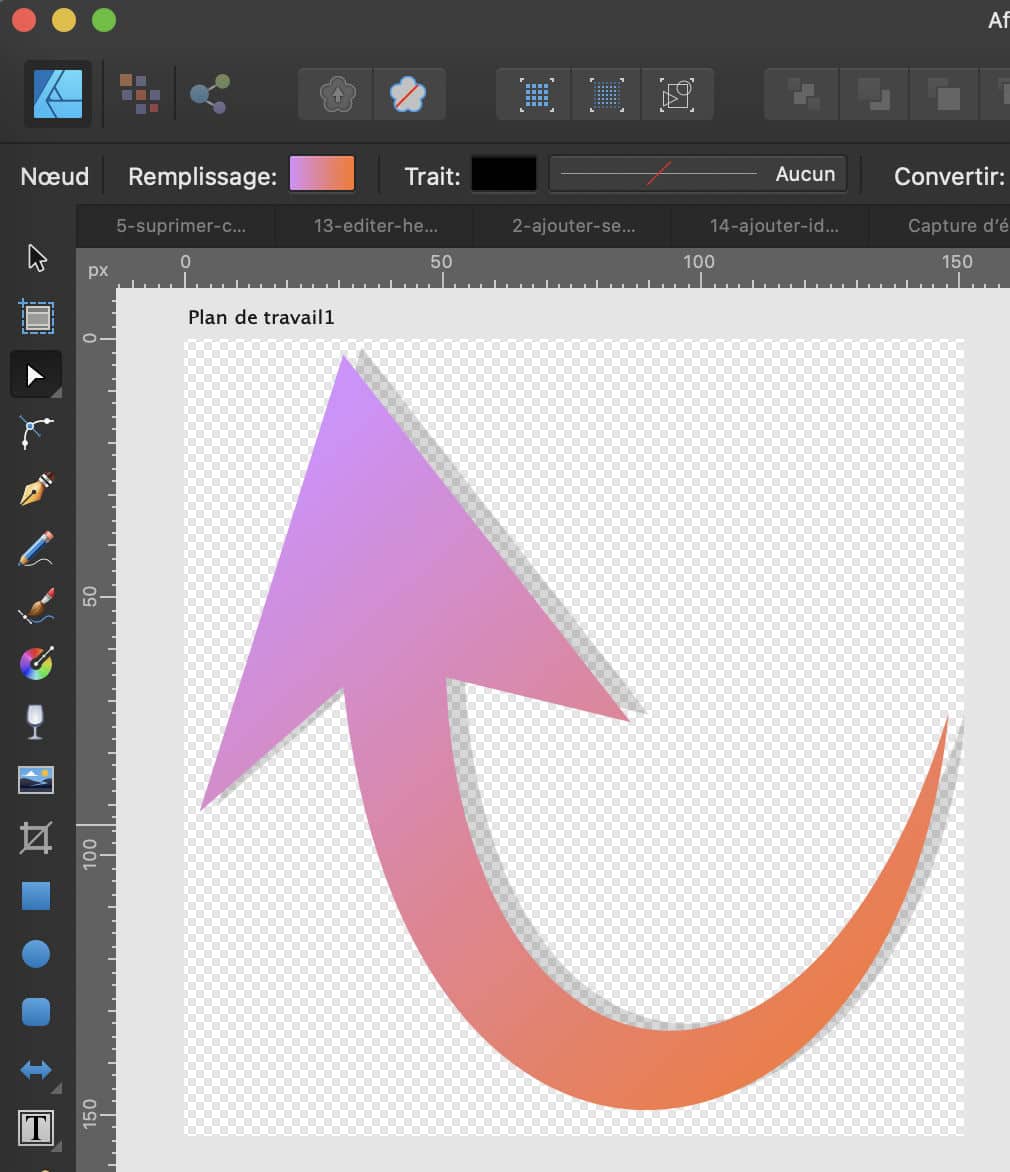
I quickly created an arrow. She's not great.
But if you have a soul of designer, you will know what to do to create a Back-to-top button at the TOP
Otherwise, you can browse the web searching free graphic elements.
5.2. - Insert the image in the footer
Once you have your image in .png format (transparent background), you can insert it instead of the Summary module icon.
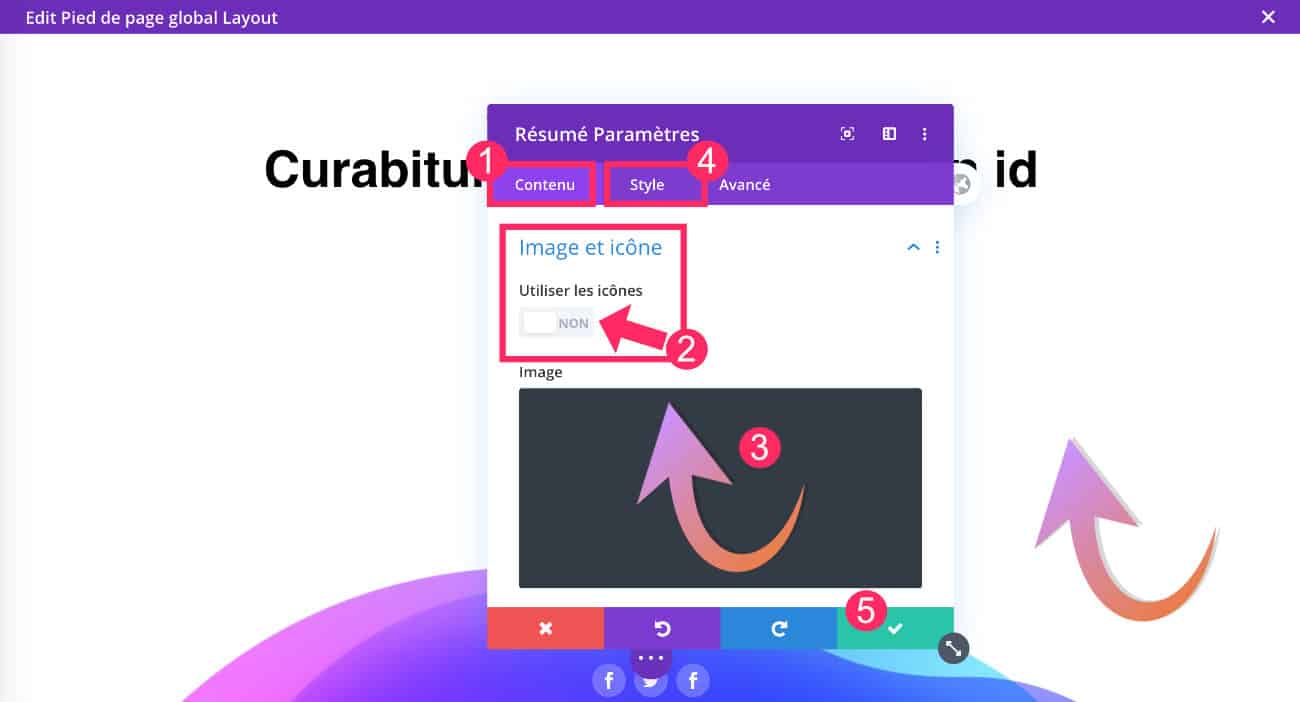
To do this, take step 1.2 of this article and turn off the icon to use an image instead.
5.3. - Check the result
There, you have a button back up completely custom!
Need more resources on Divi? Visit ElegantThemes blog full of ideas and tutos!
6 - In conclusion: a "back up" button in less than 2 minutes!
With Divi, it's a child's play to create fully customized websites!
You will no longer have design constraints and you can easily meet your needs or those of your customers.
To best customize your WordPress site, consult these divi tutos who can help you!
More resources related to customization of Back button up without using the Theme Builder:
- 5 Ways to Style the Divi Back to Top Button
- Styling the Back to Top Button
- How to Create Custom Sticky
- Free Divi Extension: Alternate Back To Top Button Styles & Animations

Merci Lycia pour l’astuce ! explications claires et précises , ton site et travail m’aident et m’inspirent bcp ^^
Bonne soirée 🙂
Merci Audrey 😉
Superbe astuce à nouveau Lycia, merci !
J’ai tenté l’expérience, mais je suis bloquée.
Après la création du bouton, j’ai ajouté l’ID CSS dans l’en-tête du site, mais j’ai mon menu qui disparait.
De base, je n’ai pas d’en-tête global dans le thème builder. Je suis passée par apparence pour le paramétrer.
Une reco pour gérer ça ?
D’avance merci pour ton aide.
Salut Stéphanie, tu as trouvé finalement ? Tu entends quoi par « j’ai ajouté l’ID CSS dans l’en-tête du site » ?
Nope Lycia !
Pour ta question, je parlais de l’étape 4 de ton tuto – Ajouter un ID CSS dans l’en-tête du site. Retournez à l’onglet Divi > Theme Builder et créez ou éditez l’en-tête globale de votre site.
Chez moi, ce n’est pas comme ça. Mon en-tête n’apparait pas avec mes différents onglets.
Merci bcp Lycia pour ce tuto
Tu es superbe.
Ah mince, tu as un lien à partager ?
Bonjour !
Merci, le tuto est clair, mais je reviens sur la question de stéphanie : quand on utilise le personnalisateur de theme pour faire son entete et qu’apres on met l’id dans le header via le divi builder, tout l’entete disparait….
Est-ce que tu as une solution ?
Je ne vois pas où mettre un id dans le header directement dans le personnalisateur.
Ou alors il faut faire tout son entete avec le divi builder et plus du tout avec le personnalisateur ? mais dans ce cas, je ne suis pas encore capable de faire ça…
j’ai trouvé entre temps…
enfin j’ai fait mon header global et du coup j’ai pu mettre mon id 🙂
Salut Aline, oui, si tu veux faire ça, tu dois utiliser le Thème Builder pour pouvoir mettre un ID dans la section qui affiche ton menu.
Super astuce !
Je me demandais par contre s’il y avait la possibilité de ne faire apparaître cette icône que lorsque la page est plus longue que la hauteur de l’écran ?
Salut Jo, non pas comme ça. Sinon, tu embarques le code seulement dans les pages qui en ont besoin au lieu de pour tout le site 😉
Bonjour Lycia,
Déjà merci pour ce tuto ! Par contre j’ai un souci, le lien est bien effectif sur ma flèche, mais il ne renvoie pas vers mon menu. J’ai créé un Menu pleine page via l’éditeur de thème donc je me dis que ça vient peut-être de là ?
Salut Annabelle, ça vient peut-être de là car je n’ai pas testé avec le menu en pleine page, c’est possible que ça ne marche pas à cause de cela 😉
Bonjour Lycia,
Après plusieurs tentatives, mon icône « maison » s’affiche en réalité avec la lettre v. Je ne comprends pas d’où peut venir ce problème d’affichage, les codes m’ont l’air bons…
Lorsque je suis également dans ma structure de menu sur wordpress, mon titre de navigation est « v » et non pas l’icône choisi au préalable.
Mon menu a été fait directement par le menu plein écran du module divi.
Salut Floriane ton code est bon, c’est un problème récurrent sur Divi en ce moment, peut-être dû au cache. J’ai pas trouvé de solution. Vide ton cache régulièrement. Ça peut aider.
Bonjour,
Je remarque que le bug que j’essaie de résoudre est également visible sur cette page … c’est à dire que par exemple l’icône « retour vers le haut » est un chiffre et non pas une flèche et ainsi que dans le menu du haut, il y à le chiffre 3 à la place de la flèche pour dérouler le menu… alors soit c’est mon navigateur qui à un problème sauf que ce soucis je le retrouve en visitant mon site depuis la tablette d’un ami ou sur mon smartphone… à la place des 3 traits désignant le symbole du menu, j’ai la lettre « a »… Auriez vous une idée pour résoudre mon soucis ??? Merci et voyez vous également le bug ici présent sur le site ??
Bien cordialement
Hello tu n’es pas le seul. C’est un souci de Divi je pense depuis qu’ils ont optimisé le code pour améliorer la performance. Il faut que je cherche mais pour l’instant je n’ai pas trouvé de solution. As-tu contacté le support ?
Ok j’ai trouvé une solution. Je publie un article la semaine prochaine ou celle d’après. Inscris-toi à la newsletter si tu veux en être informé.
Rebonjour, je viens de me déconnecter de mon wordpress et le bug ne s’affiche plus ici mais persiste sur mon site…
Cela fait plusieurs moi que je tourner et retourne sur mon site, impossible à résoudre cette énigme….
Merci de votre aide !
Cordialement
Michel
Ok super merci, je vais m’inscrire alors.
C’est un souci de cache. Ça va être vite réglé. Soyez patient le temps que je tourne la vidéo et que je publie l’article. Tu utilises WPRocket je suppose ? Si oui, le souci vient de là.
Merci Lycia pour tes astuces toujours bienvenues & pertinentes !!
Pour pousser la réflexion, j’aimerai que le bouton n’apparaisse qu’au scroll (et non dés l’affichage de la page). Comment faire ? Un bout de code pour ça ?
Lucie
Coucou tu as des options de scroll proposées par Divi dans les options avancées. Il suffirait que tu les paramètres pour l’élément souhaité
Grand merci pour votre tuto clair et précis, bravo
merci pour ce tuto !
top ! merci
Bonjour lycia 🙂
Merci pour cet article,
J’en profite pour t’indiquer que le lien « 5 Ways to Style the Divi Back to Top Button » amène à une 404.
Voici son Url actuelle : https://wpzone.co/blog/5-ways-to-style-the-divi-back-to-top-button/
Belle journée 🙂
Merci Hervé pour ton partage.
Bonjour !
Tuto très clair et précis, par contre j’ai un petit soucis. Une barre blanche apparait tout en bas de mes pages et j’en ai conclu que c’est la section dans laquelle se trouve mon icone pour remonter ma page. Ce qui fait que j’ai le bas de ma page + la section blanche et pourtant pas de pb pour l’icone qui reste fixé peu importe le scroll de la page.
J’aimerai donc faire disparaitre cette barre blanche pour ne laisser place qu’à l’icone … Des astuces svp ? merci !
Désolée du retard de réponse Johan, avez-vous trouvé la solution depuis ?
Merci pour cet article, il est vraiment agréable à lire.
J’ai apprécié la clarté des explications et la manière dont le sujet est abordé.
Ça donne envie de creuser encore plus.