
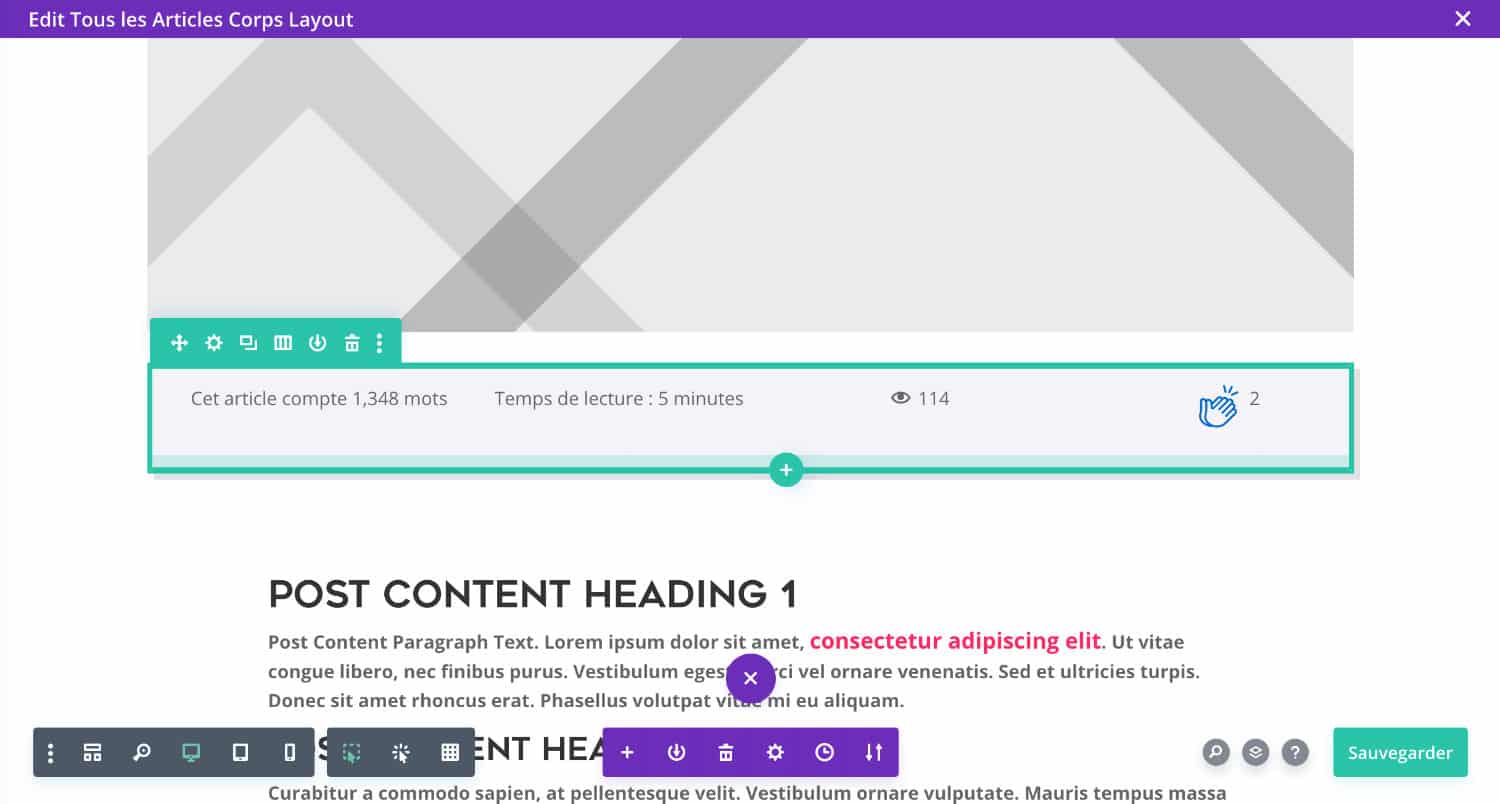
Maybe you noticed the little bar at the end of Divi Tips articles? In this bar, you find the number of words in the article, read time, number of views and one applause voting system.

Recently, I sent you an e-mail (newsletter whose registration form is in the sidebar of this article) asking if you would be interested in how to add this data to your articles. You were very enthusiastic! So here's my answer...
1 - Count the number of words and reading time with WP Word Count
WP Word Count is a free extension (freemium) and light available on the official directory of WordPress extensions.
Its settings are simple to make. After installation and activation of the extension, here is what you need to do:
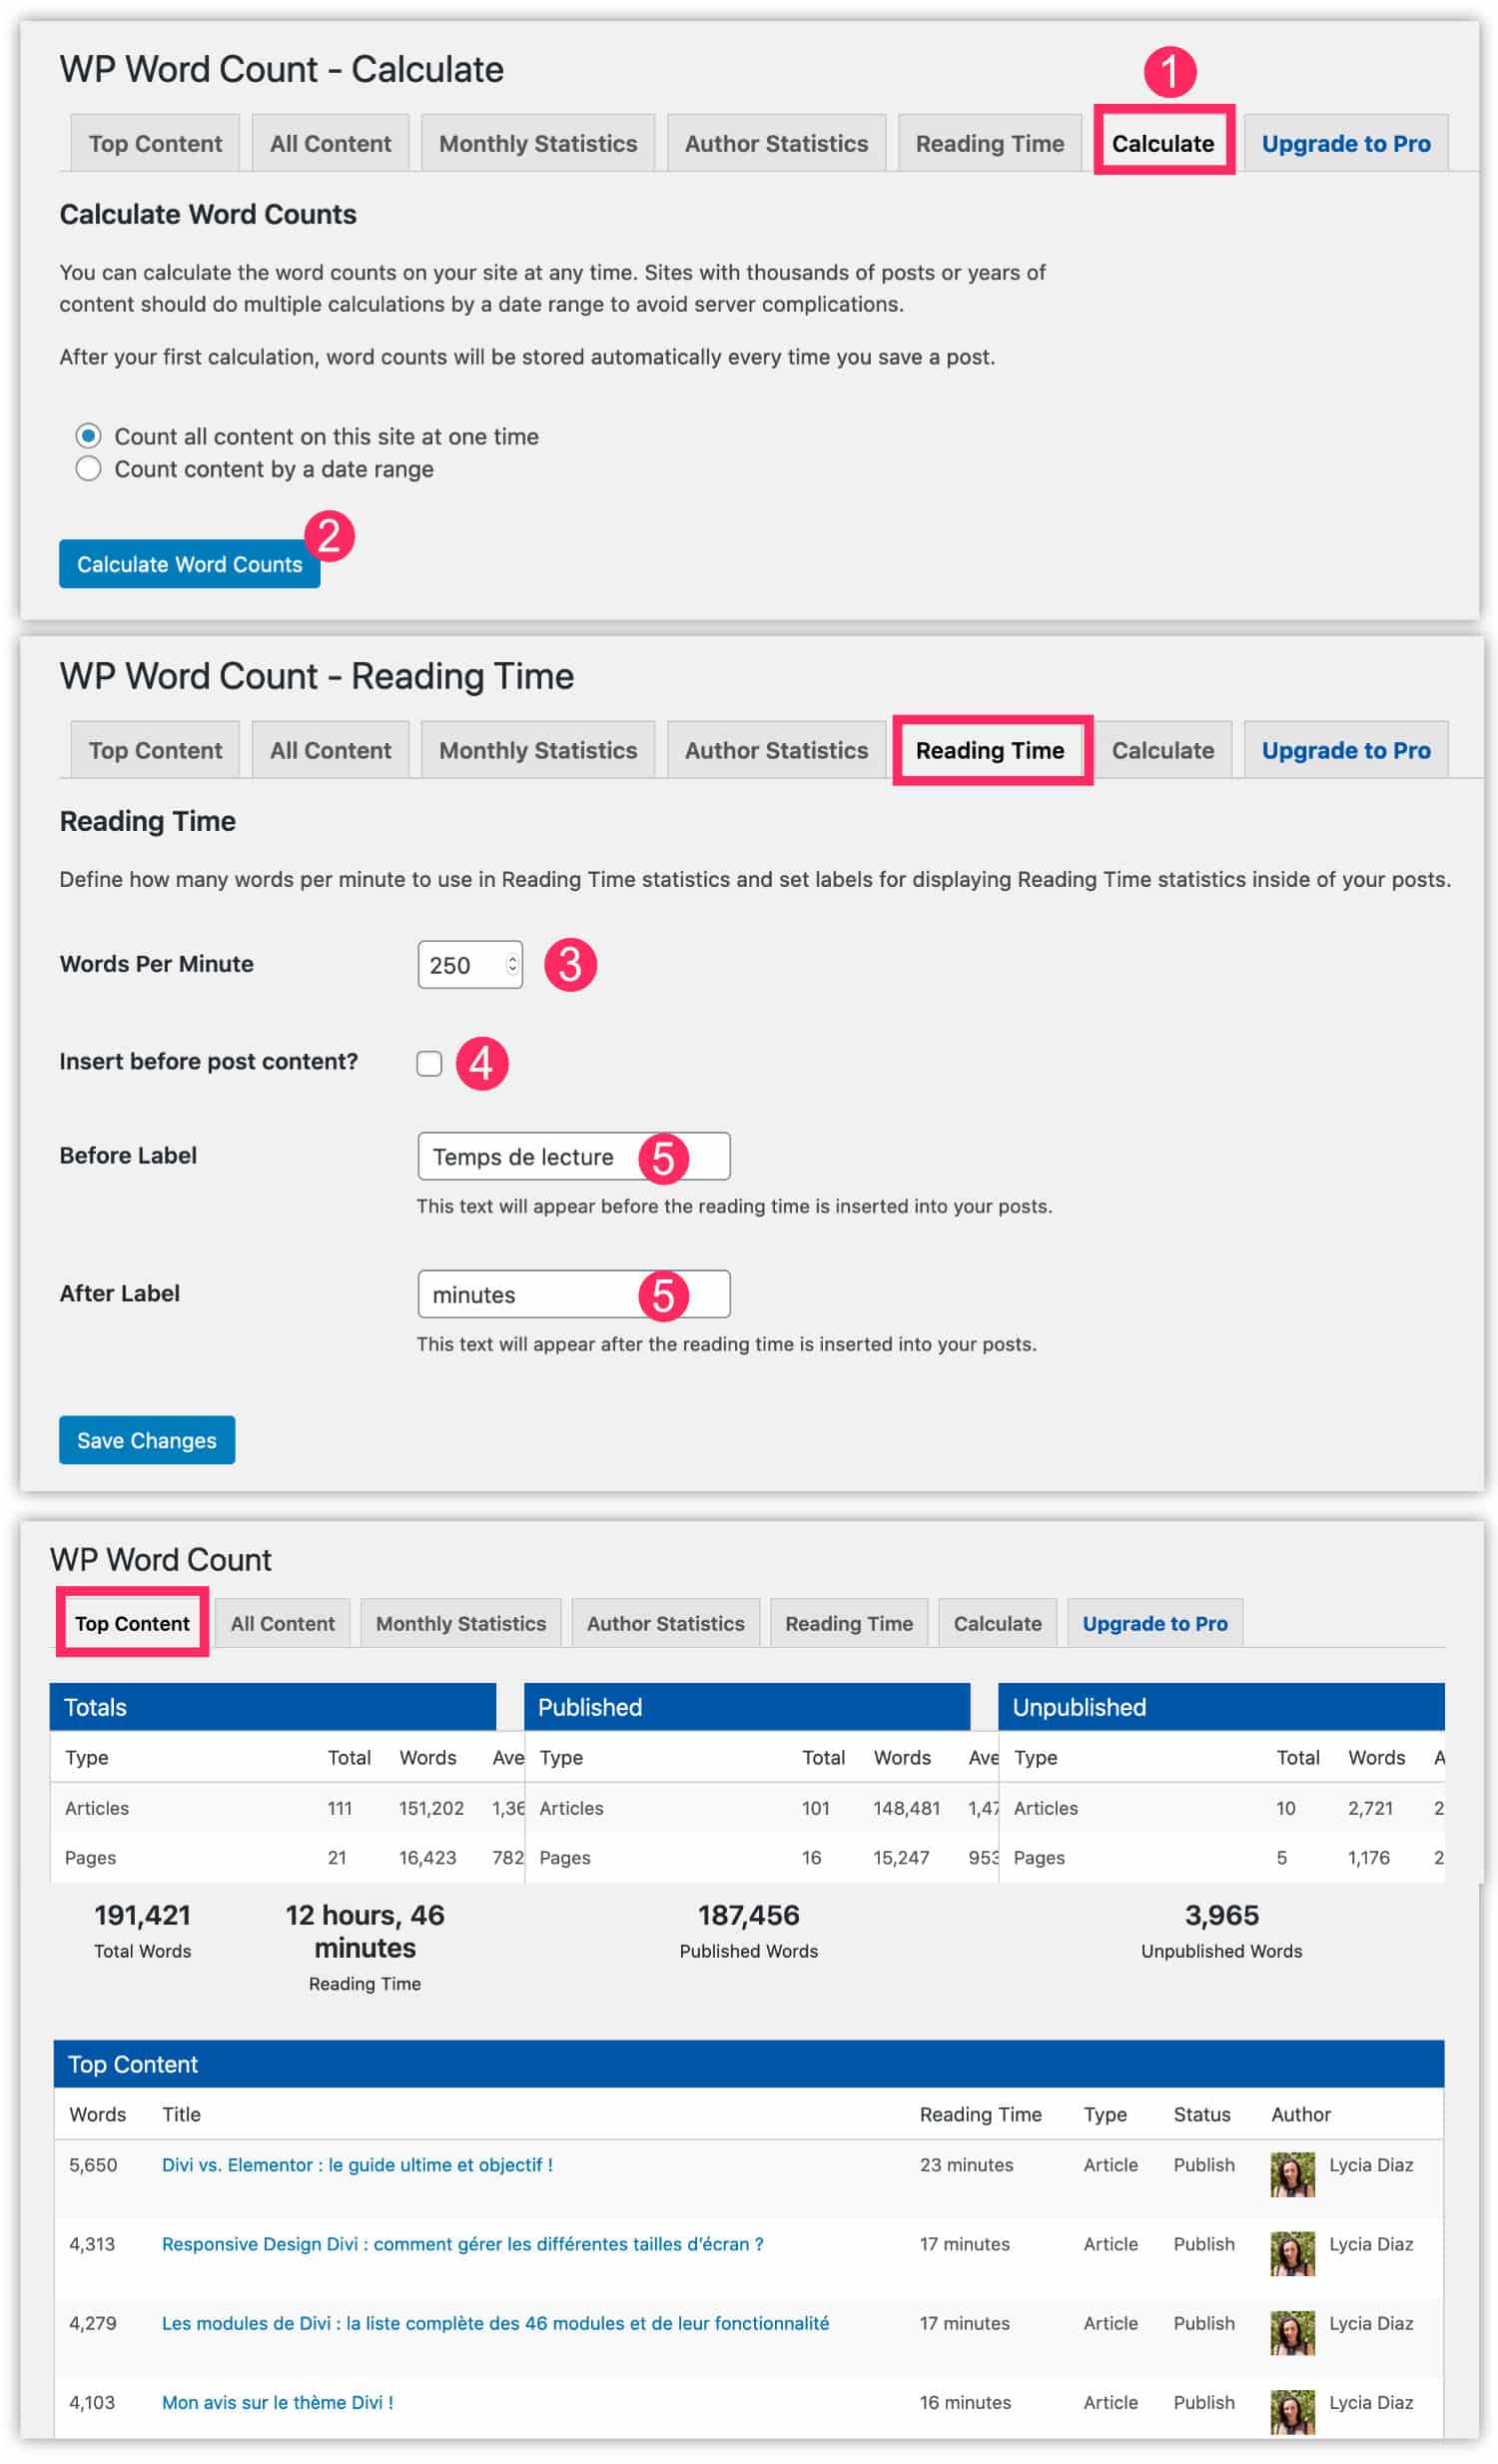
- Go to the tab Word Count > Calculator.
- Click "Calculate Word Count" And wait. The extension will recover the number of words contained in your publications.
- Then, from the tab Reading Time, you can tell how many words correspond to one minute of reading. By default, 250 words are equivalent to 1 minute playback.
- You can enable the automatic display of playback time in your publications by simply checking the box provided for this purpose (not useful for the rest of the tutorial).
- You can also insert a text that will be placed before and/or after the playback time.
Finally, in the other tabs (Top Content, All Content...), you will find statistics: how many articles, how many pages, how many words, the total length of reading, etc.
2 - Show the number of views of an article with Post Views Counter
Post Views Counter is also a free and easy to set plugin. What's not bad with this extension is that you can show the number of views public. This means you can install Post Views Counter for statistical purposes in back office.
Once the extension is installed and enabled, you will find its settings options on the tab Settings > Post Views Counter. Its parameters are separated into 2 tabs: General and View.
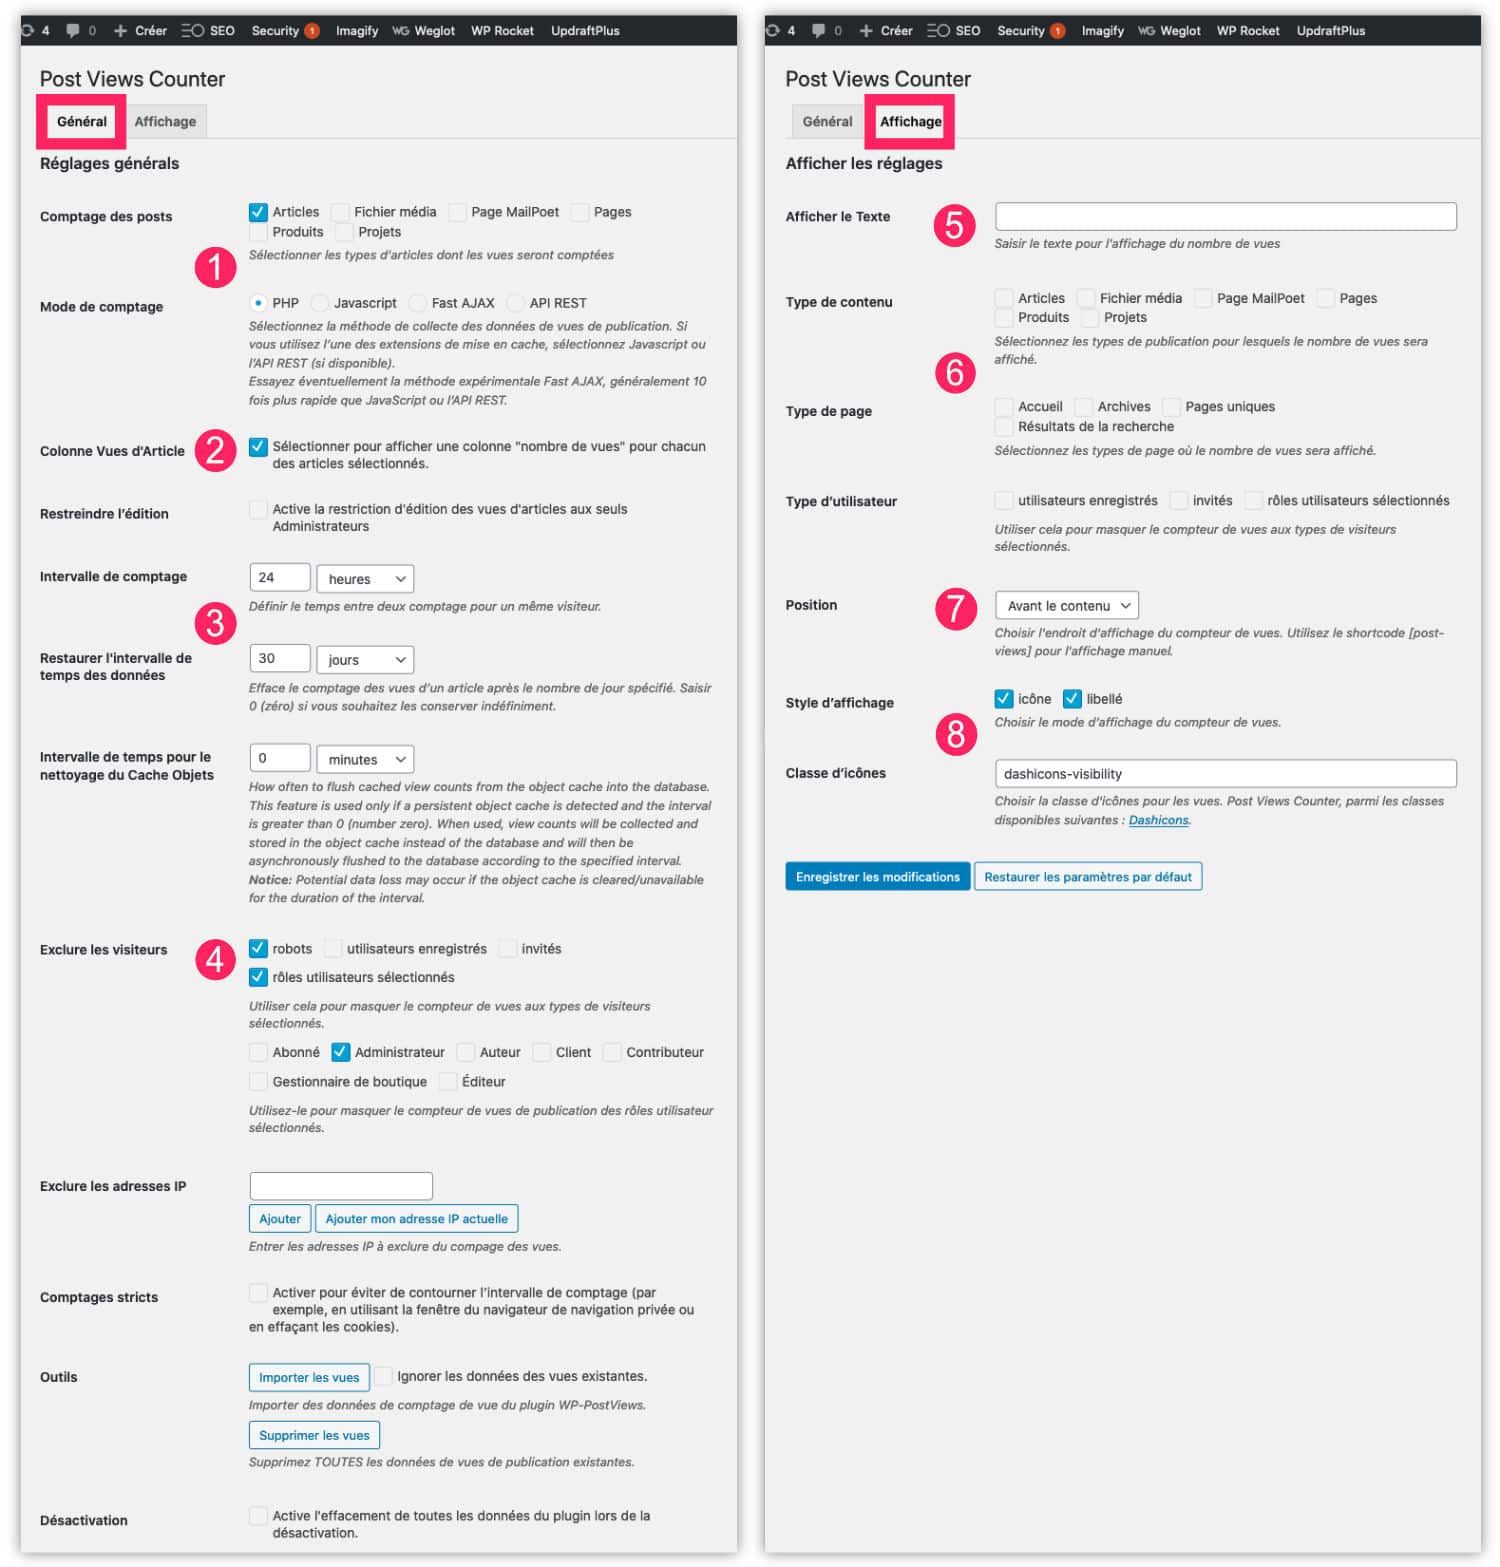
- You can enable view counting depending on the type of publication. Just check. You can also decide how to count (PHP, JS, etc.).
- You can add a new back-office column. This will appear in the list of articles (and/or pages, depending on your selected choices) to obtain the statistics of views by publication.
- You can adjust the methods and intervals of count views.
- You can exclude some visitors from counting.
- Then, from the tab View, you can set everything that has to do with the display of the number of views in front. For example, you can add text next to the number of views.
- You can automatically insert the number of views depending on the type of publication (not useful for the rest of the tutorial).
- But also the position of the automatic display, for example: before the content.
- Finally, you can choose whether or not to display an icon next to the number of views and you can change the Dashicons icon, which is the official WordPress icon font.
There, it's pretty simple as an extension but the options are enough to complement your blog posts.
3 - Add applause with WP Applaud

The last item I propose to add to your articles is a voting system with WP Applaud. But we could have chosen a system with stars like KK Star Rating, for example.
This extension is free of charge but, as you might say right away, it is not often updated...
Once installed and activated, this is how it works:
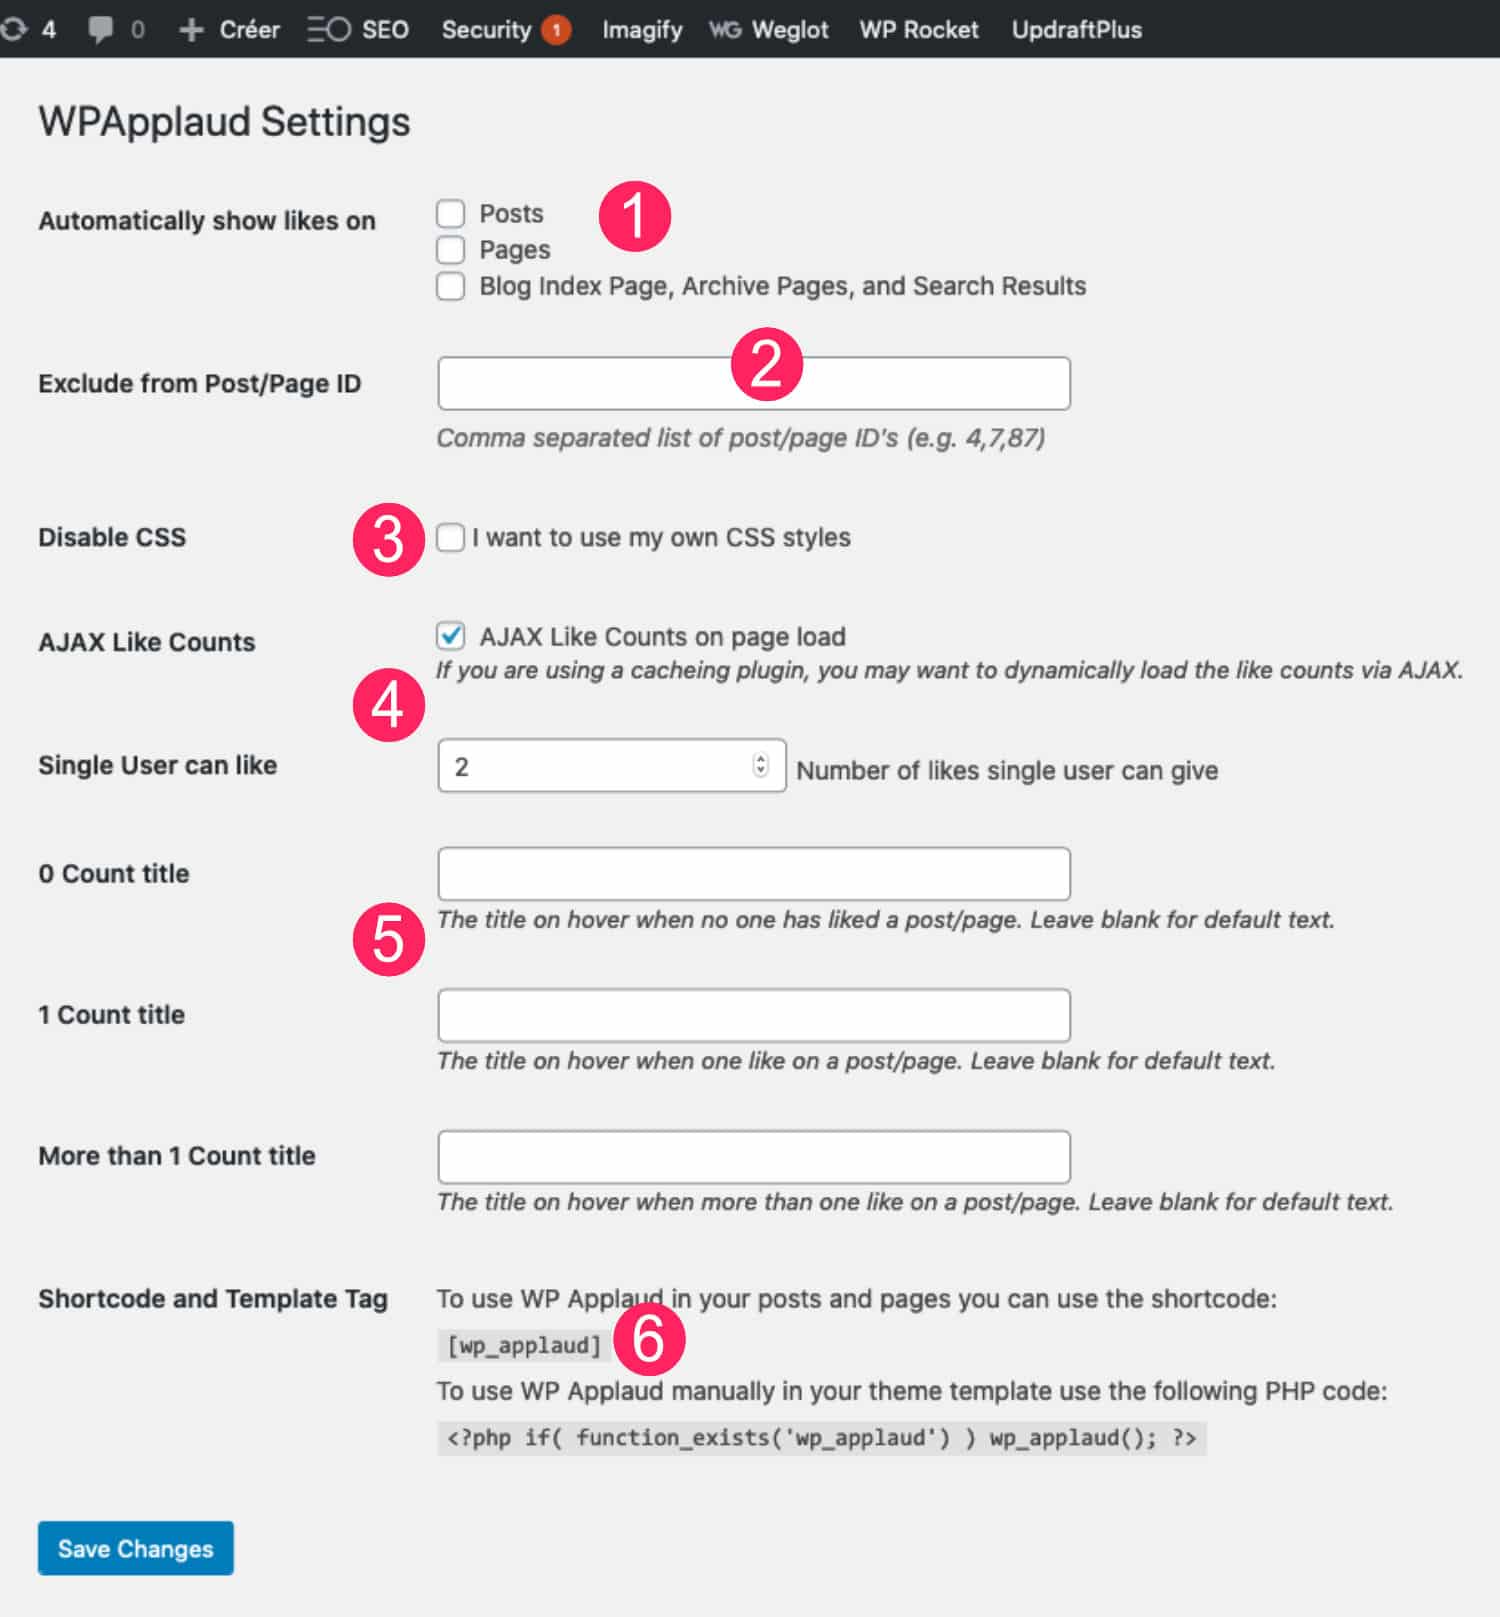
- See you in the tab WPApplaud to check the types of publications on which you want to see the "small applause" appear.
- You can exclude publications manually.
- You can disable the CSS in order to embark yours.
- You can choose the method of counting (Ajax and maximum count per user).
- You can add custom titles.
- Finally, and this is what interests us most about the continuation of the tutorial: the other display methods. You can use a shortcode to display applause at the desired location rather than automatically.
4 - Integrate elements into blog articles with the Theme Builder
Now that you have installed and set up the 3 extensions, I propose you to display this reading information in your blog articles.
For this, you will need a model article created with the Theme Builder. If this is not yet your case, you can follow this tutorial to create a Divi article template.
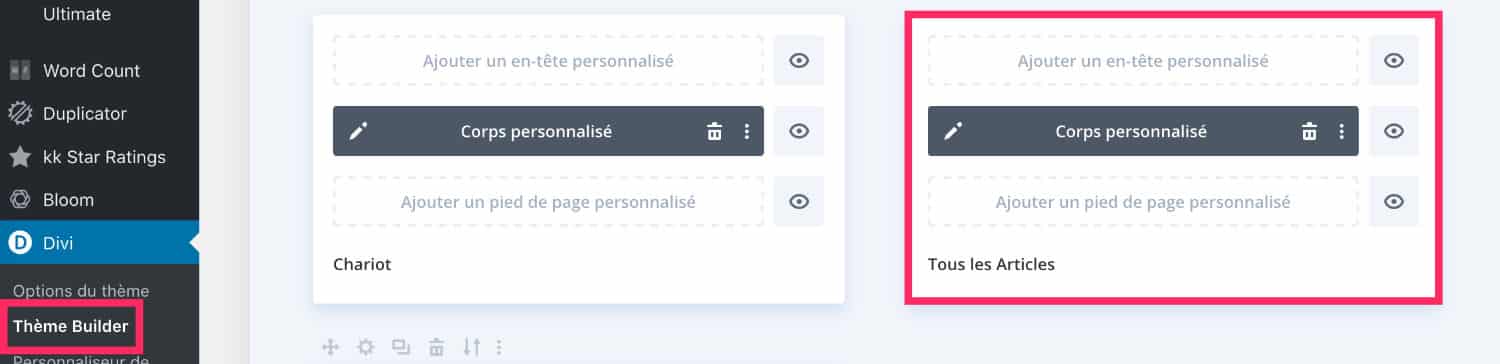
So you understand, either you create, or you modify your article template created with Theme Builder.
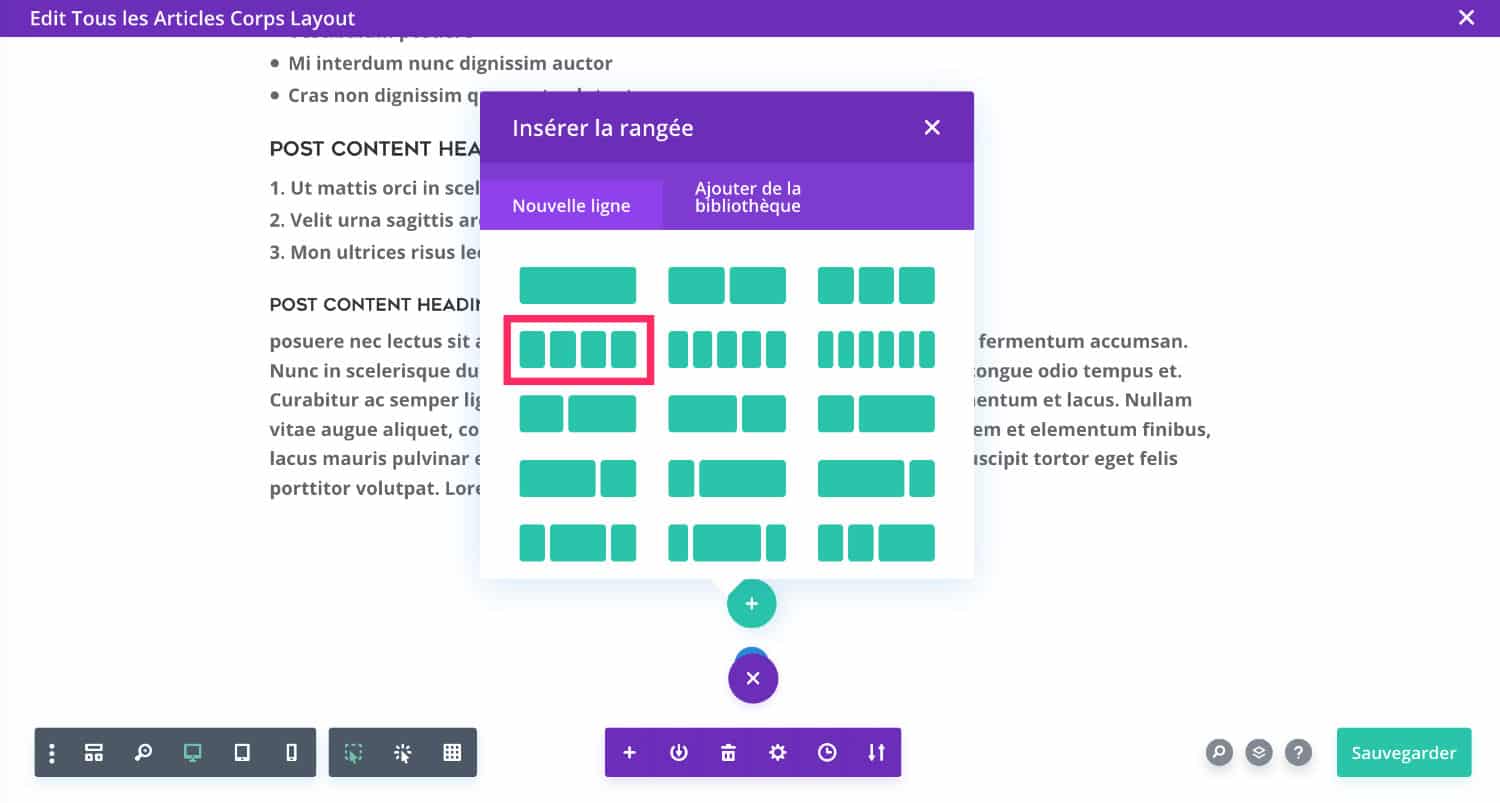
You add a new line (the "+" green) cut into 4 columns.
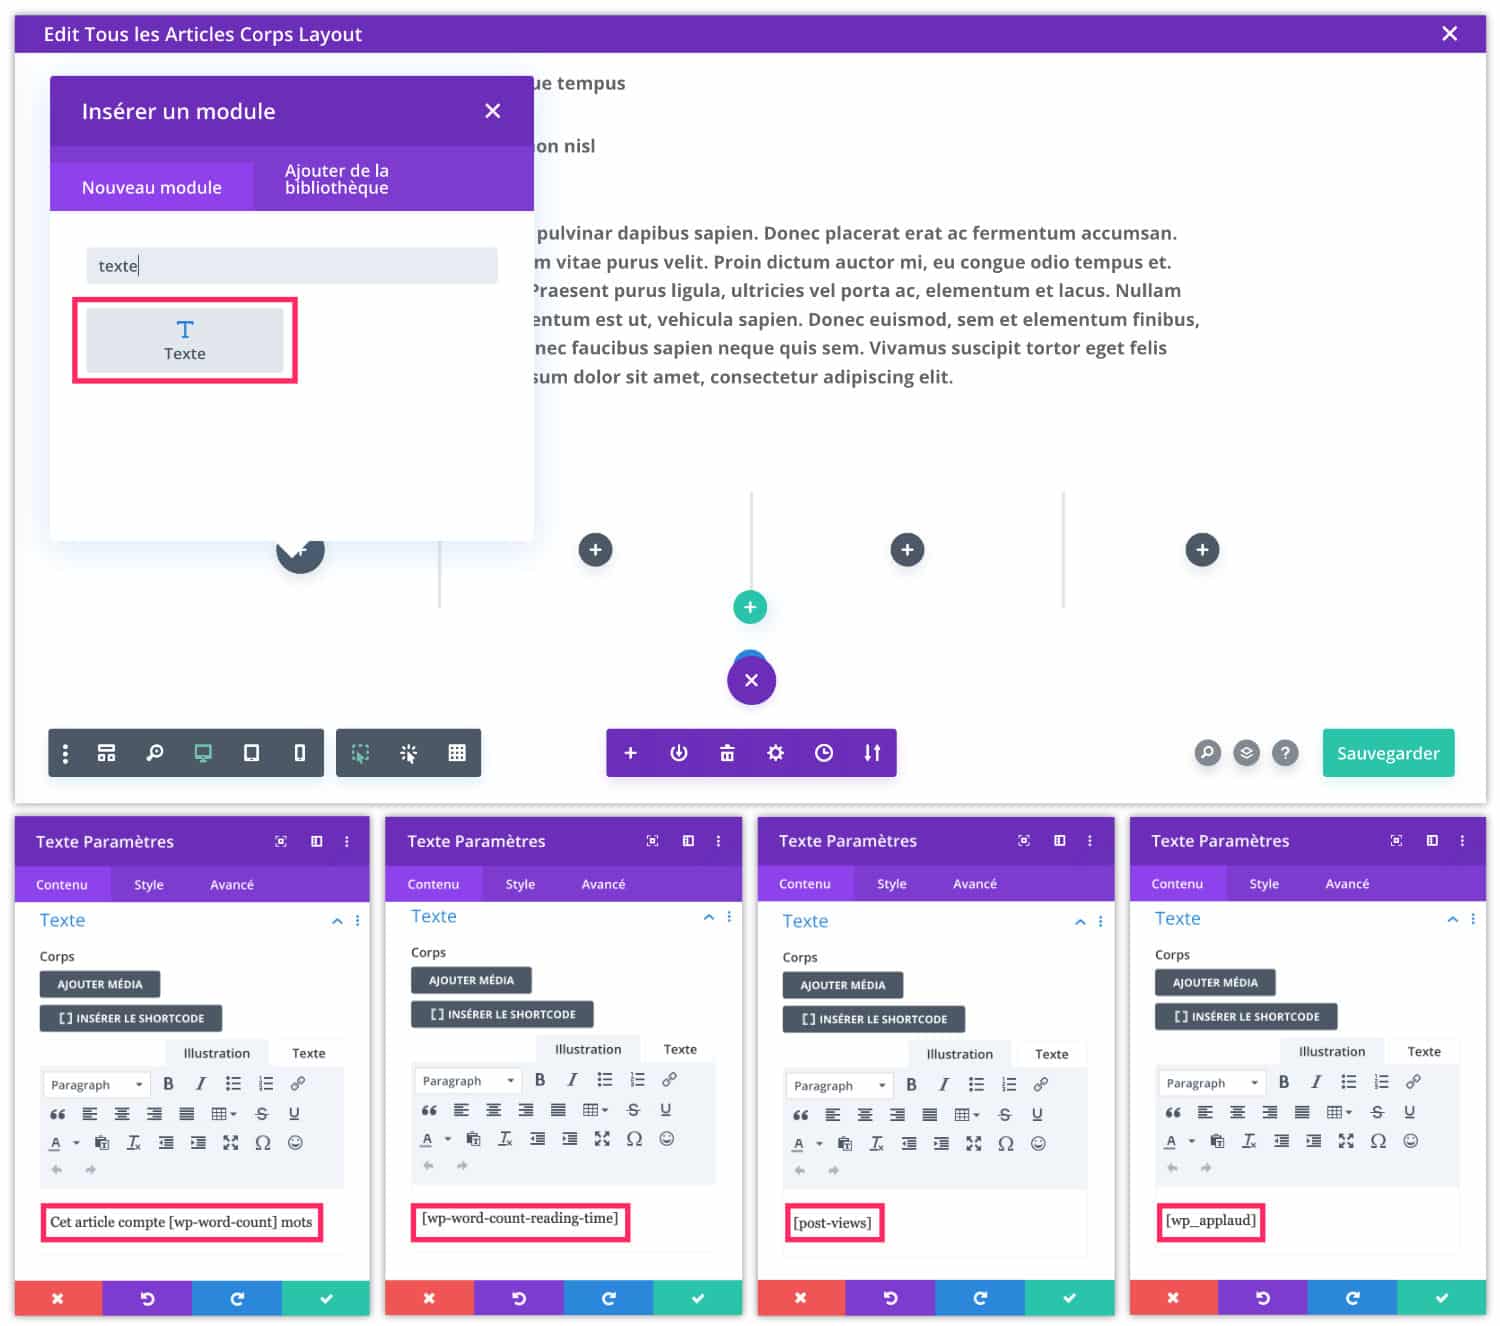
In each column of this line, you add a Text module where you will place the appropriate shortcodes:
- [ wp-word-count ]* to display the number of words.
- [ wp-word-count-reading-time ]* to display playback time.
- [ post-views ]* to display the number of views.
- [wp_applaud ]* to display the voting system.
*Note: do not copy and paste the shortcodes above because I have voluntarily added a space between the hooks to allow their display.
Here's the result:
Do you know you can test Divi for free? See you on this page and click on "TRY IT FOR FREE"
5 - Adjust the display with some CSS
Finally, it is possible that you are not entirely satisfied with the final rendering, in this case you can add a little CSS code to perfect the display.
In the following example, I added a Code module with a little CSS but you have many others solutions to add code in Divi.
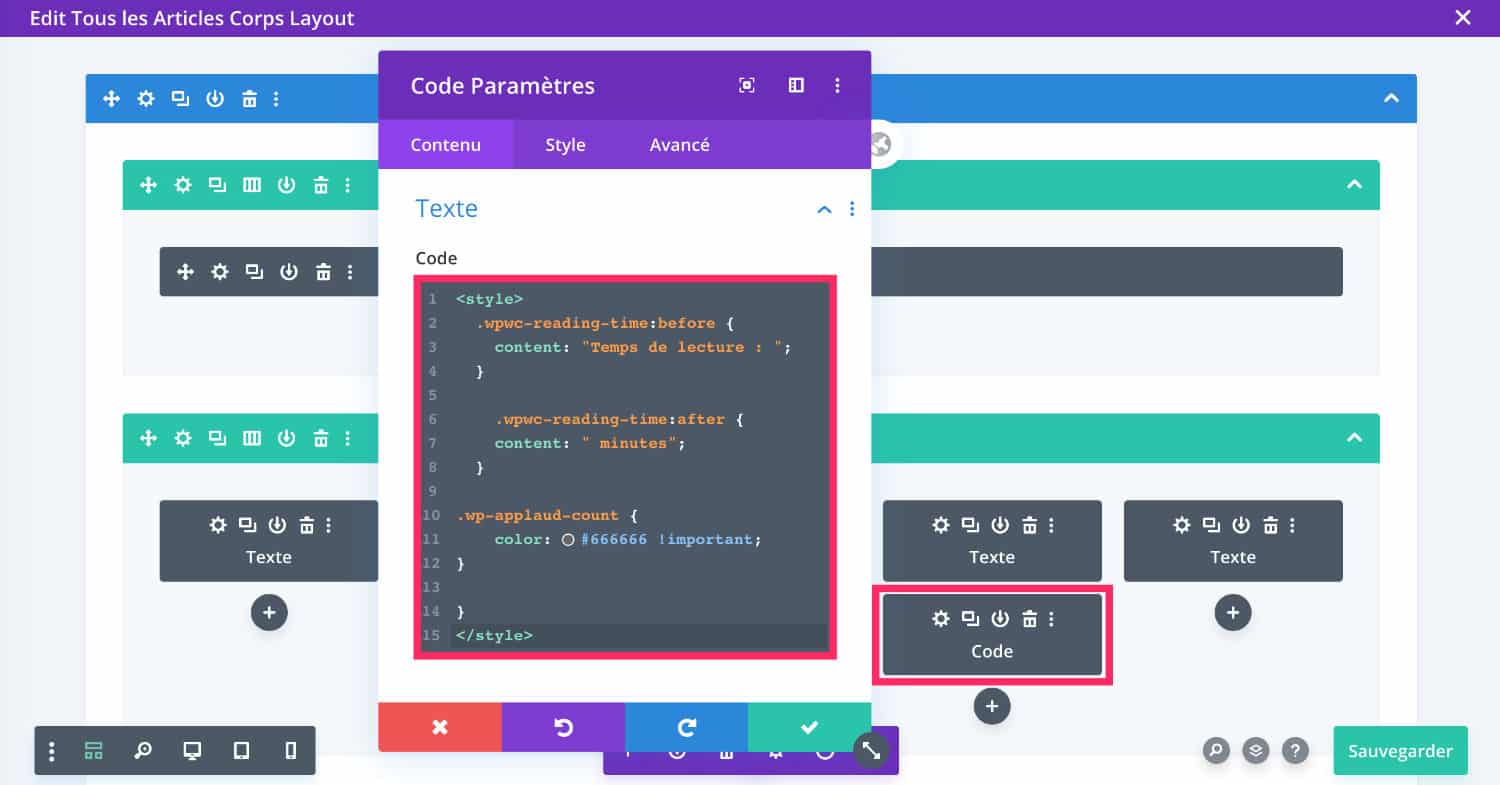
For example, you can add a "before" and one "after" to display text around the playback time. This is possible in the plugin options WP Word Count But the visual is not optimal... You can also change the color of the vote counter (WP Applaud)...
<style>
  .wpwc-reading-time:before {
    content: "Temps de lecture : ";
  }

    .wpwc-reading-time:after {
    content: " minutes";
  }

.wp-applaud-count {
    color: #666666 !important;
}
</style>
So, what do you say about these tips to enhance your blog articles with Divi?


Magnifique tout ça, merci !
Bonjour,
Merci pour cet article très intéressant.
Comment procéder pour afficher le nombre de mots et le temps de lecture juste sous le titre de l’article, à la suite des méta.
J’aurais bien voulu joindre une capture d’écran mais je ne trouve pas le lien ???
Merci.
Bien cordialement.
Bonjour Roland, pour les afficher dans les metadonnees il faut le coder comme expliqué ici https://astucesdivi.com/mis-a-jour-le-divi/
Merci Beaucoup
Bonjour,
l’extension n’est plus disponible depuis Octobre 2022 pour problème de sécurité.
Serait-il possible d’avoir un autre tuto ?
Merci 🙂
Ah mince, il faut que je trouve une autre solution alors.