You could use masks on your images to change their traditional form, it would give an originality to your layout.
For example, you could add a round mask, triangle or star For example! Anyway, anything is possible. And that's what I suggest you discover in this new tutorial: how to apply masks to your images with Divi…
You will find detailed explanations and an explanatory video.
1 – What is a mask and why use it?
A mask is a term often used in graphics and specialized software such as photoshop for example. It is a "cache" that covers an image to give it the desired shape.
In the web, you could use all types of masks to give original shapes to your images. It changes the classic format you see everywhere and it can give a very graphic look to your layout.
Did you know that? You can test Divi for free by visiting on this page and by clicking on "TRY IT FOR FREE"
2 - Make a round or oval image with rounded corners
In this case, we can't really talk about masks, but I think it can help you understand the following...
It is, in fact, the CSS property border-radius which simply allows rounding the angles of an image. If your original image is square, it will be easy to return it perfectly round by applying a 100% border-radius and the good news is that Divi allows you to do it in 2 clicks:
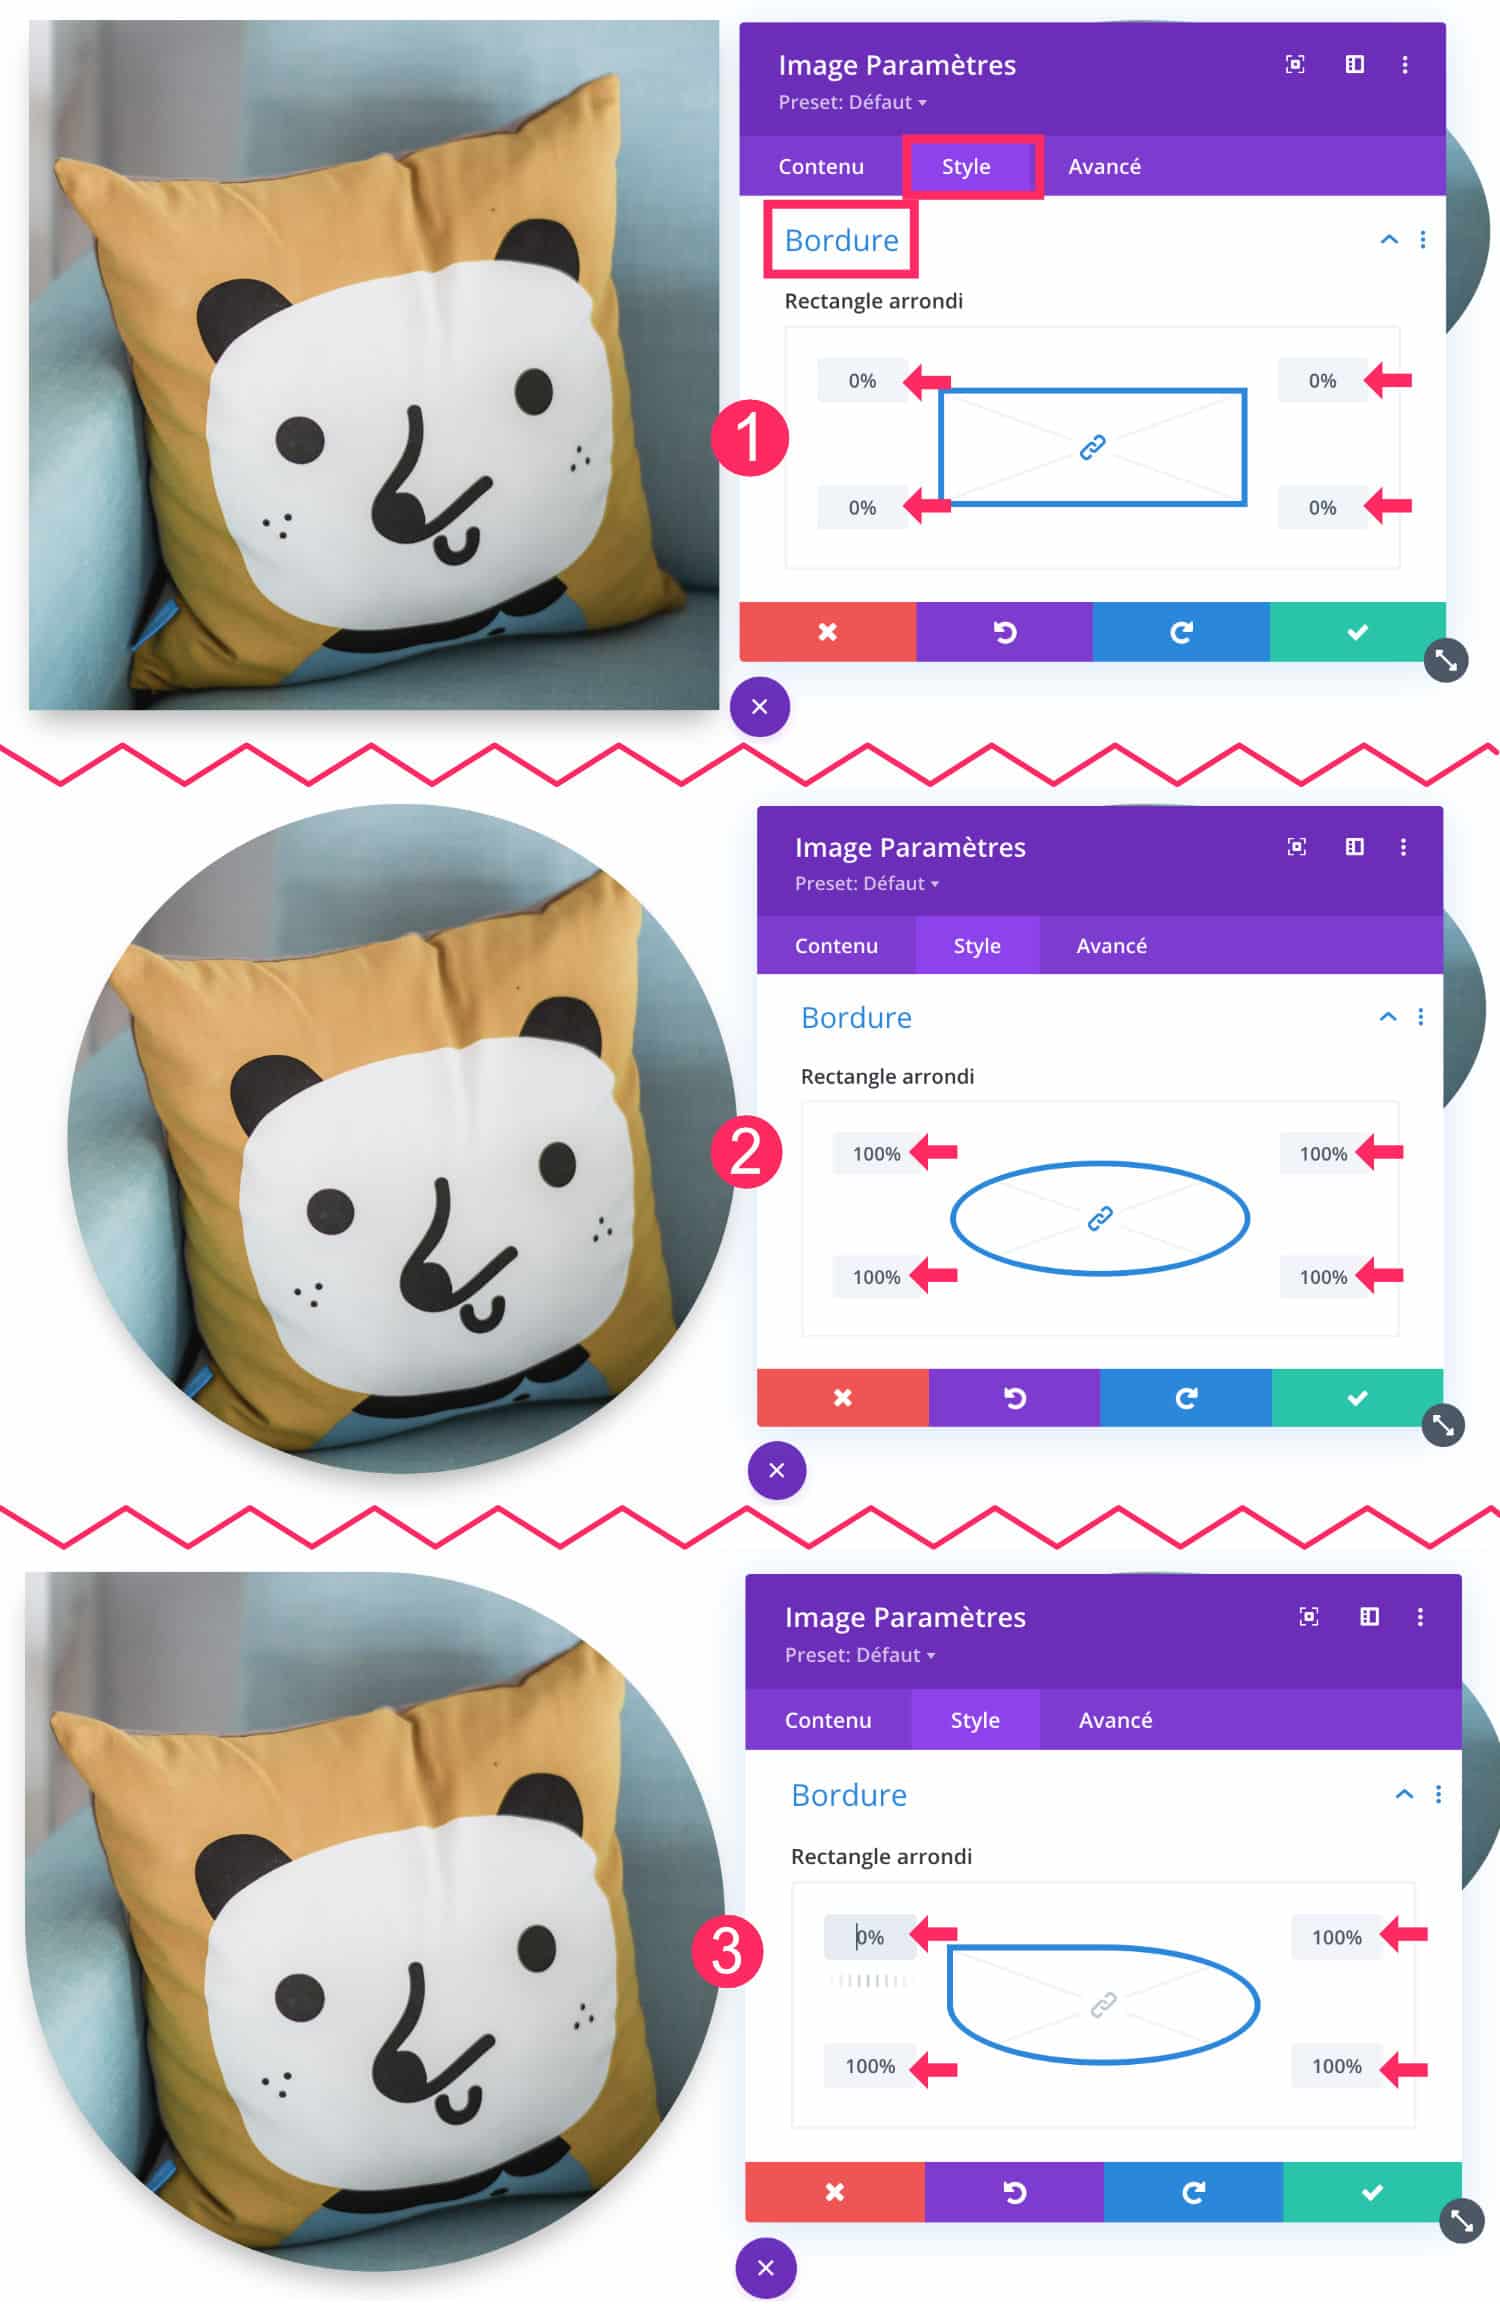
As you see on the image above, you can easily round the corners of a square image by going to the tab Style > Border and defining each angle with a value of 100% (not 100px).
In the 3 examples =
- Example 1: angles are 0% => image is square
- Example 2: The 4 angles are 100% => image becomes round
- Example 3: Only one angle is 0% and the other 3 are 100% => you get an asymmetric figure that offers a certain style
But there's one butt! This was possible because my original image was square :
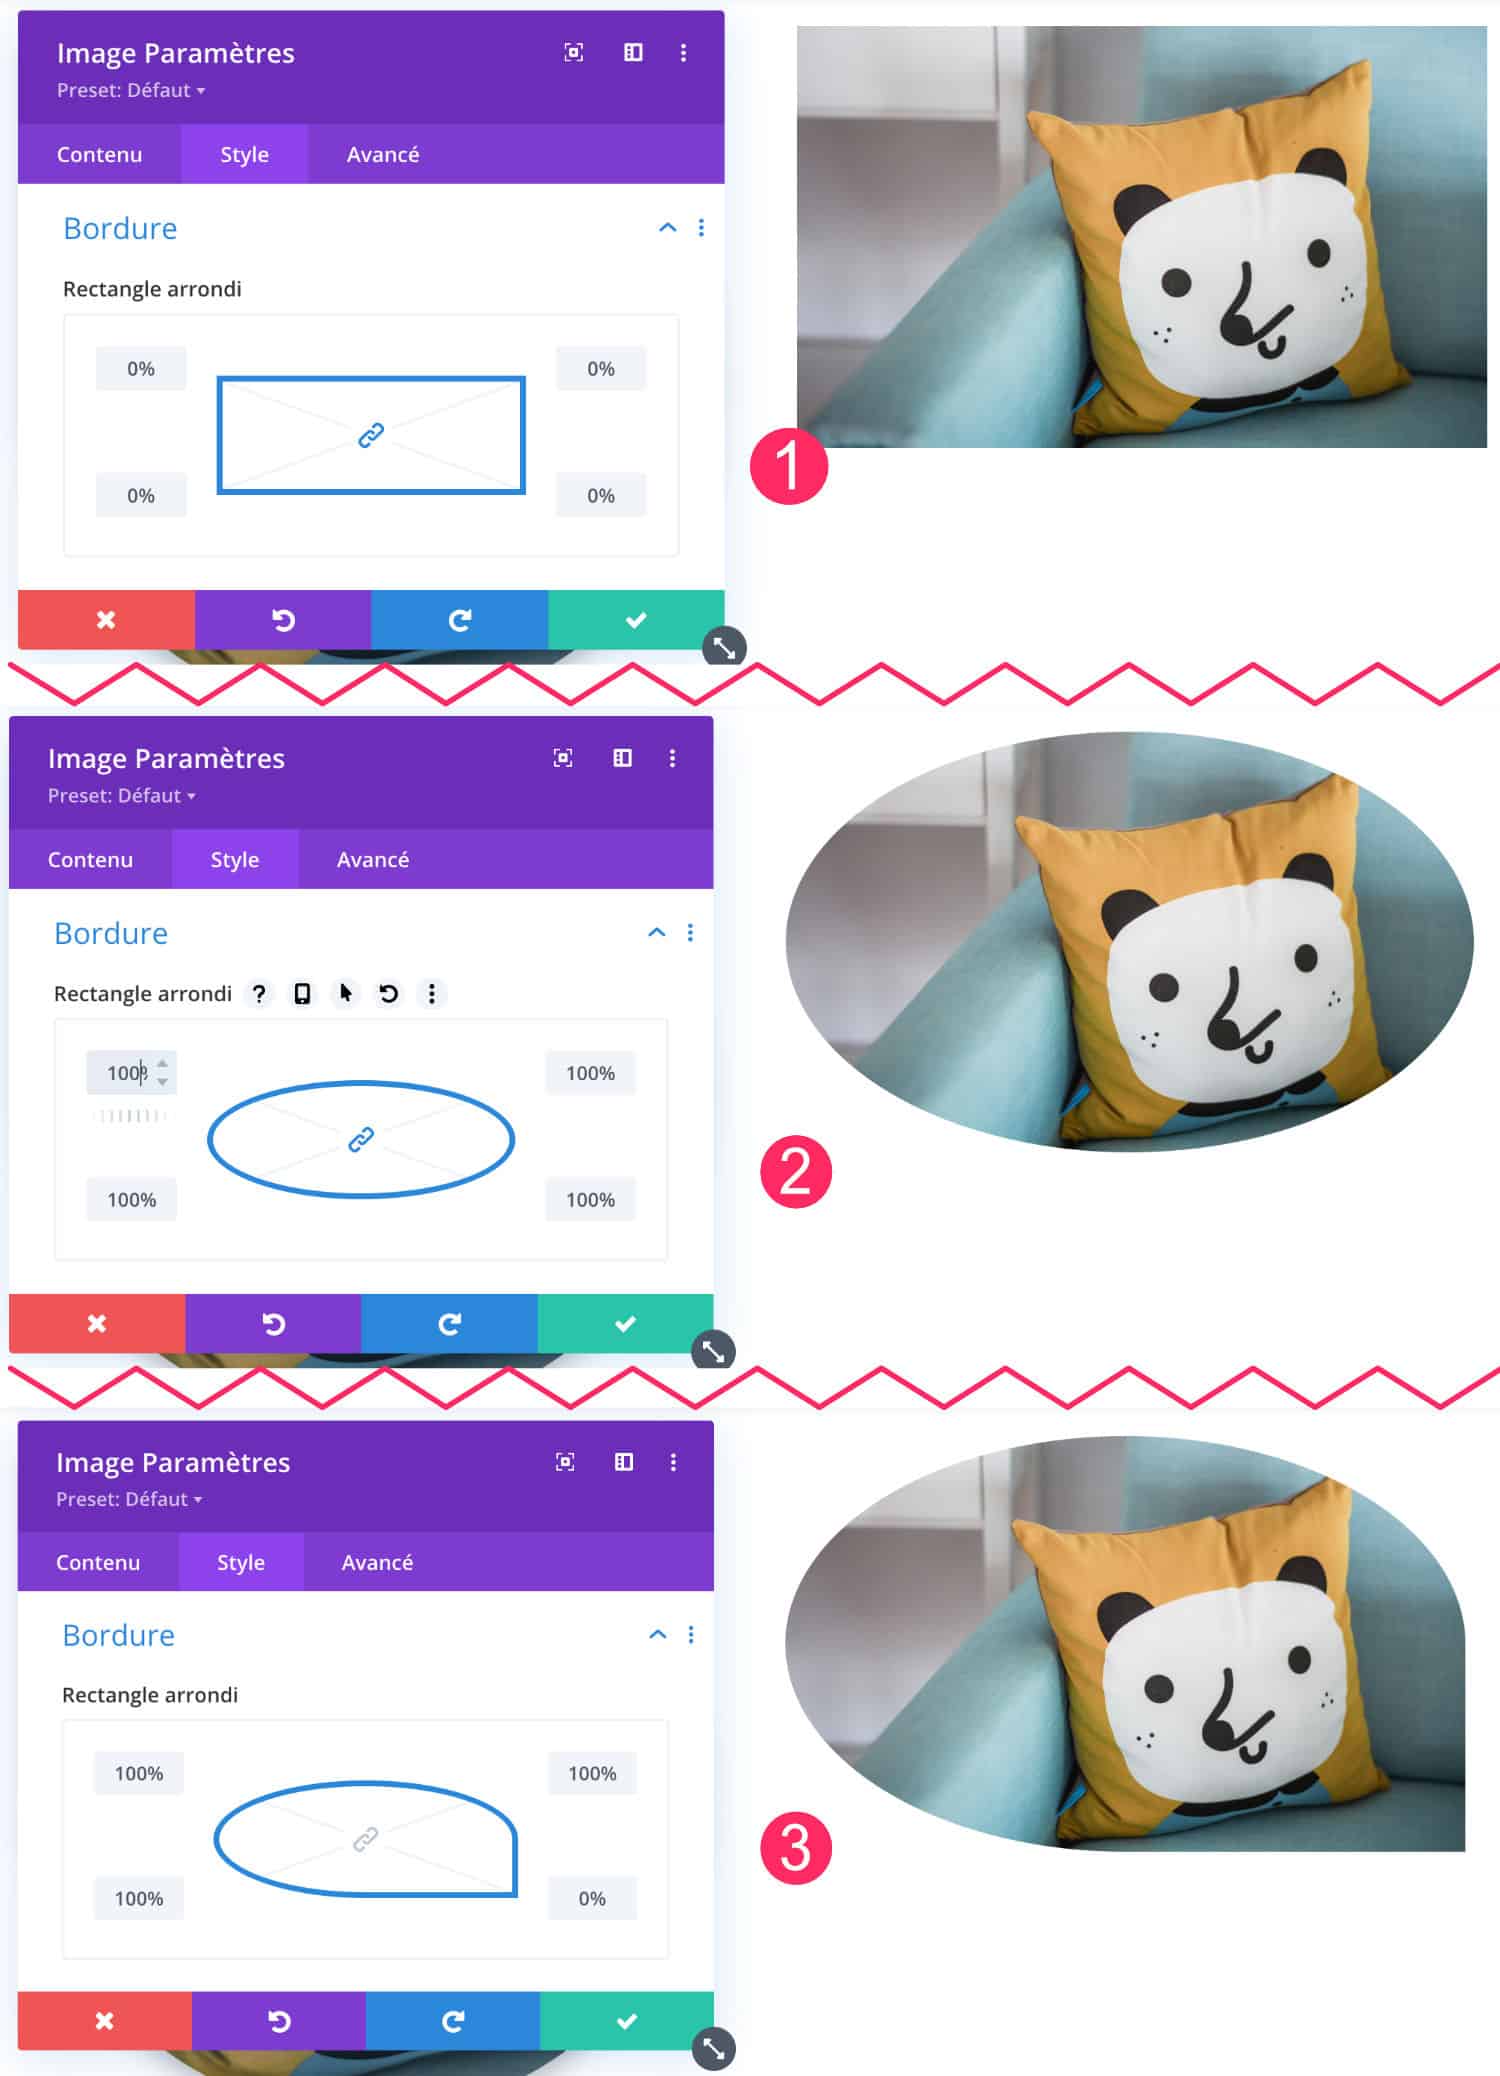
If you look at the image above, you quickly understand that by using the property border-radius on a image to landscape ratio, we cannot get a round picture. Your image will become oval and it makes absolutely sense.
However, this can meet some need for design, I imagine...
But then, how to get a round image from rectangular image ???
Don't delay! Discover the theme Divi here !
3 – Apply a round mask to an image with Divi
The answer comes... As you cannot get a round image from an image in landscape format, you can use another function of Divi: Adding a gradient to the image... A particular gradient, certainly, but a gradient anyway!
Here's how:
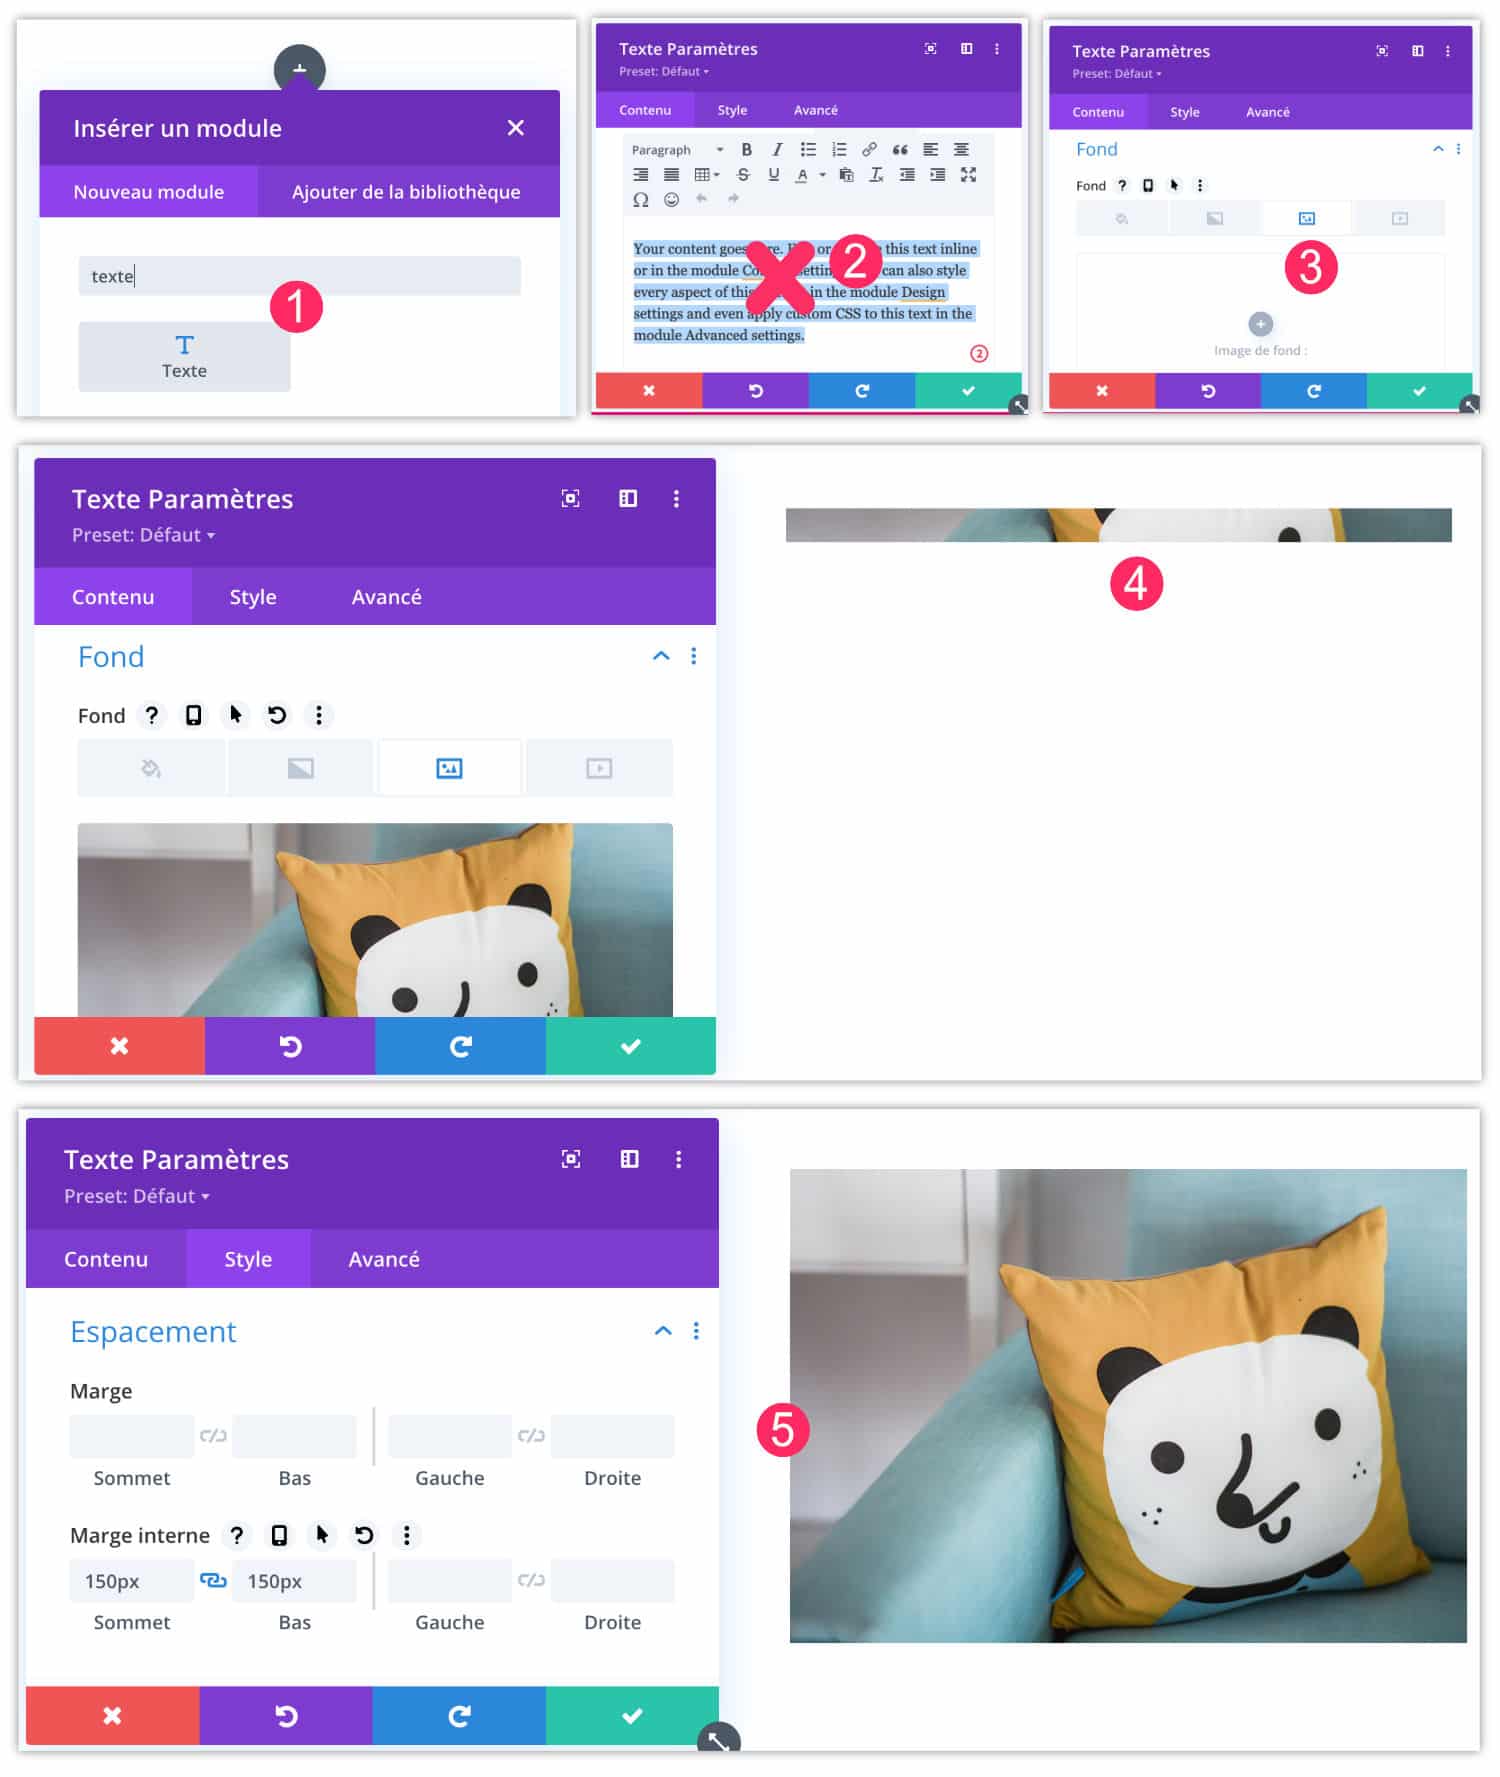
- First add a Text module
- Remove the waiting text
- On the tab Content > Background text module settings, add a background image.
- At this point, you do not see the image yet because "the box" is still too narrow.
- Go to tab Style > Spacing > Internal Margin to add about 150px at the top and bottom (values can change depending on the size of the images). Your image appears.
Next:
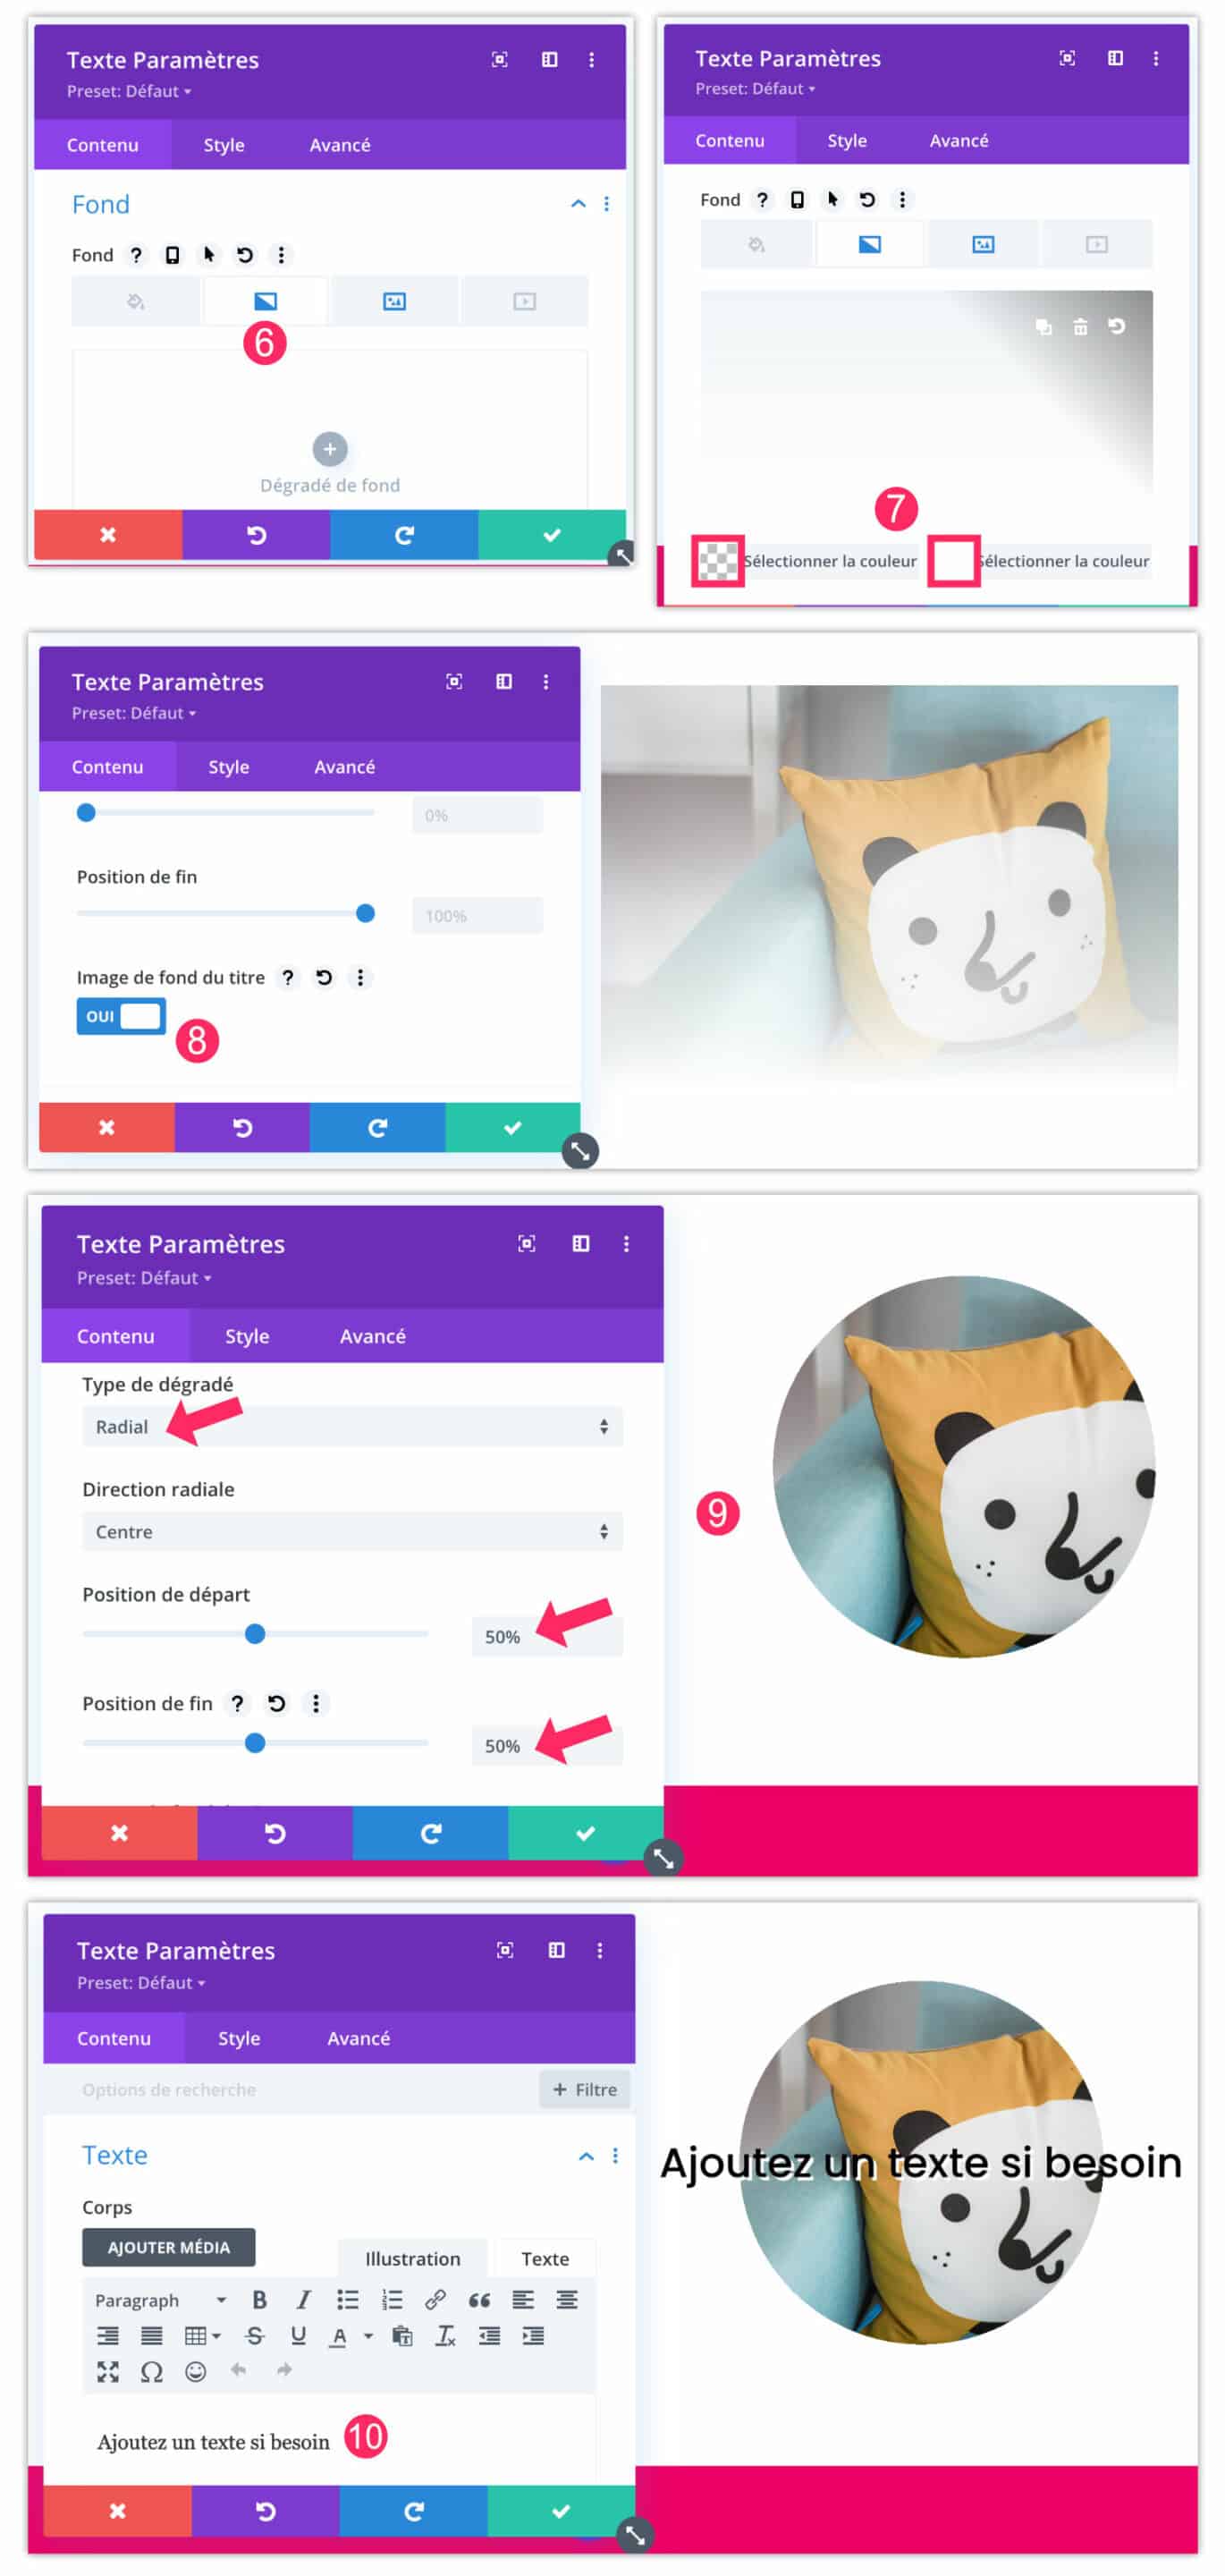
- Go back to tab Content > Background to add a gradient.
- The first value of your gradient must be transparent colour and the second value shall be the color of your section. For my example, my section is white, so I choose white. If my section was black or red, I would have chosen these colors.
- Then place this gradient on the image, checking the option « Background image of the title ».
- Edit gradient to make it RADIAL for LINEARY, then starting and ending position at 50%. There you go. a round mask covers your image, whether square or rectangular.
- If you wish, you can add text above or use other features of Divi to bring originality: make a rotation of the module, an animation or a zoom effect For example...
4 - Add bevel to image
You can also make a bevel on your image, for this, you can follow the previous tutorial (this one from Chapter 3) to point 8, then it is the type of gradient that changes:
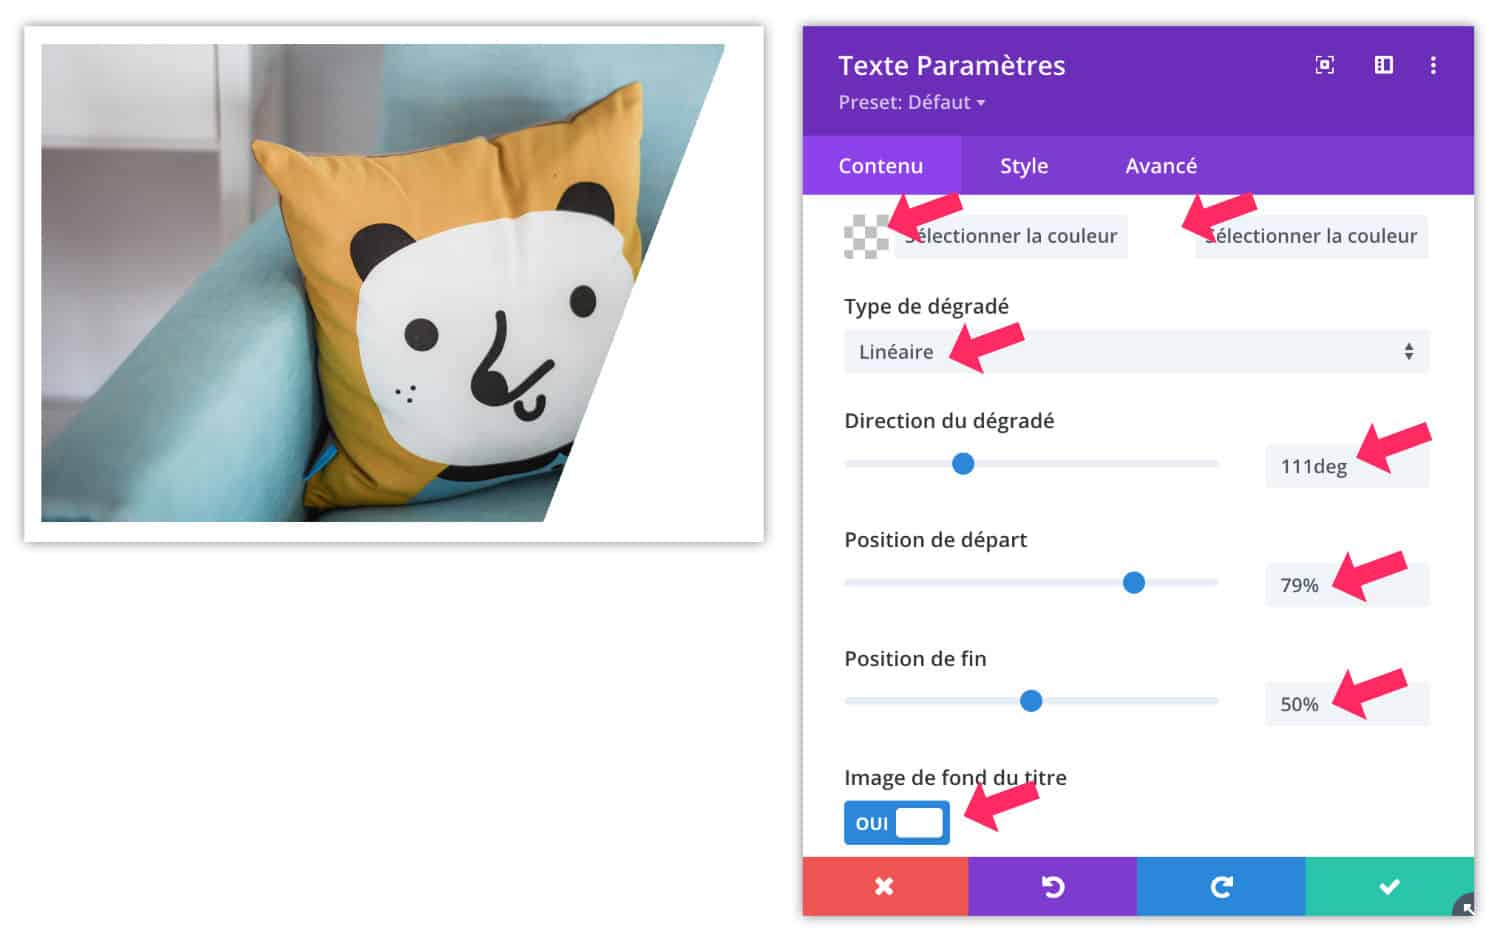
For this example, I chose:
- Linear degradation (instead of radial)
- Direction of gradient: 111° for example
- Starting position: 79% for example
- End position 50% for example.
But of course, use the values you want to get the desired rendering.
5 - Use a mask of any shape (star, heart, triangle, etc.)
For this latest tip, you will need third party software such as Affinity Designer, Illustrator or Photoshop For example, because Divi alone won't be enough...
So, at first, you will have to realize your Custom masks in your software:
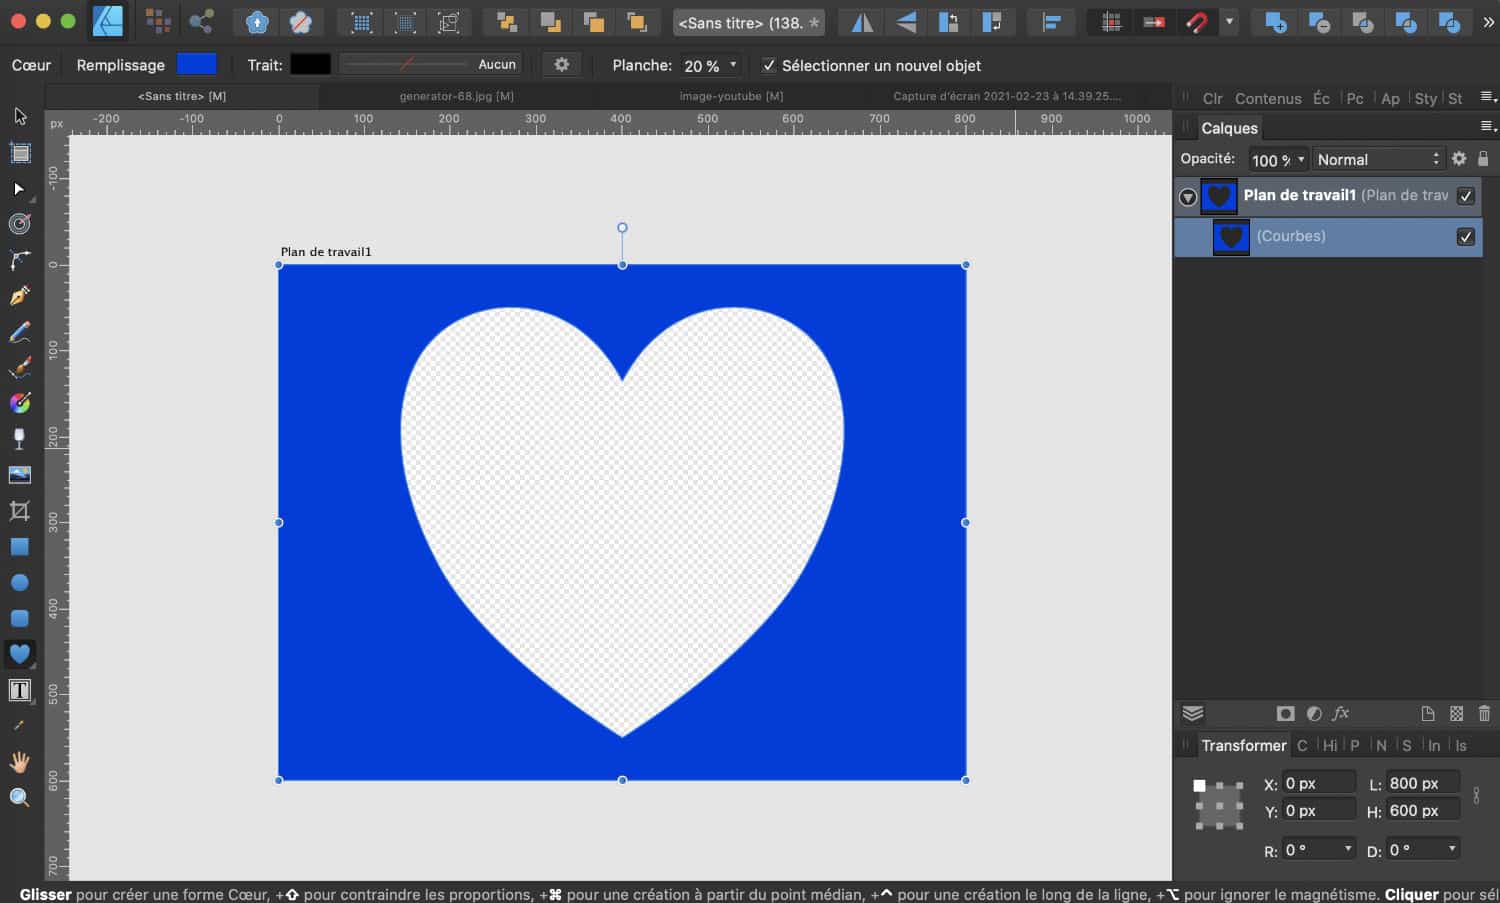
With the Forms, you will realize the mask of your choice and you will choose the suitable colour. Make sure to export to PNG format to maintain transparency.
Back in Divi:
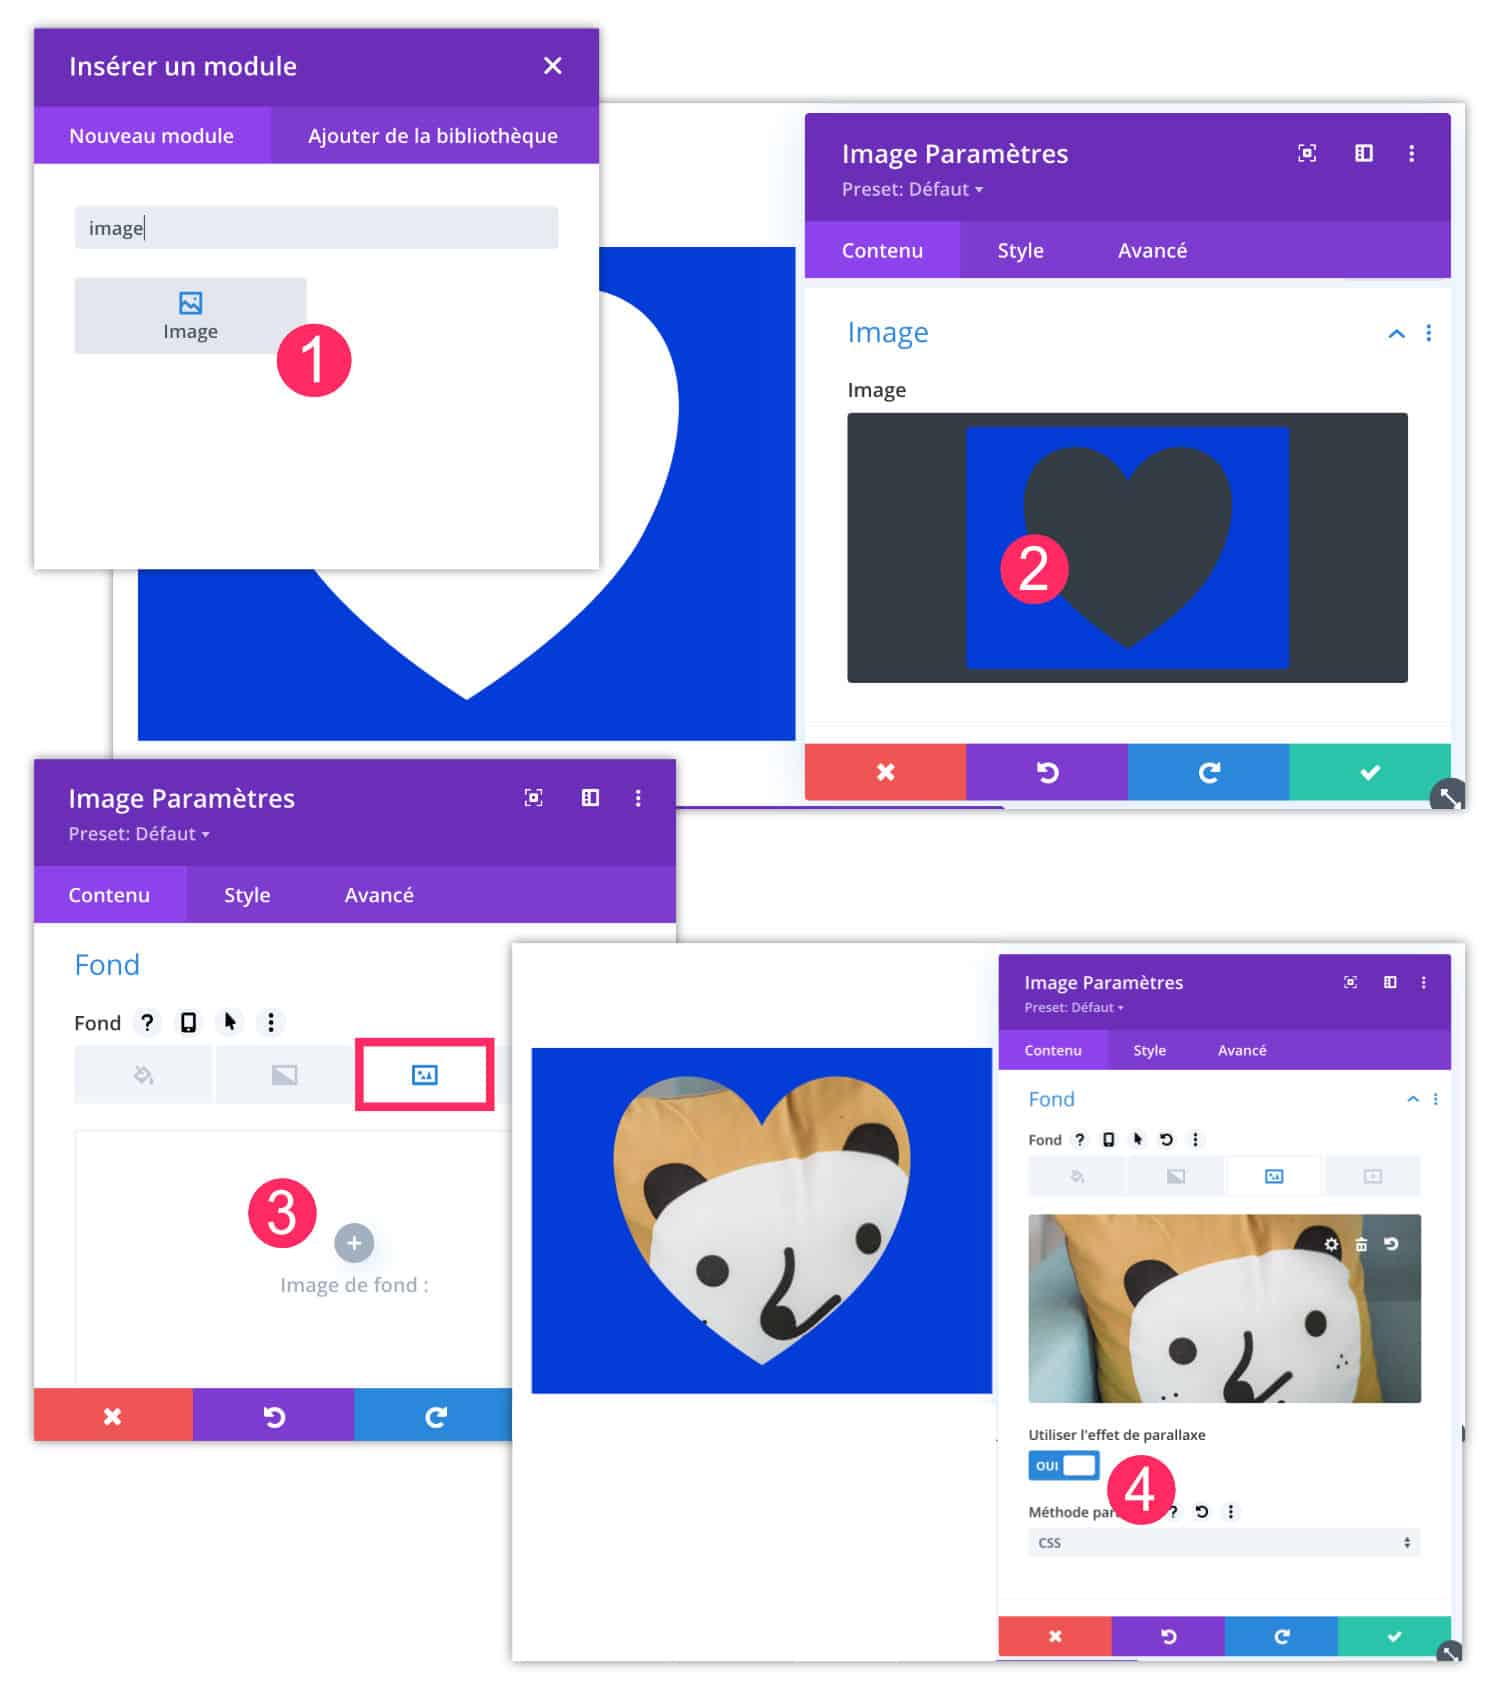
- Add a Image module
- Import your PNG format mask
- In the tab Content > Background, add the background image of your choice
- You can activate the parallax to give a sliding effect scrolling the page if you wish.
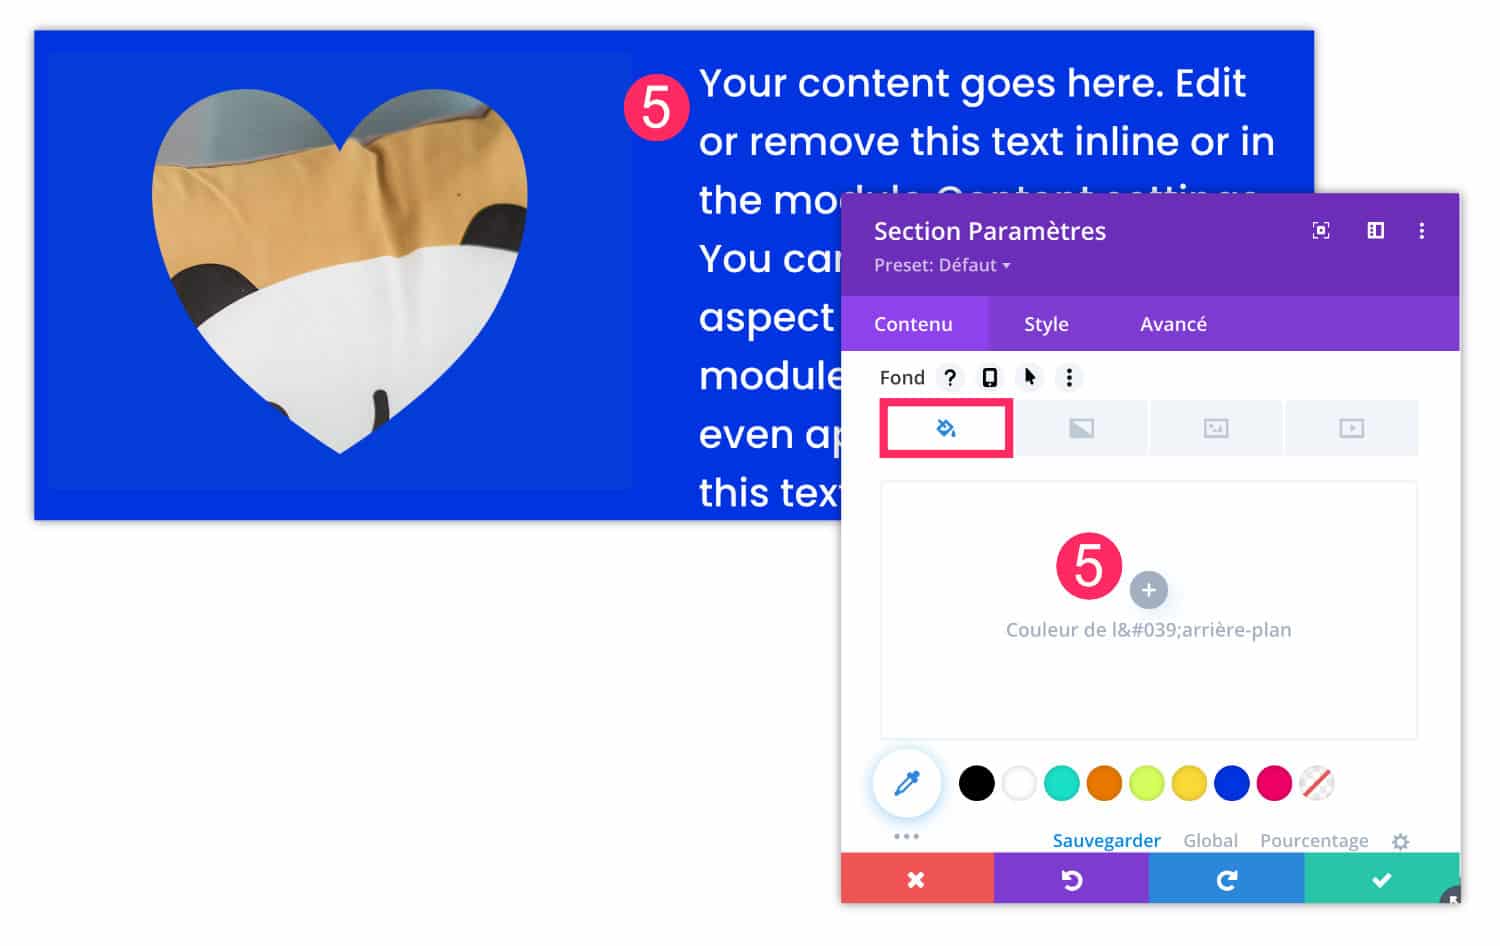
Finally, remember to define a background color for your section (5), it must be of the same color as your mask If you want the effect to be successful:
6 - Create masks with Divi Mask
If the previous solutions do not meet your needs, the alternative is to use a extension that allows to create your masks directly from the Visual Builder.
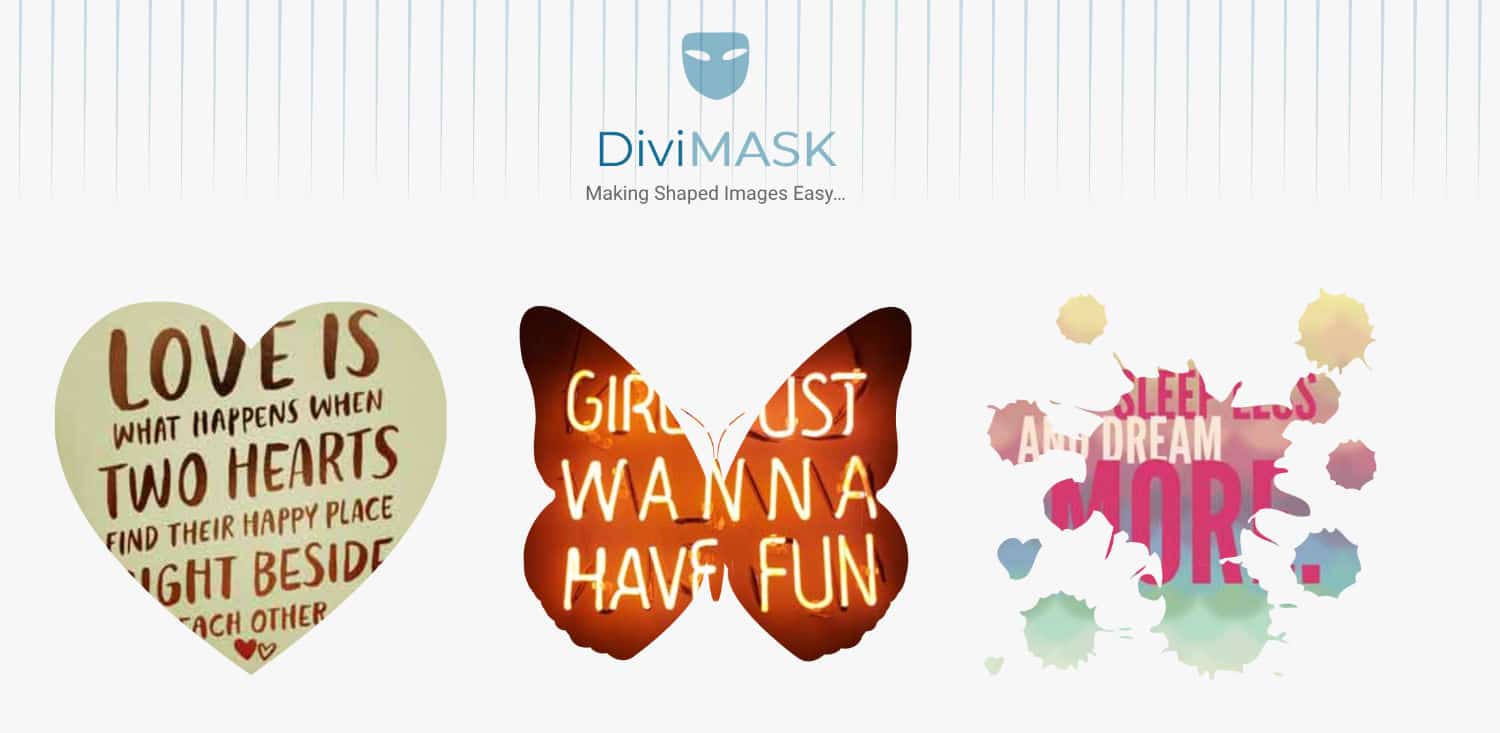
Divi Mask allows you to do this with preconfigurable and editable shapes or with custom shapes (import SVG images). It adds a new module to the Divi Builder with unique styles for images and backgrounds.
This is a premium extension (24$) that you will find on the Elegantthemes marketplace. I also invite you to discover the tutorial on this topic.
7 - Masks on images: the tutorial in video!
You just saw it, the masks on your images are very easy to make! In the video, you will find the realization of these effects and some additional tips:
Need more resources on Divi? Visit ElegantThemes blog full of ideas and tutos! Or learn how to effectively use this theme through my training Divi !


Merci! ça donne des idées! ah si je pouvais avoir vos compétences!!! hihihi
Ça a à venir Ivan !