
Divi tips came into being in 2017, and since then I have never managed to make a complete overhaul. I made changes to the right to the left, but I had never really updated his design. It was high time! Indeed, I believe that a website or blog should remake a beauty every two or three years... Like, they're the worst shoemakers ever. 🤣. In this article, I explain how I made the redesign of my Divi Tips blog.
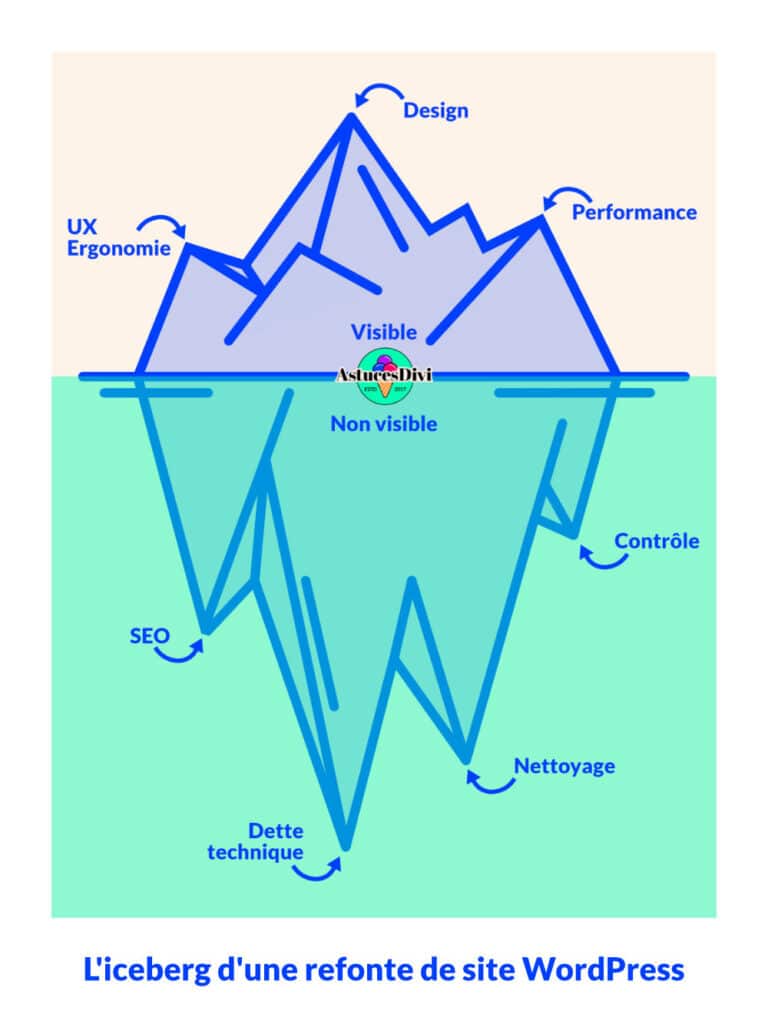
The iceberg of a site redesign
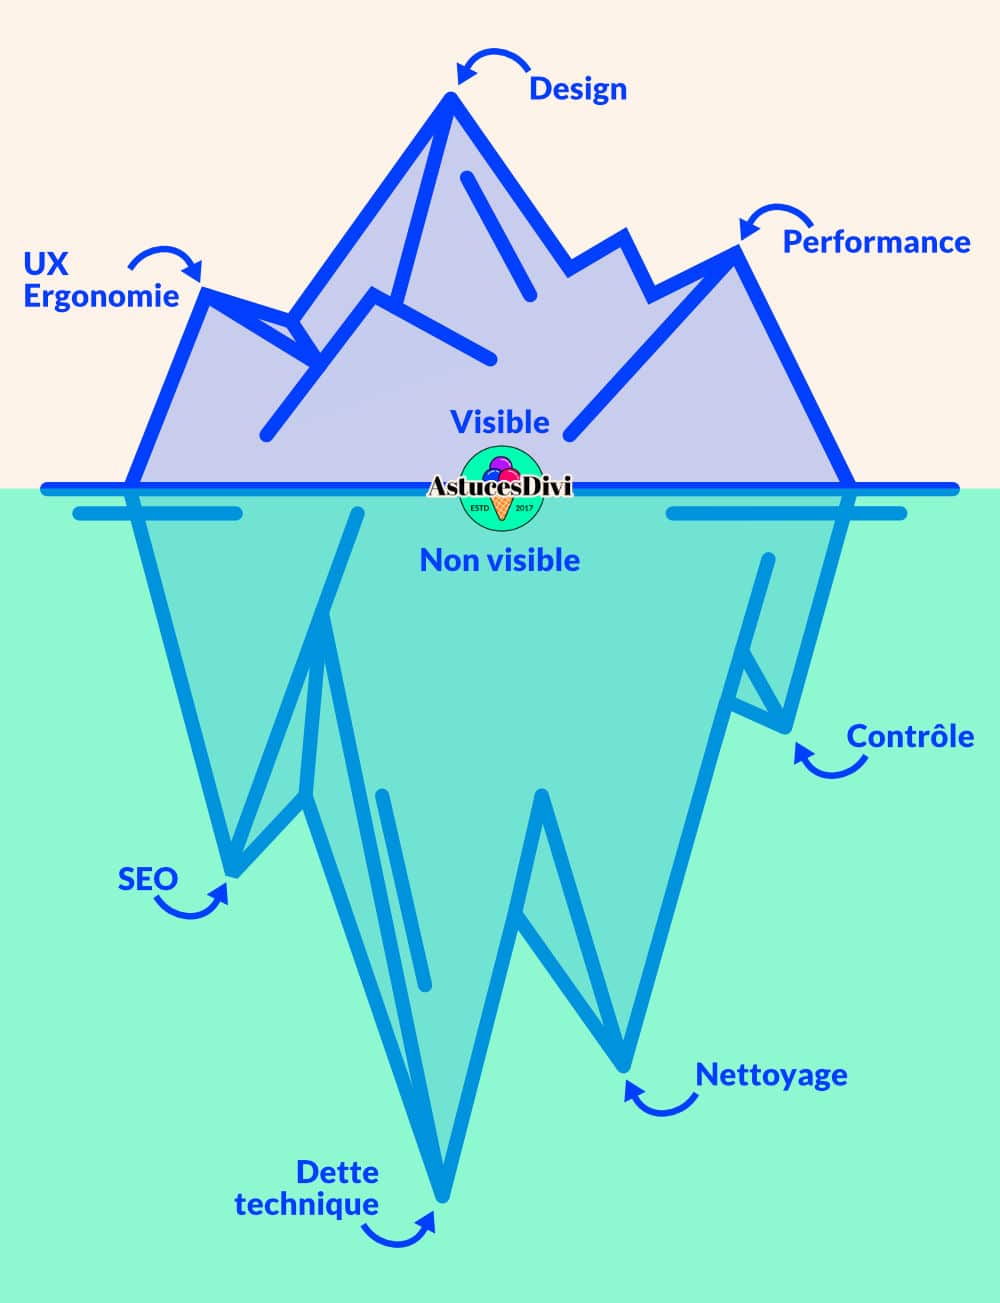
Before I go further, I would like to highlight the fact that a complete overhaul is not solely based on design change.
Indeed, any website, and even more so if it has existed for several years, accumulates errors and technical problems, creating what is called the "technical debt". This accumulation can make maintenance and updates increasingly difficult.
A few days ago, I had a pressing desire to see all this again. At first, I thought a couple of hours would be enough... what an idea! The invisible part of the iceberg was much more consistent than I imagined...
I'll explain everything in the rest of the article.
The steps that follow vary depending on the state of the site and the amount of work to be done during your redesign project. That's why you won't be able to follow them "step by step", but rather "case by case"...
Phase 1 - Local migration
Initially, I just wanted to refresh the design of Divi Tips. I thought it was enough to change two or three things and it wouldn't be more complicated. But when I started, directly on the production site, I quickly realized that 2 hours wouldn't be enough 😫 Hey! I finally made the decision to duplicate my site locally to work quietly and achieve a satisfactory result.
For this, I used UpdraftPlus - which is at the base a backup plugin - but which also allows to migrate sites with PRO version. I copied it to a local site on Local WP.
Once the site was migrated, I saw back-office error lines not visible on the production site. So I realized that a few extensions had been badly aged, so we'll talk about it after...
Phase 2 - Complete design redesign
👉 Abolition of the Child Theme
It was my haunting: child theme.
It should be noted that before October 2019 and the appearance of the Theme BuilderWe had to "recode" the patterns of a theme in a child theme. It was also the perfect place to add new features like adding a new icon at the footer For example.
Divi tips, dating back to 2017, accumulated a lot of code in her child's theme and I knew that sooner or later, you would have to put your hands in the cambodia.
So I made a radical decision, I totally deleted the child theme. After all, it also serves local sites: to allow yourself to experiment, to try, to let go!
And there: boom 💣 Hey! It was obvious that this would have an impact on the design of Divi...
But it doesn't matter, my goal was to start almost from scratch, and that goal was achieved!
👉 Changing fonts
I wanted to change the fonts used on Divi Tips. I've replaced Geometos by Abril Fatface for securities, and Poppins by Lato for the body of text.
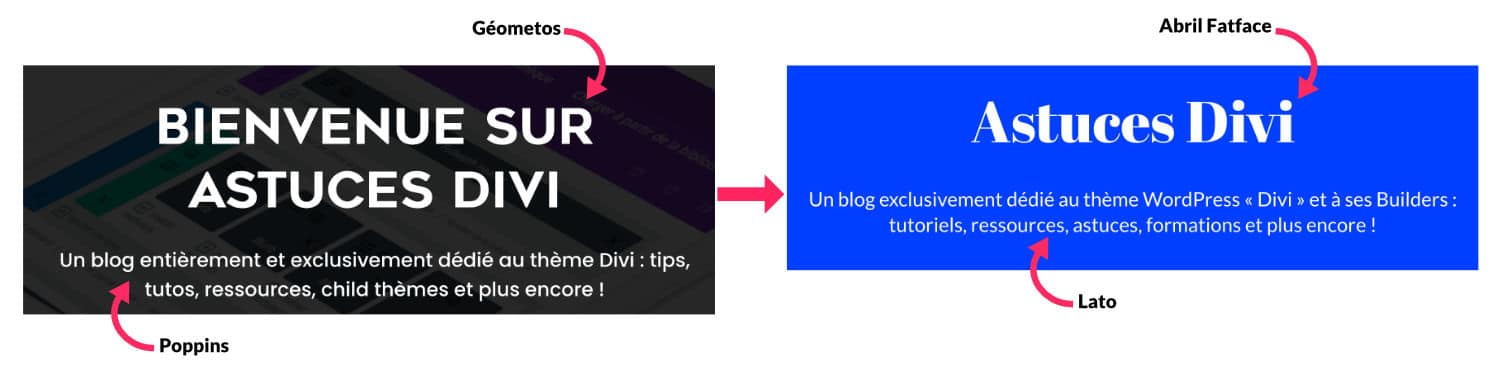
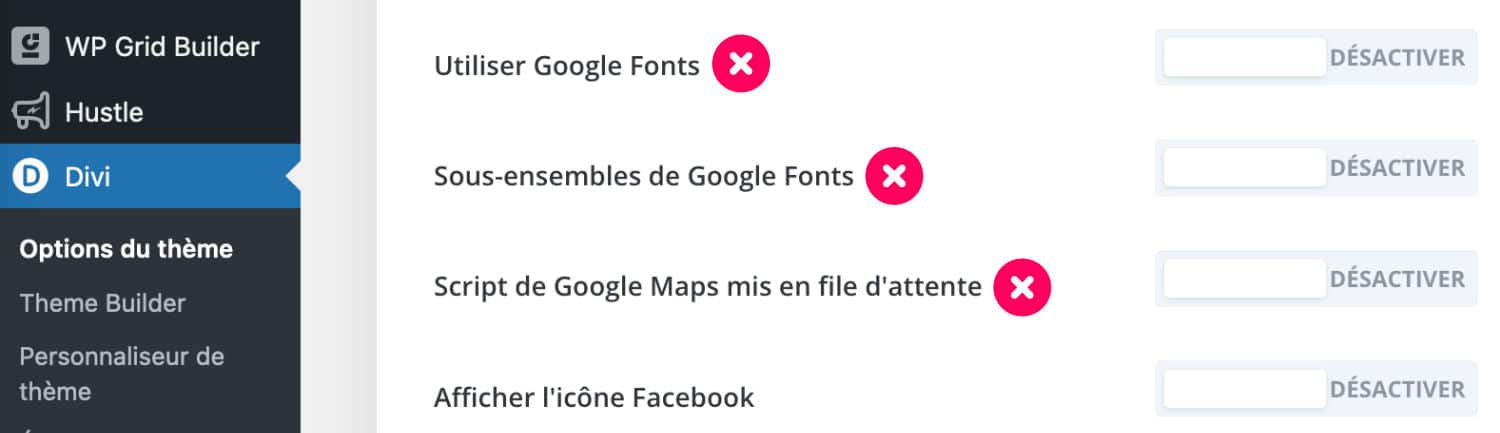
To respect confidentiality and GDPR, I imported these fonts locally to not use Google Fonts fonts.
👉 Choice of new colors
To be honest, I never liked the old colors, I had chosen them to maintain consistency with those of the Visual Builder. But I couldn't take it anymore. 😮💨...
I've been thinking, do I have to radically change everything? Which would mean that my 140 highlighted images would no longer be consistent with the new colors? And that it would be a phenomenal job if we had to redo them in the new colors...
Or can I find a trick to keep my highlighted images while changing a little those colors that are really dull?
So I listed the native tools of Divi that would allow to change the colors of these highlighted images without having to replace them...
Bingo! Divi's filter options allowed me this:
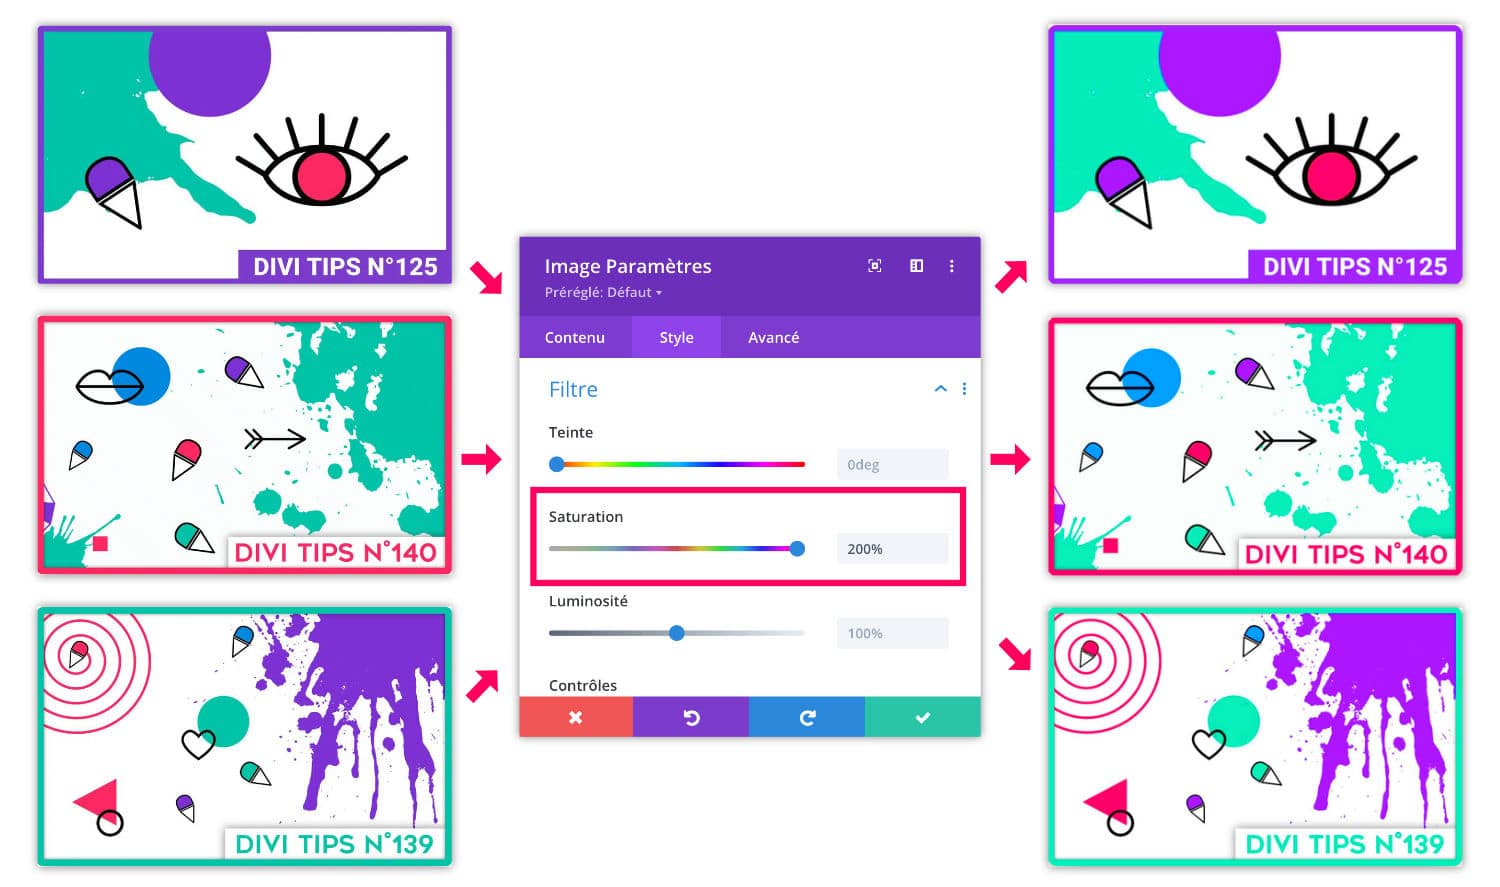
At the blog article template from Divi theme, I tried to increase color saturation to 200% using the Filter options of the module displaying the highlighted image. The result convinced me: I keep most of the original colours while making them brighter. This is how the color palette of the blog has evolved:
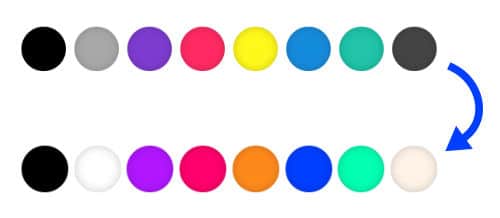
I cheated a little with blue, orange and beige, which do not result from saturation of old colors...
👉 Rebuilding main page layouts
Fortunately, Divi Tips does not have many pages, only a small handful. So it was easy to activate the Visual Builder on the homepage and the few landing pages to update the design, change colors, review texts and provisions...

👉 Reconstruction du design des modèles du thème
Once the homepage was almost ready, I worked to rebuild the design of the main theme models, namely:
- Models for articles: four models in total, because I wanted to use distinct colors in each model.
- Models for category archives: four in total again here, since I have four categories with four different colors.
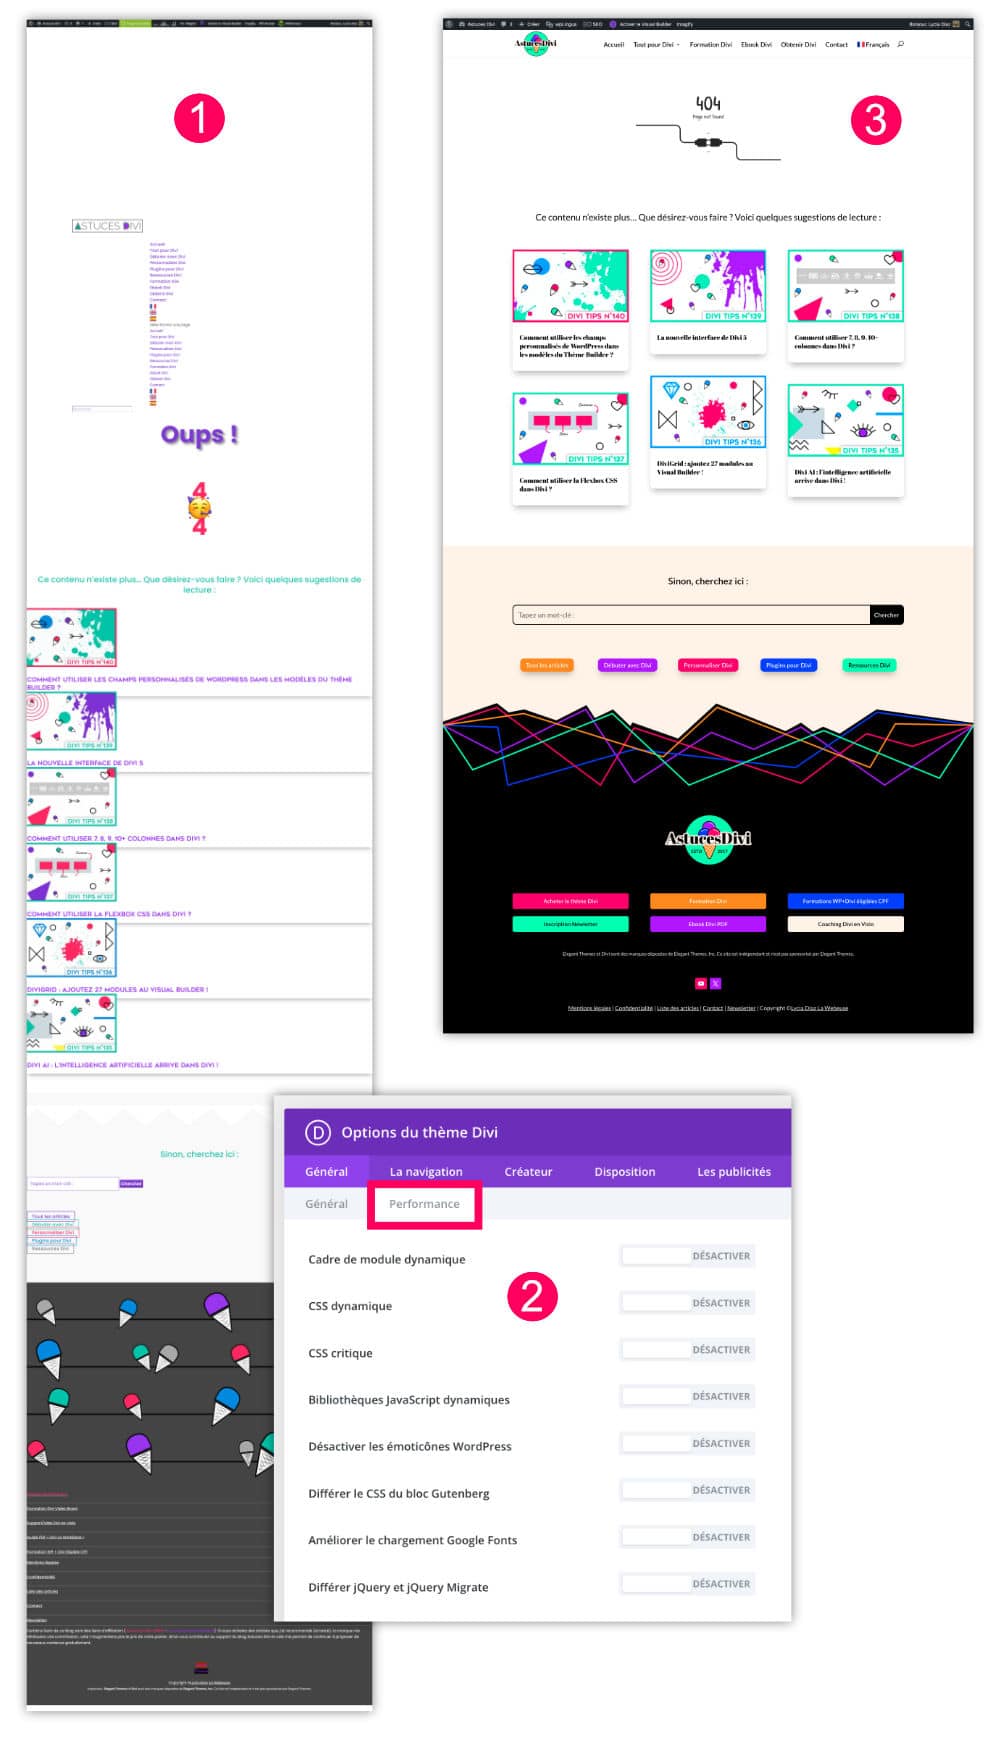
- Template of error page 404
- The search results page template
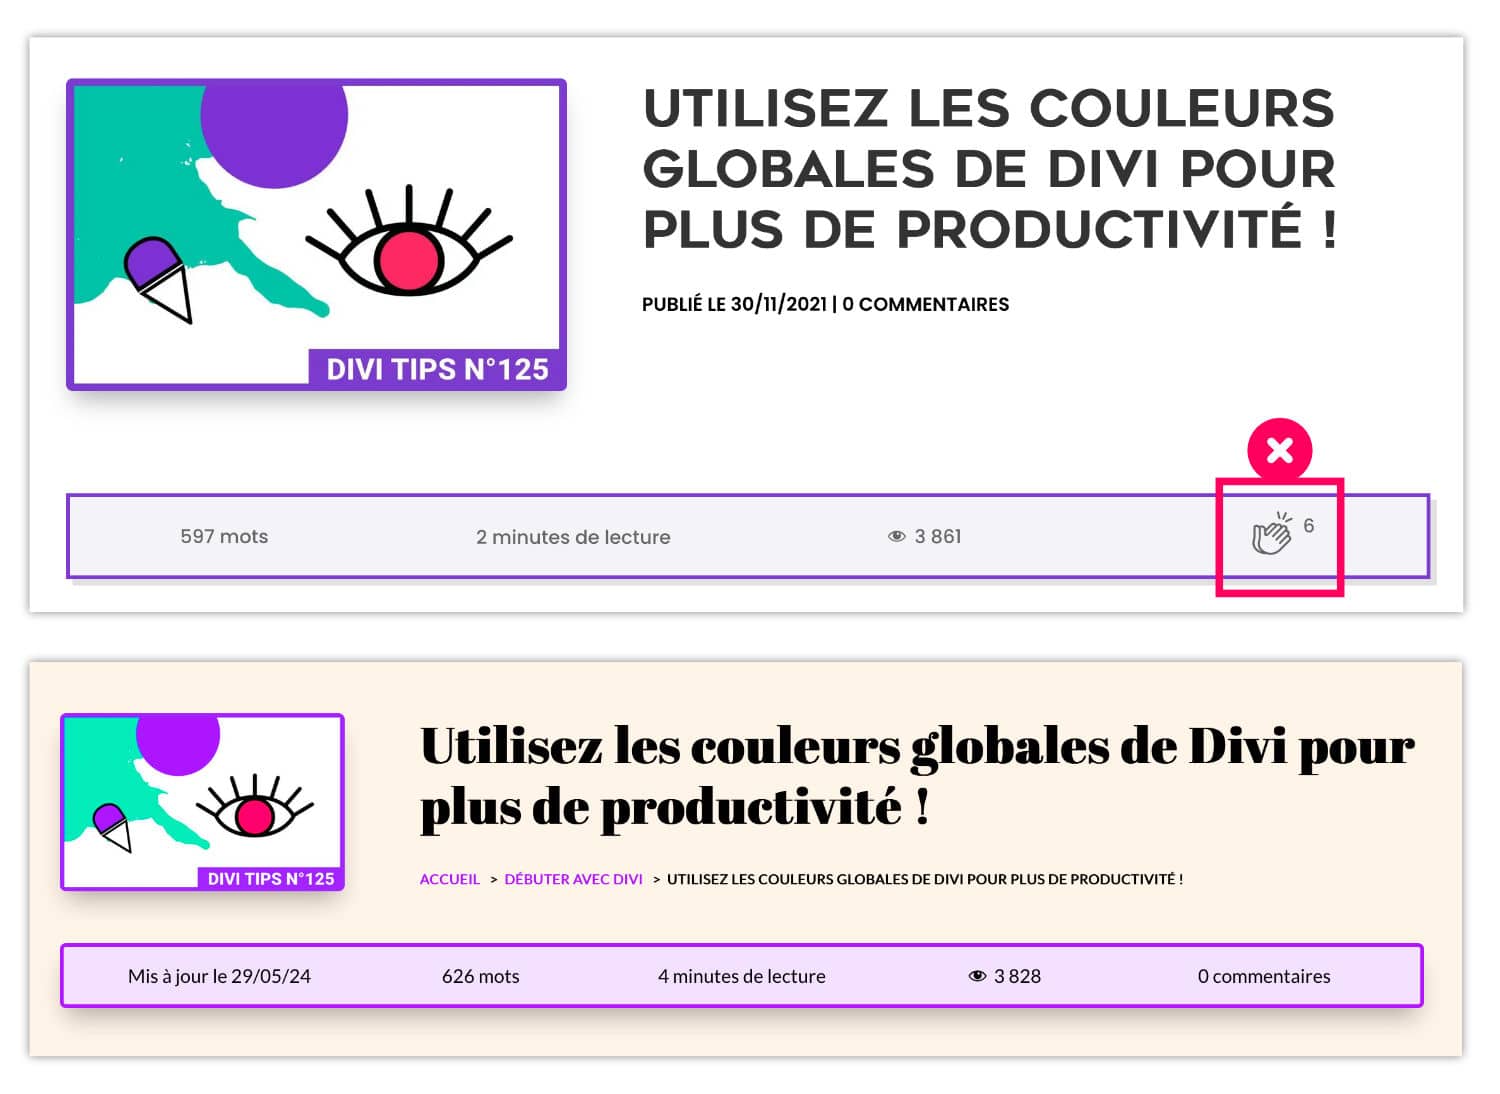
For the model of the articles, I kept the same mind, but I got the design and the colors back. But to my greatest despair, I had to remove WP Applaud extension which generated errors and has not been maintained for some time. I hope a good Samaritan updates it.
Concerning the template on error page 404, I finally found what caused the broken layout problem. It might be helpful one day: it was enough to disable Divi's performance options to find an error-free layout.
👉 Replacement of Divi Blog Modules
Basic, the Divi Builder offers a blog module to display the query loop (the blog results), but this one is not very sexy, or let's say it does not offer many options to customize it 👇
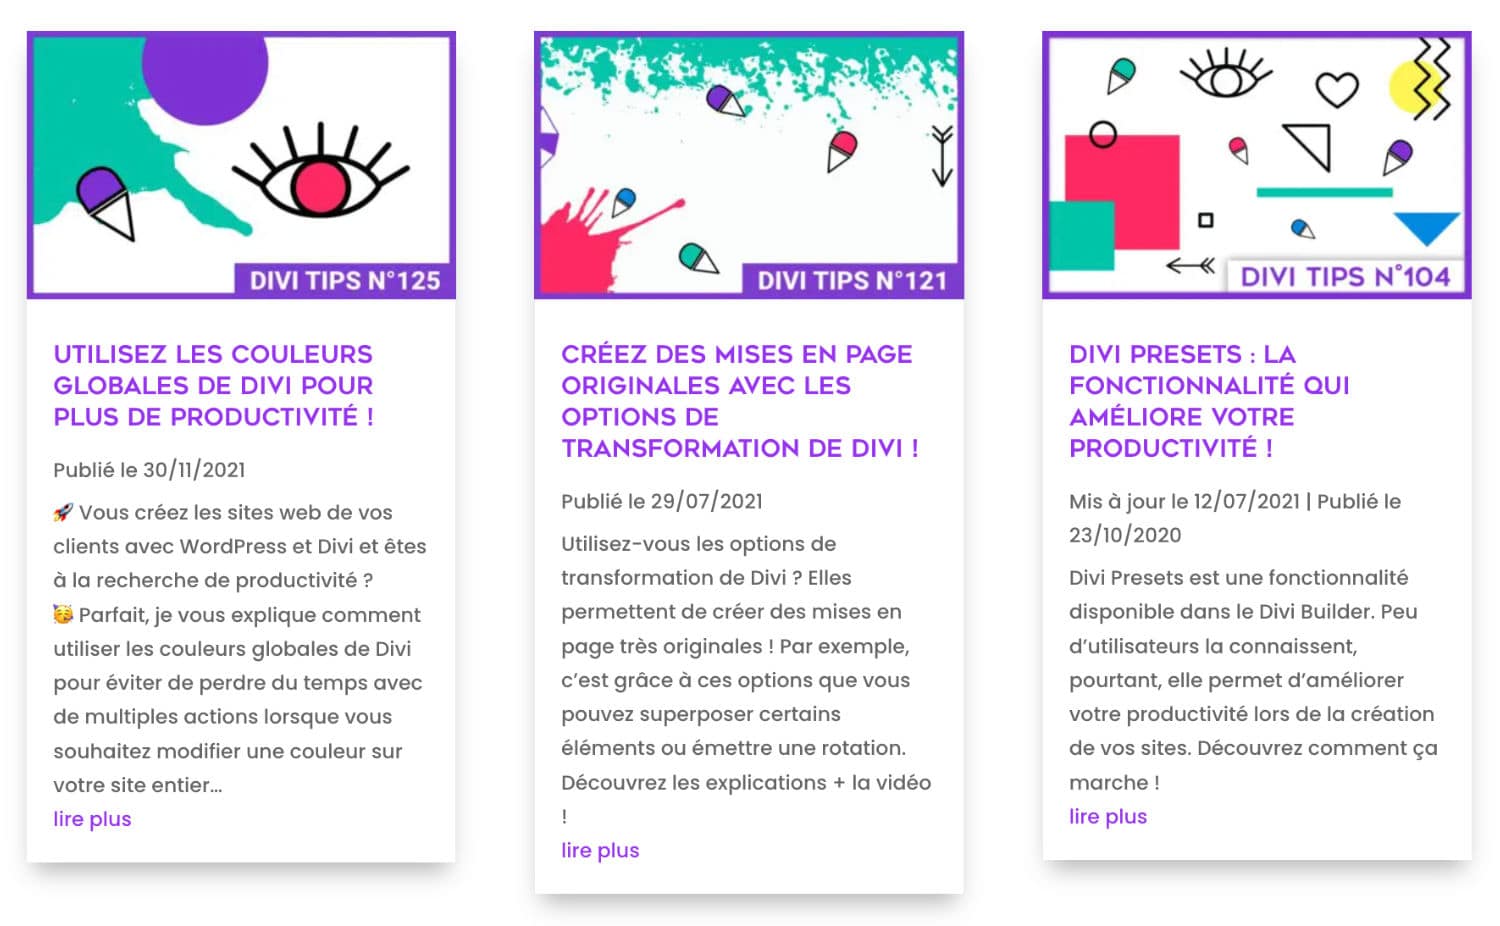
In the old version of Divi Tips, I had coded a custom style in my child theme. For this redesign, I decided to dispense with the Divi Blog module to replace it with WPGridBuilder extension, and here's the result:
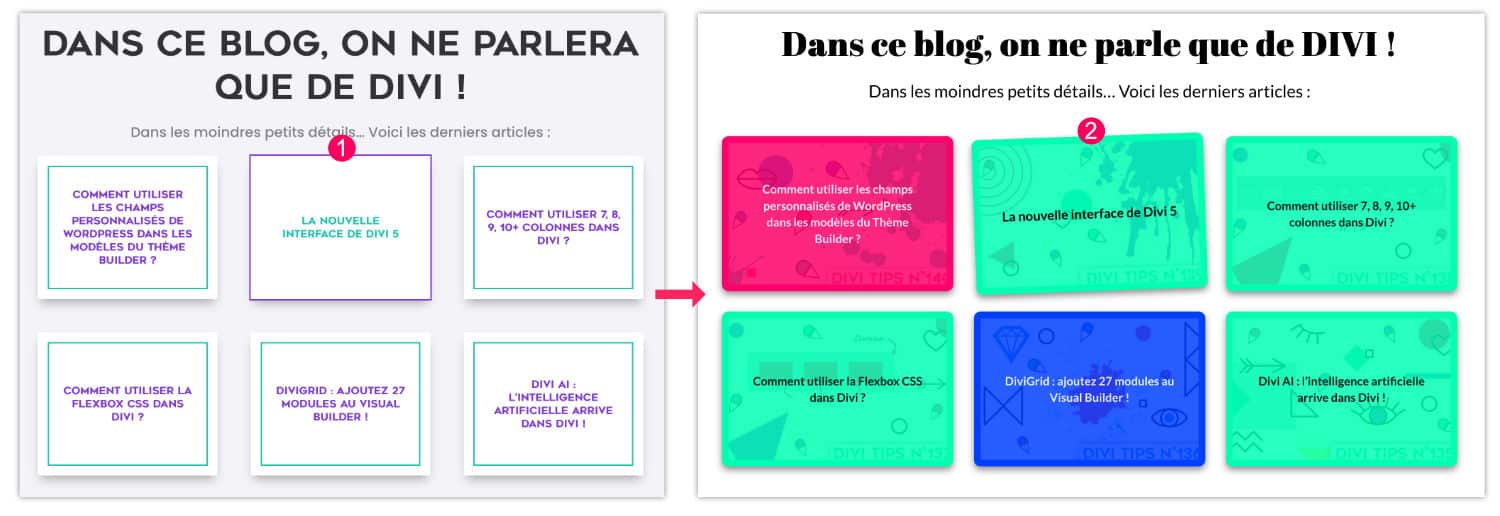
It must be said that WPGridBuilder is not easy to take in hand, it is addressed to initiates, myself, I took time to understand its functioning, but I am very satisfied with the result, the game was worth it! In addition, this extension brings a lot of comfort to blog readers who can easily filter the results. Take a test on the blog page and you will see. So WPGridBuilder allowed me to improve design and UX.
👉 Change of logo
I was asked: "Why ice cream?". Those who really know me don't offend, because they know there's something wrong with my head. 🤪So, yes, why ice cream? Because at the base, the A and D of Divi Tips made me think of an ice cone, and then the slogan of the beginning was Fresh tips for Divi. All right, I'll give it to you, it's a little hairy...
Today, for this redesign, I thought to myself "to display an ice, as much as it really looks like an ice cream"... It's not said it's the final logo, but in the meantime, it'll be this one!
Phase 3: Cleaning and cleaning!
Until then, I've only told you about what's visible, so the tip of the iceberg. The most pleasant and satisfying part of a redesign! But the upside down is another story.
A 7-year-old site has inevitably accumulated a lot of unwanted things.
First of all, there are the extensions that have been followed over time:
- WooCommerce => uninstalled and never replaced
- MailPoet => GetResponse => replaced by a SendFox script
- Secupress => iThemes Security => WP Cerber => and finally replaced by various security extensions.
- Bloom => uninstalled and never replaced
- Monarch => uninstalled and never replaced
- Pin It => uninstalled and never replaced
- Yoast => replaced by SEOPress
- Etc.
I certainly forget tons!
Then there are the host changes: o2switch => Kinsta => WPServer.
Finally, there are all the custom CSS and scripts that have been added over the years. He's a real melody!
So I took my pain in patience and I removed, cleaned, little bit by bit.
First, I used the PRO version of WP Database Cleaner to make an advanced and thorough cleaning of my database. Having already used this extension, I had confidence and found it very effective... But you're not going to believe the rest: in the backoffice, this extension "makes you believe" that it removes everything. What a surprise when I opened PHP MyAdmin: I found my Yoast, WooCommerce, MailPoet, etc. tables that I had just deleted with WP Database Cleaner... So I made a good backup of the database and then I deleted everything manually, nothing is human!
And I'm back for 7 years with a clean database!
Phase 4: Last modification and control
During this step, I took the opportunity to implement my plugin wpLingua to manage multilingual. Even if the translation is automatic, you must manually pass on each page of the site to generate the first translation, for each language. Let's say it's not mandatory, but if the site has a lot of content and it already generates traffic, it's better.
So I went through the ten pages of the site and the 140 blog articles to make a thorough check of the new version of Divi Tips, and this allowed me to:
- correct shells,
- convert the articles that had been published before Gutenberg's release into a block (there were still some articles left).
- find broken images, as a result of the host changes: for example, there were still 24 images whose link to Kinsta's CDN, knowing that the blog has not been there for a long time.
- correct the custom CSS of certain Gutenberg blocks that were no longer in harmony with the new colors of the site.
- add the table of contents to articles that did not have them.
- etc.
Phase 5: Production of the new version
In the same way that the site was duplicated locally the time of the redesign, the new version must then be produced. So reverse migration!
Once online, it's time to check that everything is OK on various browsers but also in mobile versions. It was also at that time that I reactivated WP Rocket, the cache extension that improves performance. Of course, you know me, I had taken care to do a performance test on PingdomTools before and after reimporting the new site and the result is surprising:
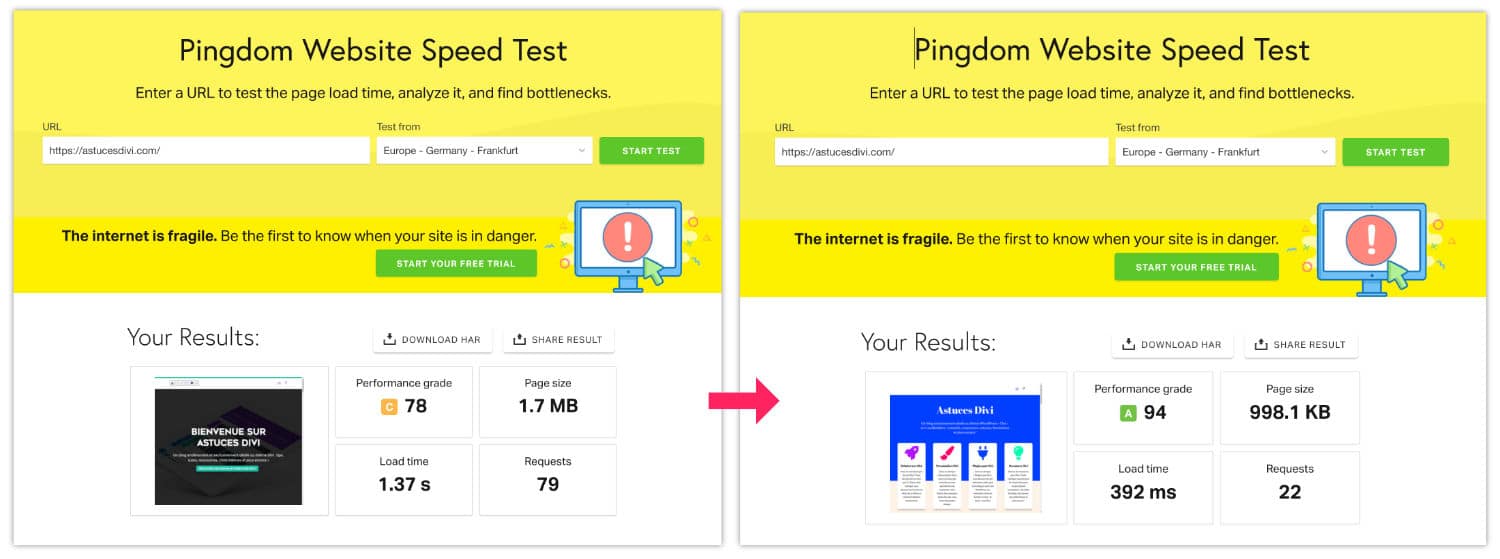
Performance has improved at all levels: grade / page weight / loading time and number of queries. I specify that WP Rocket was installed and activated during both tests.
So this is a good thing done: updated design and improved visitor experience!
ChatGPT: my redesign assistant!
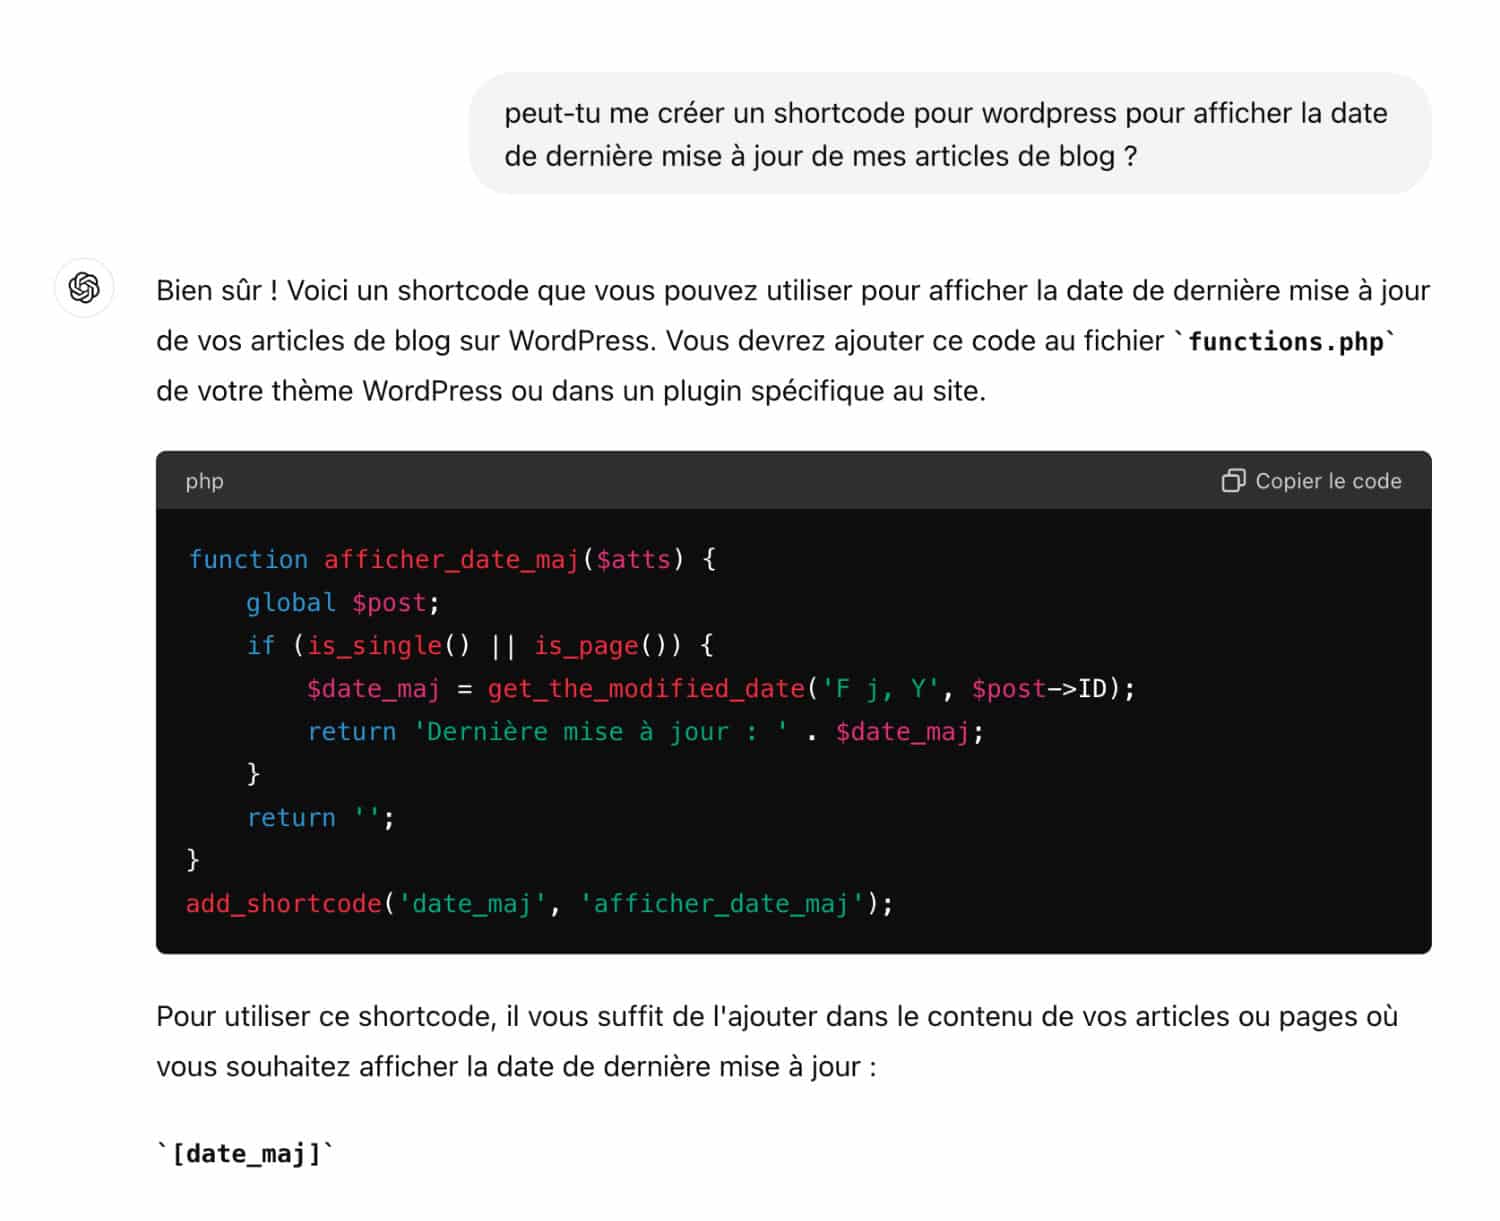
In conclusion, I wanted to point out that ChatGPT was my faithful assistant in this redesign. It's amazing how he helped me. For example:
- He helped me create or perfect some custom CSS rules.
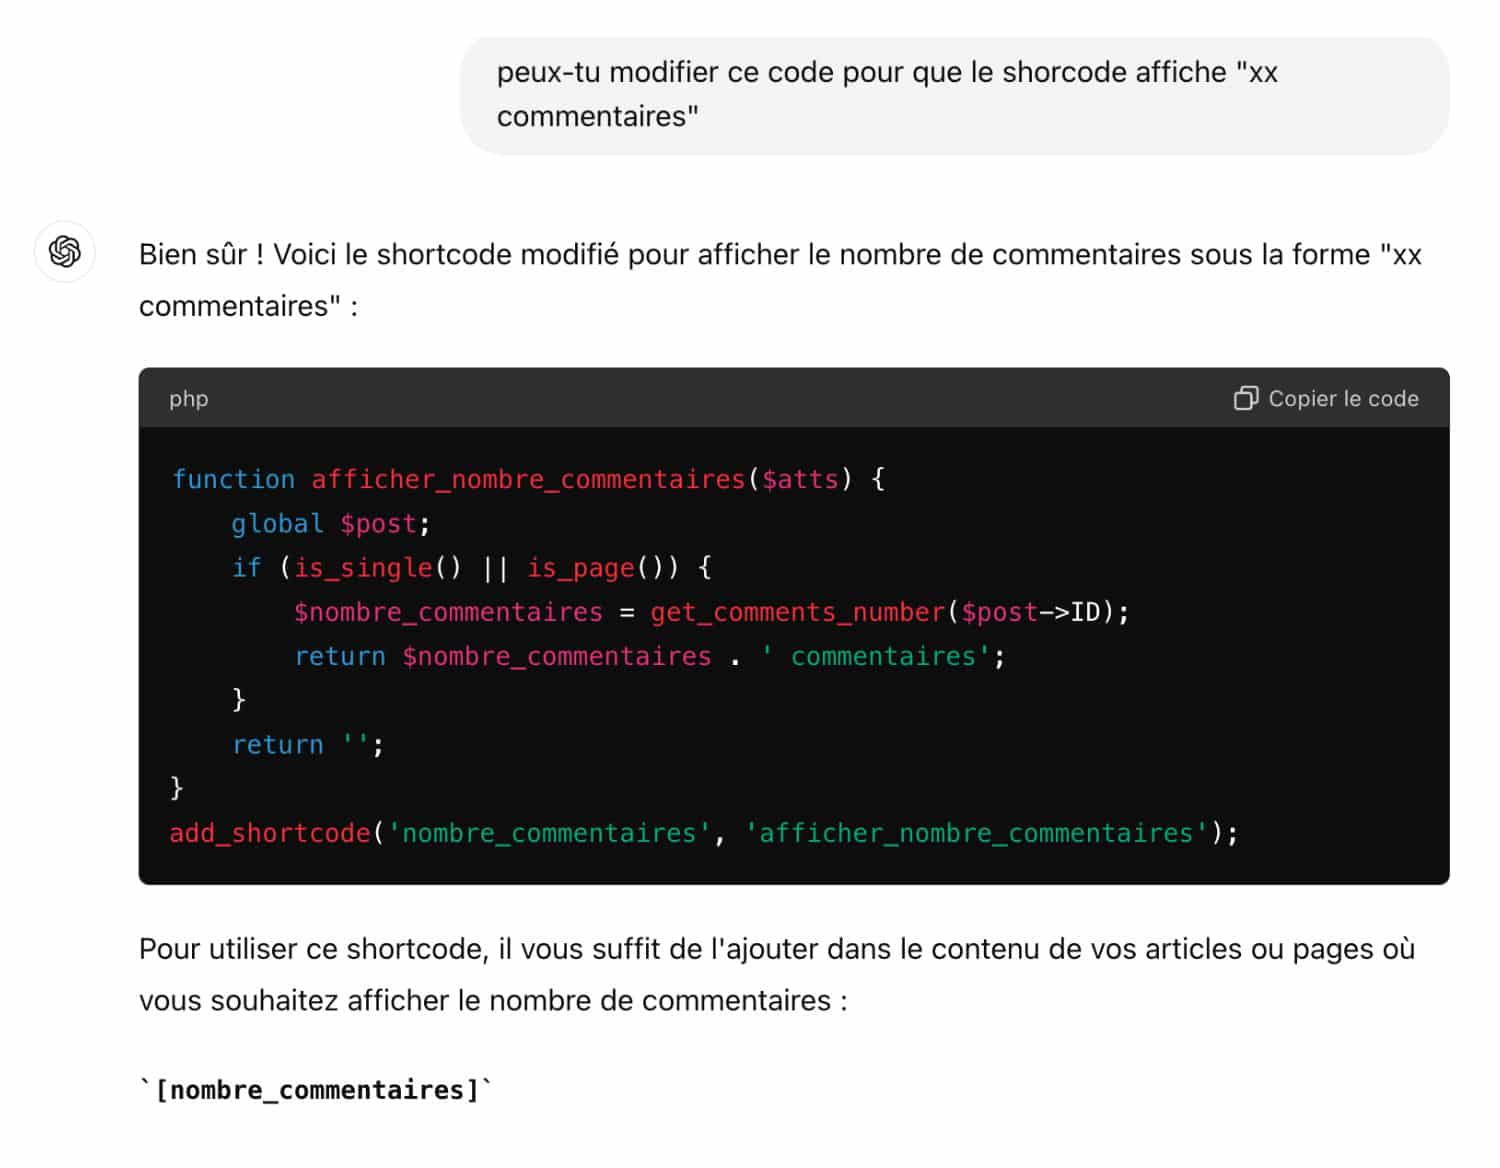
- He created 3 small shortcodes (Code Court) that allowed me to remove 3 obsolete extensions.
- He created scripts that made it easier for me to find articles in a specific detail (e.g. the presence of an unwanted shortcode, or the presence of certain links...).
- etc.
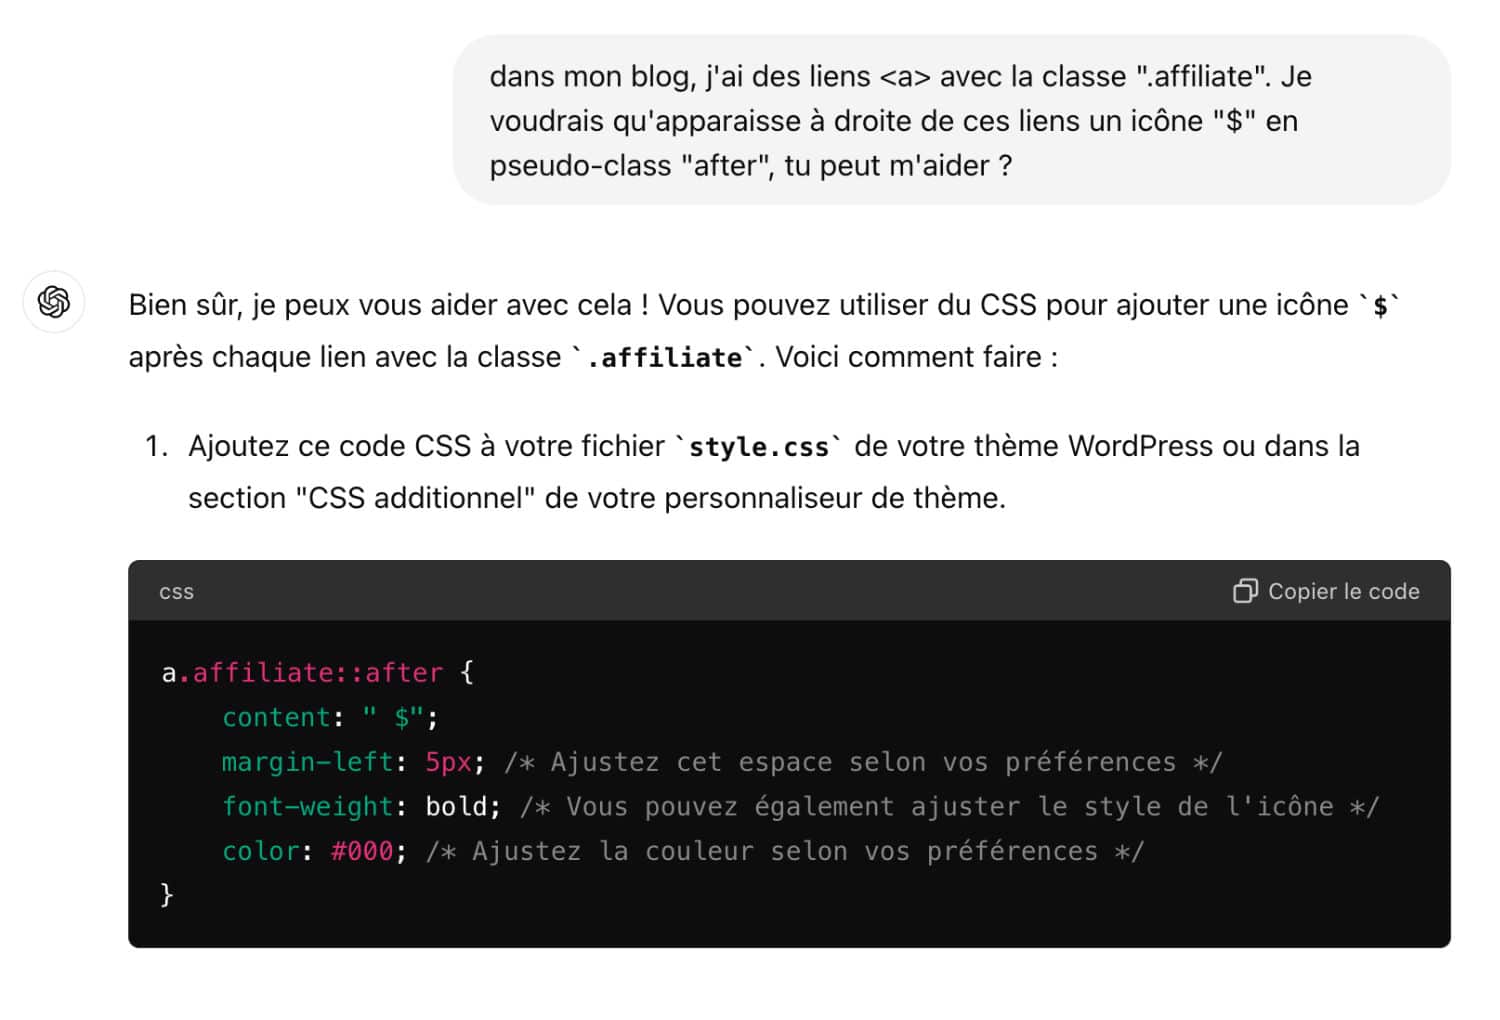
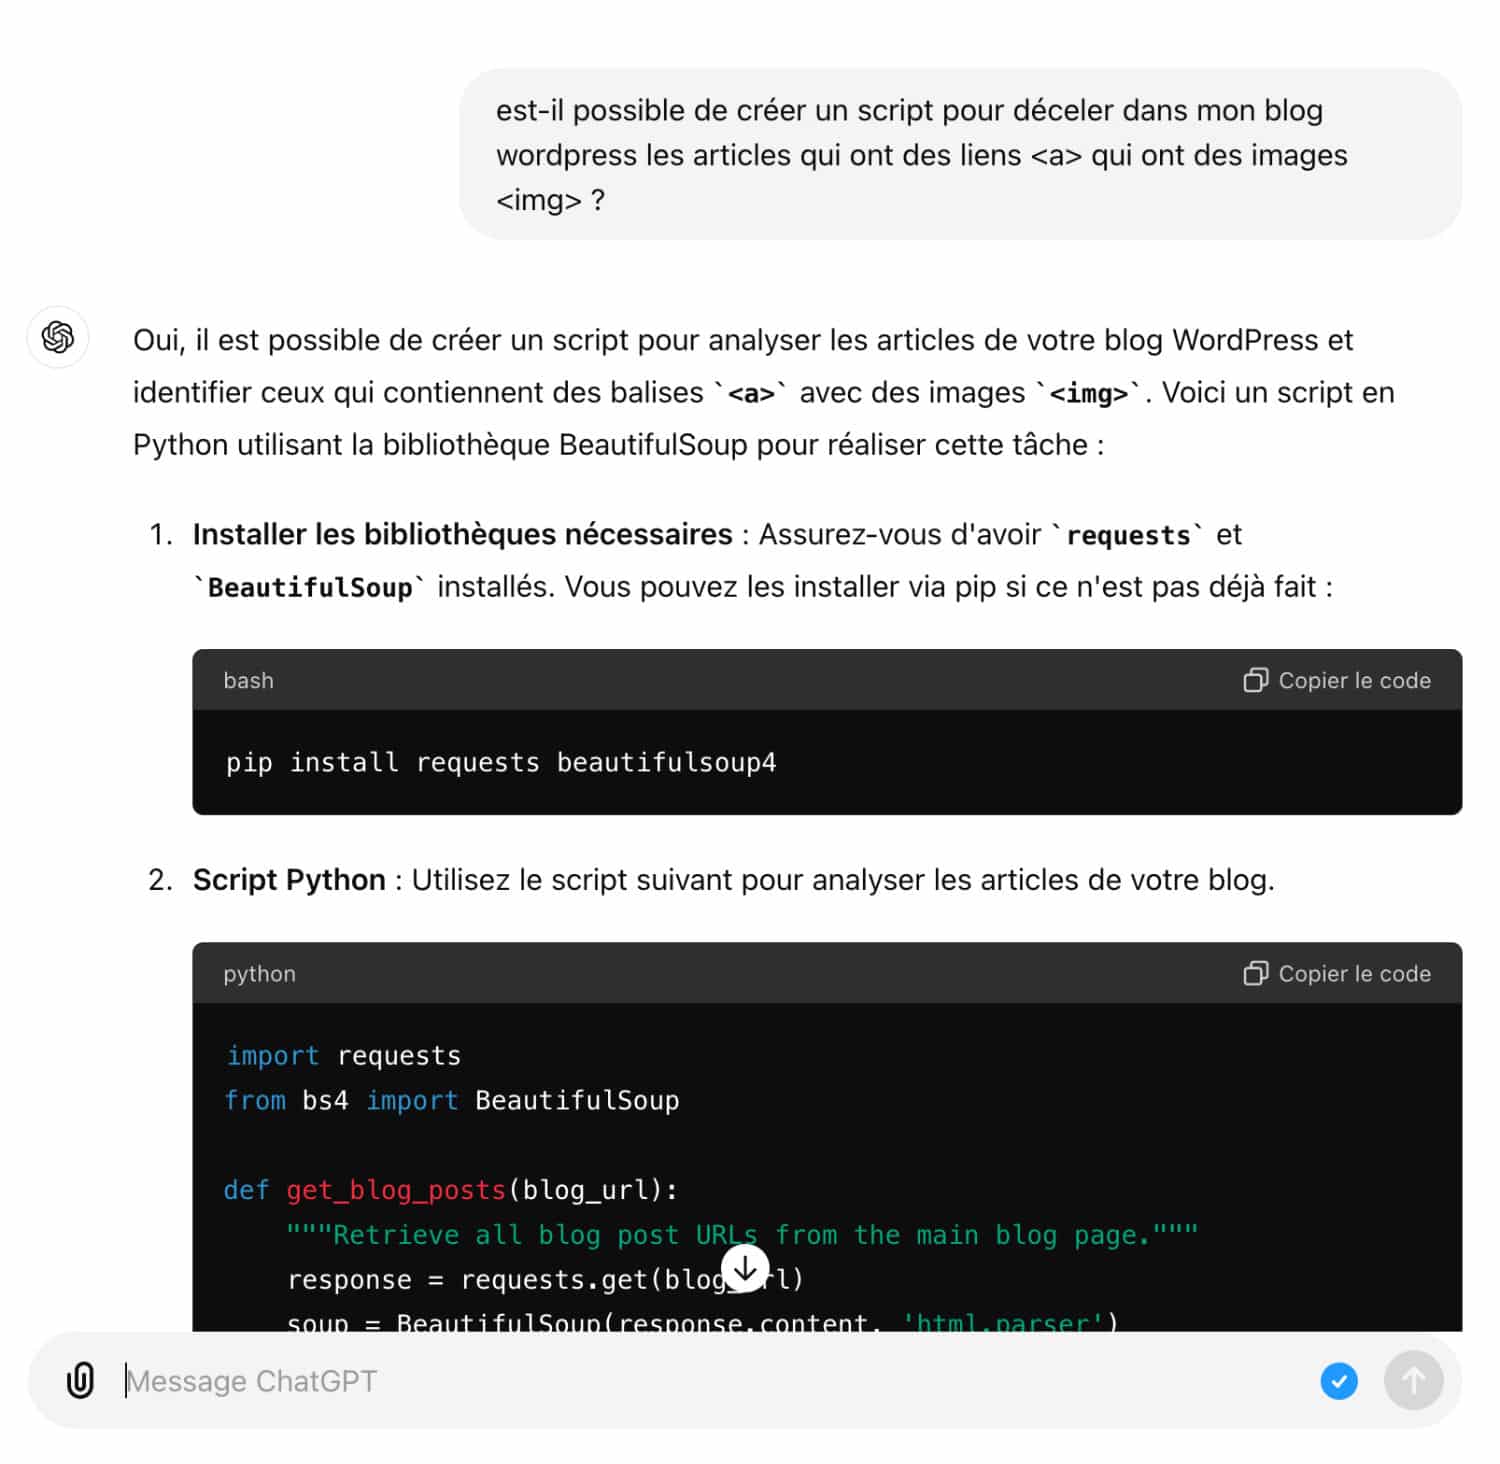
(click to enlarge images)
I asked him so much that I feel like I exploited him. 🤣 Hey!
Of course, I took some and left some. This is better when you have a few notions, it allows you to check if the code provided by ChatGPT seems to be correct... Also, when it says that you have to place the code provides in the theme, you know very well that you must not do that! We put the code in a child theme or in Snippet Code (which is my case): See all ways to add code here.
Rewrite a blog, in conclusion...
We come to the end of this adventure 🥵. I didn't say everything because it would be too long but I hope you enjoy the new version of Divi Tips, that you like its new colors, fonts and user experience!
What we must remember above all is that this redesign was "easy" because I never activated Divi's Visual Builder on my articles! I always use Gutenberg on my articles and manage the design of the model via the Theme Builder. This way of doing things saved me from having to refresh the design article by article! Can you imagine 140 articles, how long would it take? As explained, I just had to refresh the design on my few pages (home page & landing pages), the rest of the work was done within the few models created at the building theme.
How often do you refresh your blogs and websites?

Bonjour Lycia,
Merci pour cette demonstration et bravo, le site est super!
Comment avez vous réaliser l’animation d’entête, c’est génial?
Bonne journée,
Carole
oups que de fautes d’orthographe…. désolée
Hello !
Voilà un article super intéressant !! Merci Lycia !
Un petit bug, le zoom des images chatGPT / CSS ne fontionne pas
Bravo pour cette jolie refonte !
J’adore la nouvelle conception, Astuces, et merci de partager ton processus. Je dois le faire moi-même 🙂
– Dan
Merci beaucoup Dan !
Merci Adeline 😉
Merci pour l’info Jerôme, il faut que je jette un œil, peut-être à cause de WPRocket ;-(
Ah mince ! J’en ai corrigé plein, mais visiblement il en reste encore ! Ça prouve au moins que je n’ai pas écrit l’article avec ChatGPT 🤣
Bonjour Carole, je l’ai fait en suivant ce tutoriel : https://astucesdivi.com/arriere-plan-interactif-divi/
Bonjour Lycia !
Vraiment top cette refonte ! Je suis moi-même en train de travailler la refonte de mon site du coup lire ton aventure m’aide pas mal dans les points à ne pas oublier etc. !
J’ai juste une petite remarque concernant les boutons charger plus de tes articles (page de blog et dans les différentes catégories) ceux-ci ne fonctionne pas. Je ne sais pas si le problème vient de chez toi ou de chez moi. Je me permets donc de te laisser ce message.
Je te souhaite une bonne journée !
Bonjour Anaïs. Oui, merci, il faut que je vérifie ces boutons, effectivement, merci du rappel !