
The "Publish Content" module (or Post Content) is available from the version 4.0 of the Divi theme. Maybe you haven't used it yet? Maybe you don't see what it's for?
Perfect, you're in the right place!
You will see that this module is indispensable in half the cases of creation of templates with the Divi Theme Builder. And also, that it is unusable in the other half...
You will also discover all its settings options...
1 - What is the "Published Content" module of Divi?
This feature was expected on firm feet and it is finally possible!
The "Post Content" module allows styliser once and for all the content (body) displayed within your pages and articles. No matter what this content was created with: with Visual Builder or with WordPress Editor (classic or Gutenberg)...
In the past, one had to go through the addition of CSS to stylize all the titles of a site for example...
Yes, because the tab Appearance > Customize > General Settings > Typography does not allow you to choose a customised font for the different title tags (h1, h2, h3, etc.).
Nor can we differentiate colors by type of title.
You can only choose one font size for the text body and another for the header title, idem for typography...
That time is over! Now the module "Publish Content" (Post Content Module) allows you to stylize all HTML elements of your content.
Thanks to it, you will define the size, color, spacing, typo, responsive versions, box-shadow, animation and even more of the following:
- Titrations h1, h2, h3, h4, h5 and h6,
- The quotation blocks,
- Hypertext links,
- The images,
- Smartlists,
- The numbered lists,
- The whole body (body).
But don't worry, the setting options will seem familiar to you because nothing changes at that level.
2 - Where can one use the module "Post Content Module"?
For starters, do not look for the module Publish Content within the Visual Builder, the one you use within the page or article for build your layout. It is simply not available here.
And it's normal, it's only usable within the Divi Theme Builder !
Since it serves to dynamically stylize your entire siteit must be used within theme templates.
But not any theme template! On some, the Publish Content module (Post Content module) will be indispensable, on others, it will not serve anything!
This module is really useful - and even indispensable - on the Article templates and page templates...But you can use it on other types of templates...
Let's take a closer look at this:
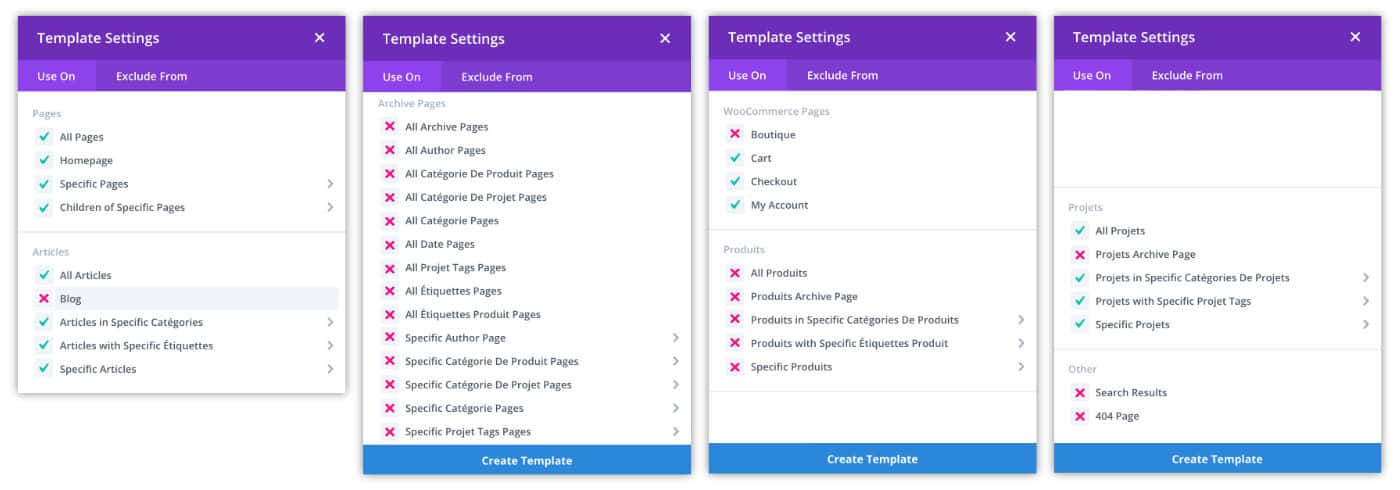
You can use the Publish Content module on:
- Pages: All pages, Homepage, Specific Page, Children.
- Articles: All articles, Articles in specific category, aricles with specific label, specific articles.
- WooTrade Pages: cart, checkout, my account.
- Projects: All projects, Projects in specific categories of projects, Projects with specific project tags, specific project.
The Publish Content module will be useless on:
- The blog page,
- All archive pages,
- The shop page,
- All product pages: although this is not really true since the Publish Content module still allows to display the "long description" of a product as explained in this article,
- The Search Results page,
- Page 404.
Don't delay! Discover the theme Divi here !
3 - How to insert it into a theme template?
The integration of Post Content Module within a theme template is identical to the insertion of any type of module...
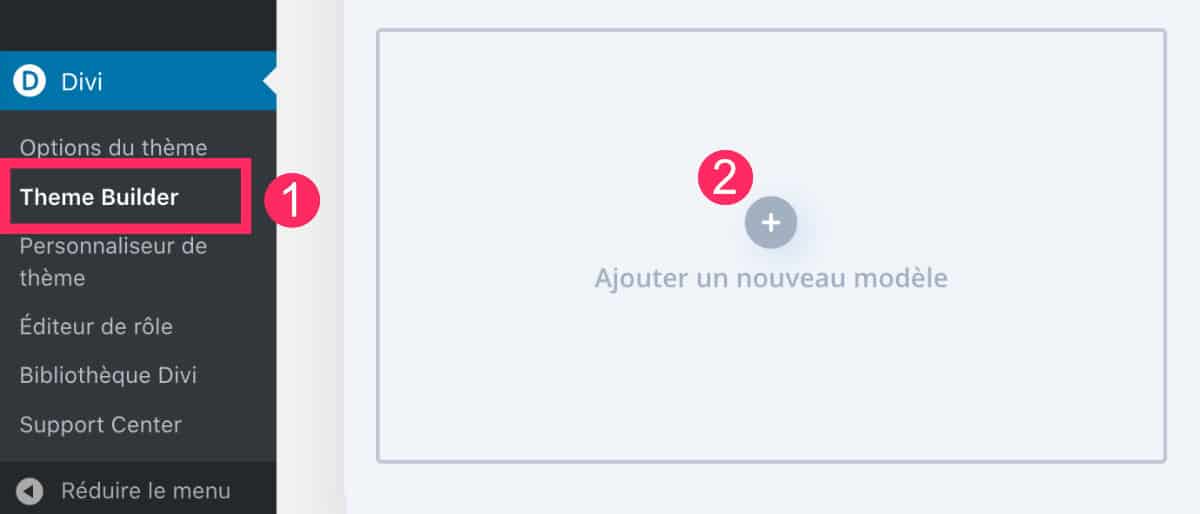
Go to the tab Divi > Theme Builder, click "Add a new model" (Add New Template) and choose the template type to create.
We just saw it, it can be a template for all your articles or pages, a template for articles in a certain category etc.
You will then enter the edition (building) of your template (model): you can create it from scratch or you can use a layout present in your library (discover how to import/export a theme template).
For this example (screenshot below), I create the template from scratch.
- In the template editor,
- Add a new row (green). Composition 1/1 is recommended.
- Then click "+" to insert a new module.
- Select the module "Published Content".
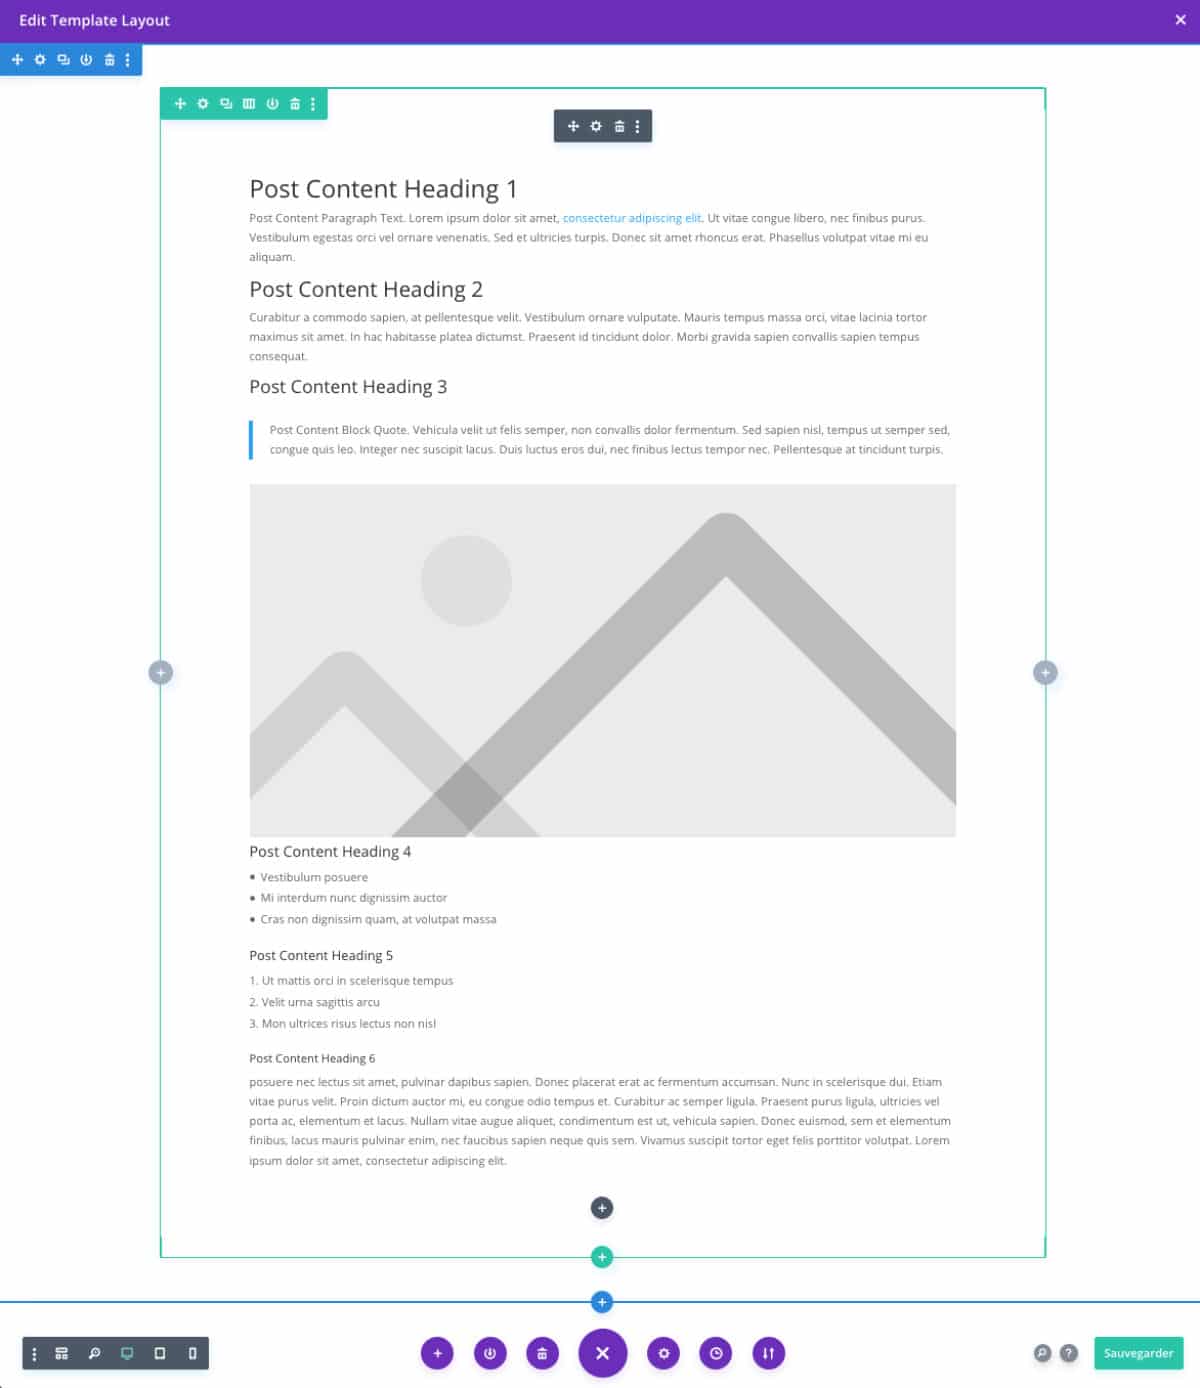
Once inserted, the Publish Content module looks like the screenshot above.
You don't have to ask yourself what this text is like and tell you that you never wrote it... It's normal: it's a dynamic text.
Everything that will be changed here will apply to all content using this template. And that's the most interesting!
4 - How to customize the Post Content module?
Once you have inserted this famous module into your template, you just have to change it...
To do this, click on the icon of the toothed wheel which appears on the mouse (at the hover).
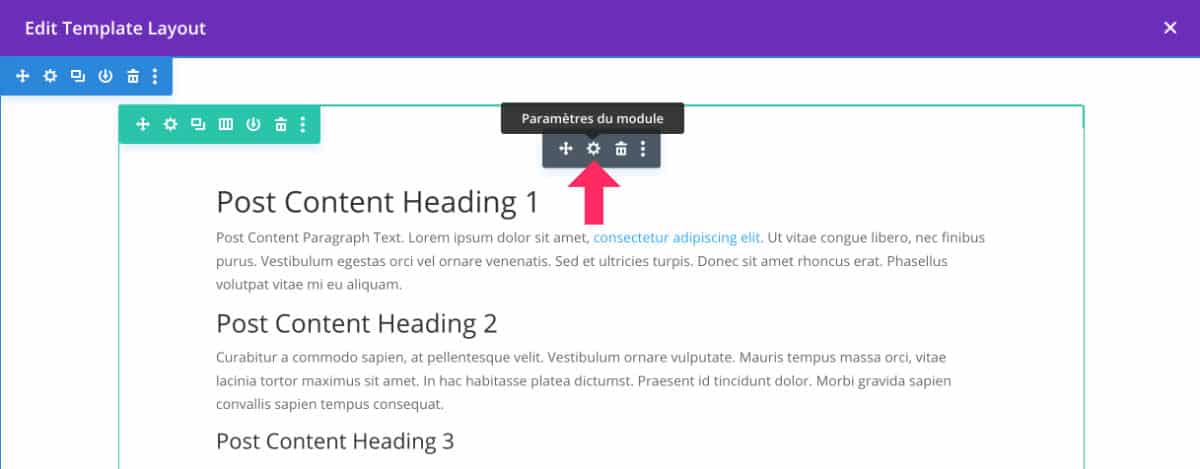
A window will open and offer you a lot of options.
Even if you think you already know them all, believe me, I discovered some more when creating this tutorial! Like, when you take the time to look in detail, you always find interesting things!
Let's see in detail...
4.1 - Tab Content
When the popup opens, it is Content tab which is present by default.
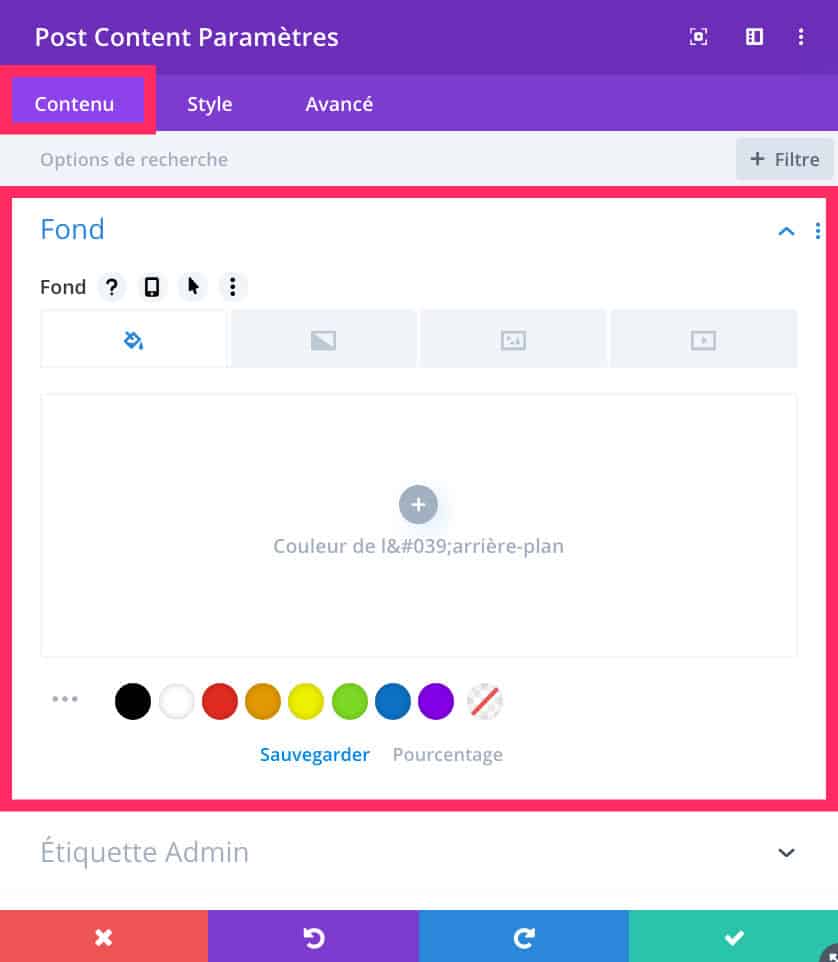
Nothing very complicated here. You can only change the background color of the Post Content module (the color of the main content).
4.2 - Style tab
It's in Style tab the majority of design options are found.
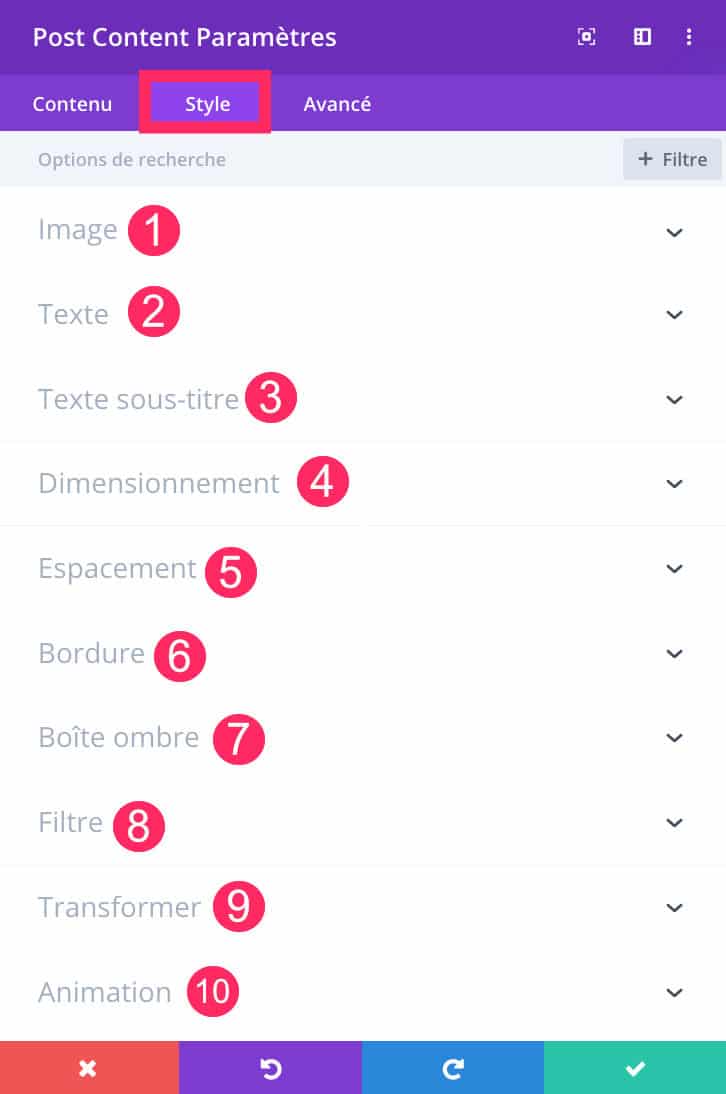
Here you will find the following sub-tabs:
- Image
- Text
- Text Subtitle
- Dimensioning
- Spacing
- Border
- Shadow box
- Filter
- Transform
- Animation
Each of these tabs offers options to stylize the items in question... All the choices you make here will apply on all pages of your site that use this template (theme template).
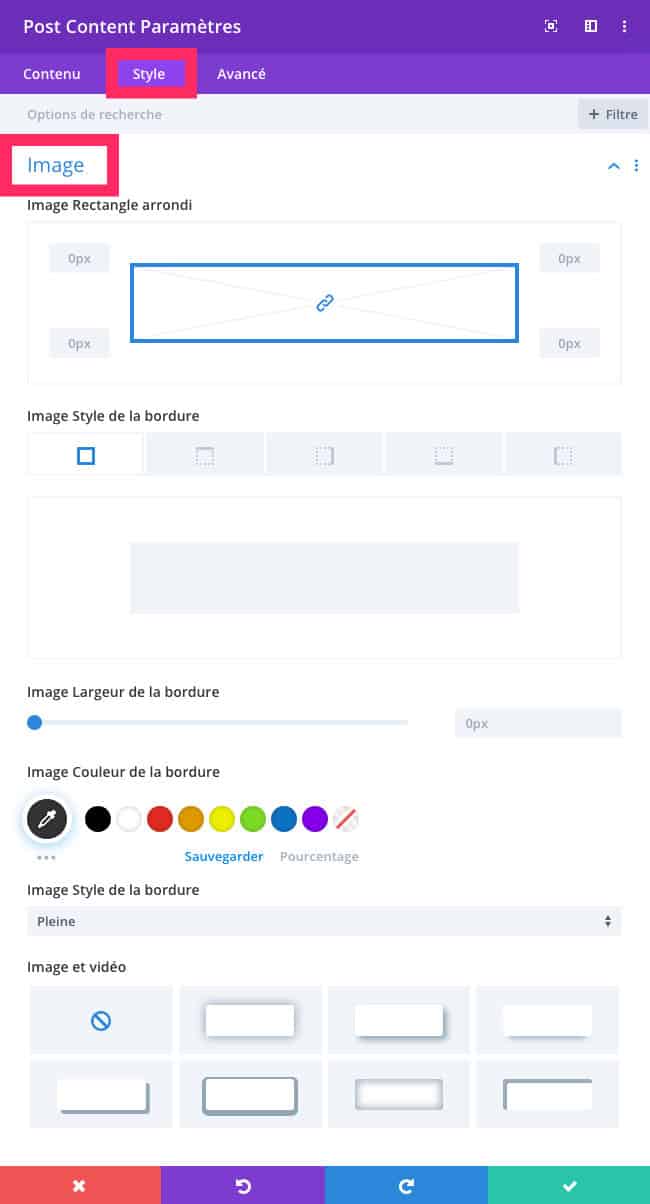
The Image tab
Here you will set the design of all the images inserted into your content.
For example, you can
- Rounding the angles,
- add a border,
- choose the thickness of the border,
- changing the border color,
- add a shadow to your image.
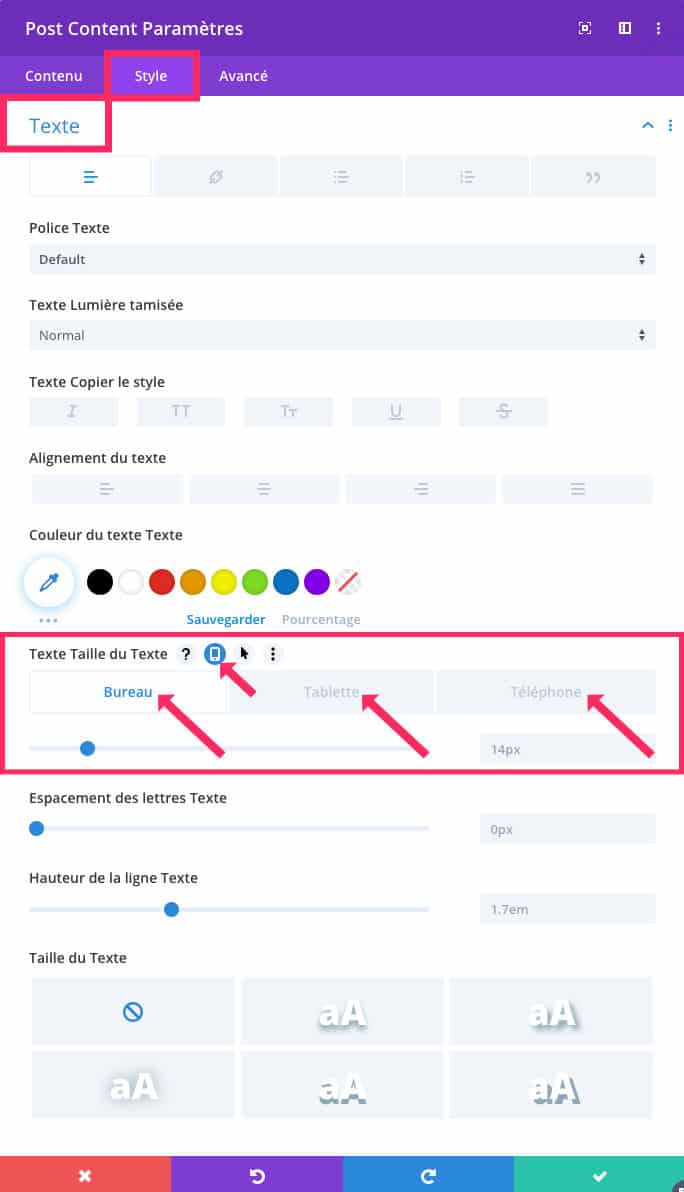
Text Sub-Tab
Here you will define the design of the different texts of your content.
Not only will you define the body of the text, but also hyperlinks, smart lists, numbered lists and quotation blocks.
For each of these elements, you can change the typo, style, color alignment, spacing, line height, shadow, etc.
But most importantly, you can setting different values according to screen sizes. It's ideal for improve your site's responsive.
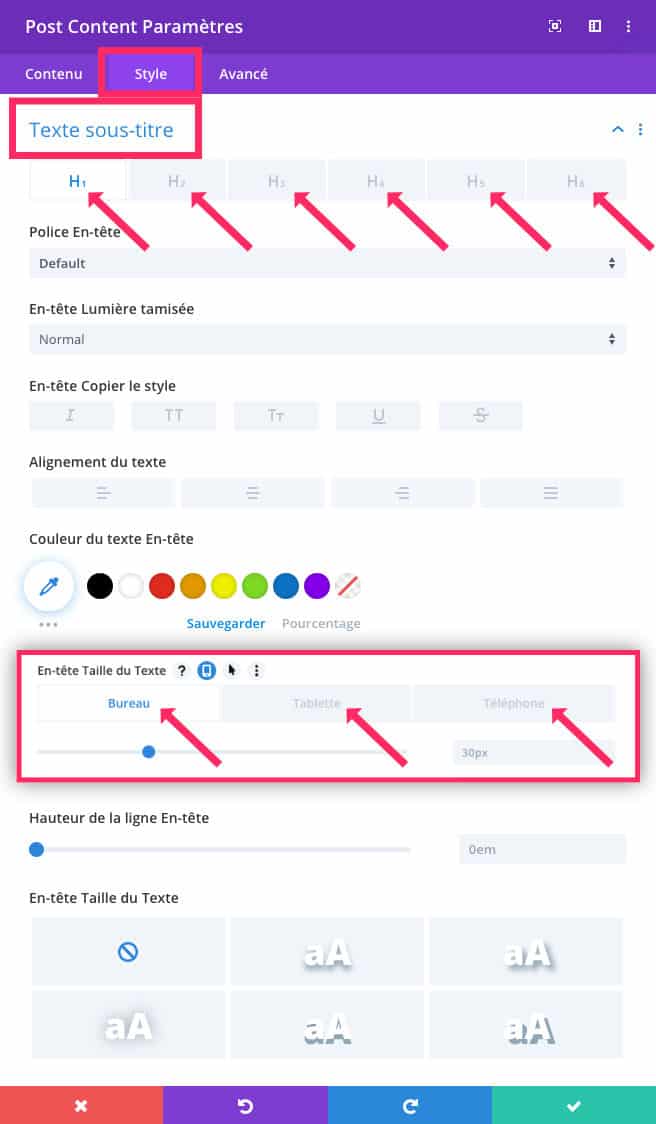
Text Sub-Title
Well, I grant you, the EN-FR translation is not great (see here). how to get a translated Divi)...
The tab "Subtitle text" allows to stylize all titrations.
As with classical text, you can define a typo, a size, an alignment, a color ect. for each type of title.
Do not forget to select each title to customize it (h1, h2, h3 etc.).
Also remember to make your settings according to the size of the screens (office, tablet, phone).
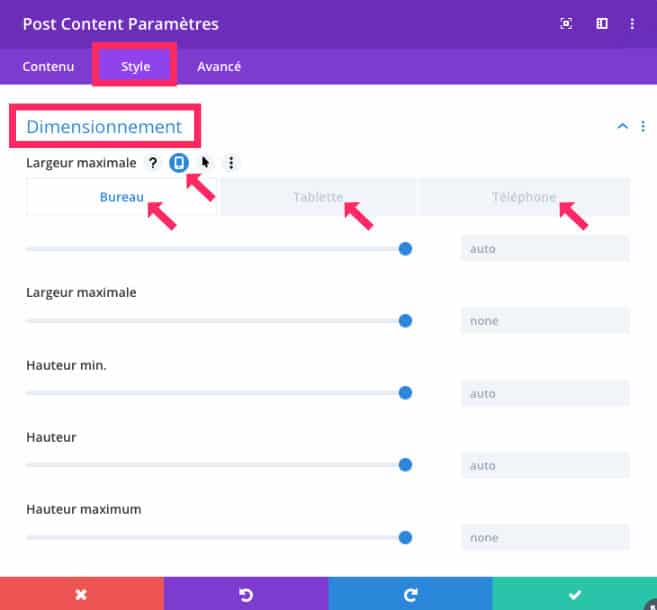
The Dimensioning sub-tab
Here, nothing sorcerer, you will be able to define a width and height for your content, whether in mobile version, tablet or desktop.
Instead, it would be advisable to leave the default values.
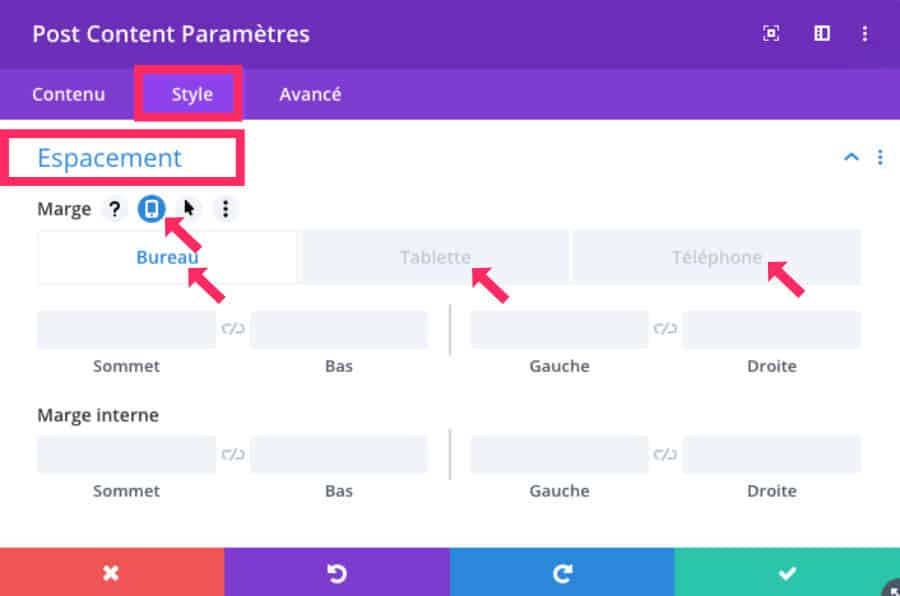
The Space tab
The sub-tab spacing allows you to add Margin (Marge) and Paddy (Internal Marge) to all your content.
You can also set these values according to the size of the screens.
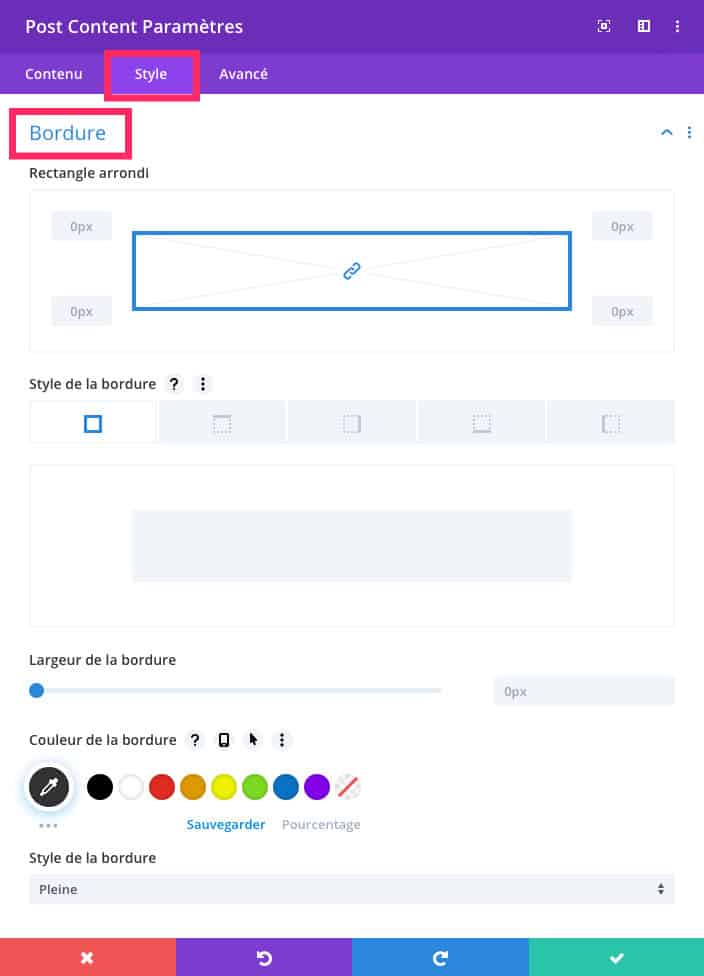
The Border sub-tab
The border you will define here will apply to the entire part of the contents.
You can define rounded angles, border style, thickness and color.
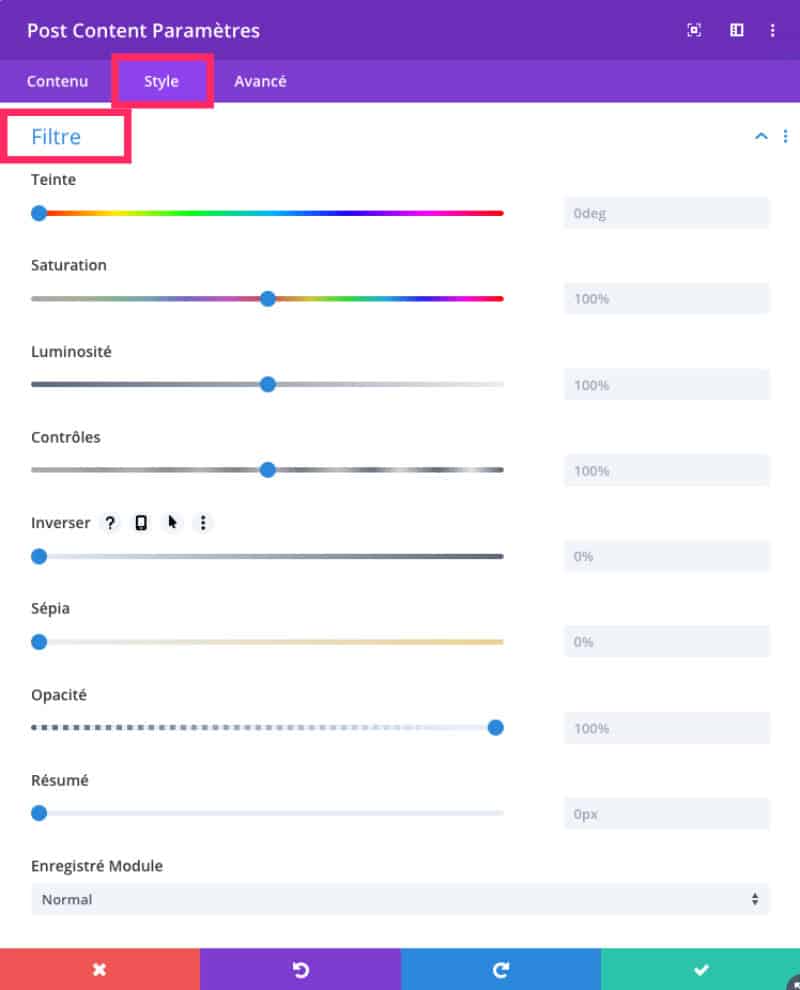
Filter sub-tab
I rarely used this option...
It adds a color filter or opacity to your content.
This may be interesting on an image for example but on the whole content, it seems to me not to be optimal.
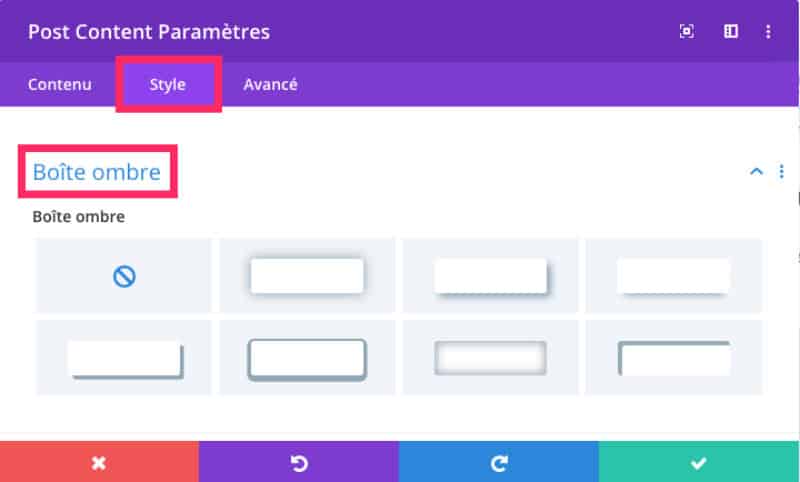
The Shadow Box Sub tab
If you add a shadow, it will apply to the "box" of your content.
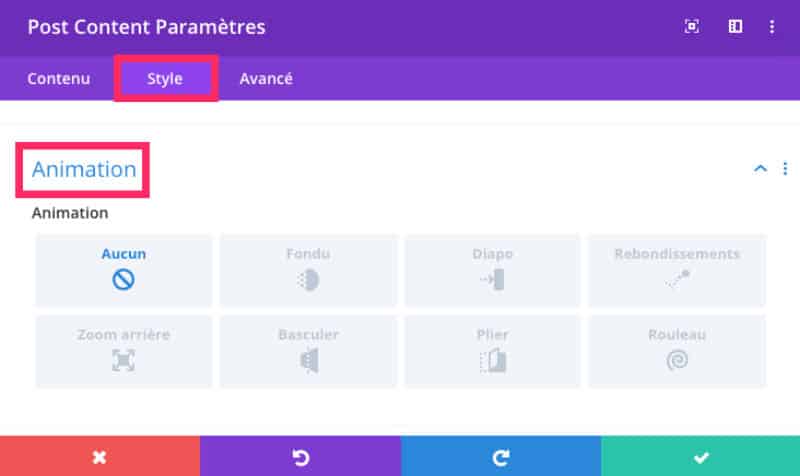
The Animation sub-tab
Same for animation, it will apply to the "box" of your content.
Do you know you can test Divi for free? See you on this page and click on "TRY IT FOR FREE"
4.3 - Advanced tab
Advanced tab allows to go a little further in the design.
This is ideal if you want to add ID or CSS classes which you will later call from your theme child or from the tab Appearance > Customize > Additional CSS.
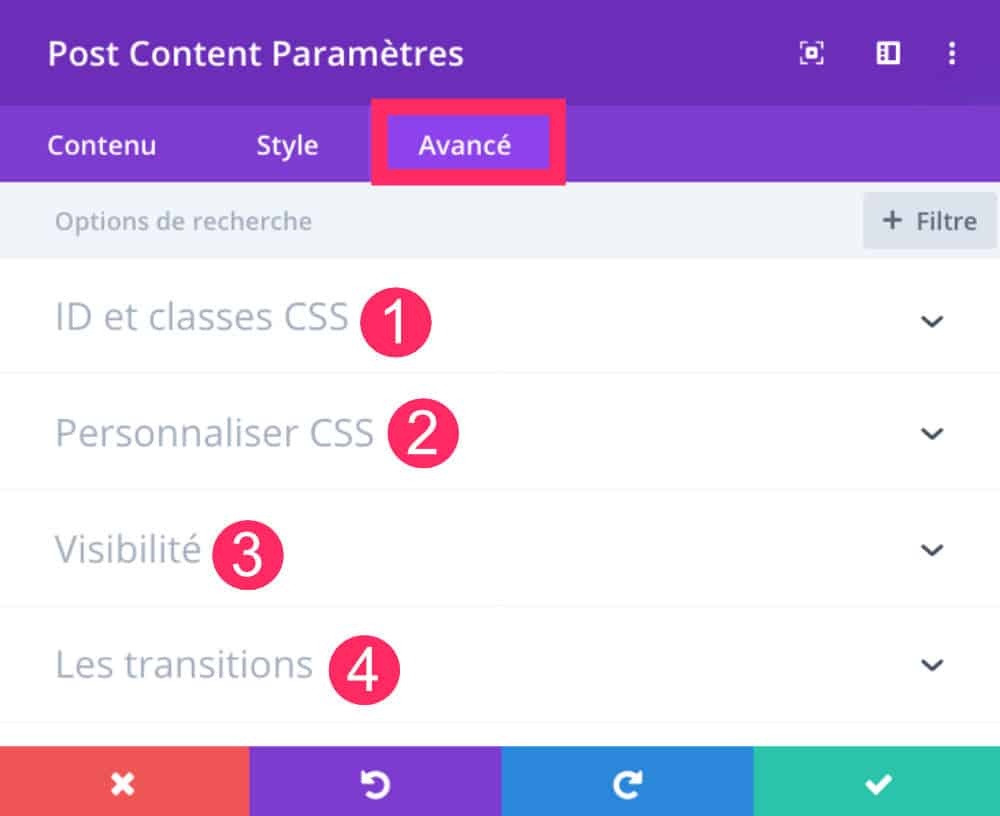
Here you can:
- Add an ID and/or CSS class.
- Add CSS code directly within the module.
- Defining visibility: it is ideal to enable or disable elements depending on the size of the screens. However, here, it will be on the Post Content module in its entirety that you will act.
- Change transitions (duration and time).
5 - In conclusion...
With this new Post Content moduleFinally, one can define the overall design of a site or a site. model file in two stages three movements.
We do it once and for all and it saves us crazy time!
But what is most appreciative is that one can easily respect the Guide styles a graphic charter!
To start with Divi, discover all the articles to start calmly!

Merci pour cet article très complet !!
Merci beaucoup Lycia!
Bonjour Lycia,
Je vous remercie pour la séance de coaching qui a été très bénéfique.
J’ai testé ce soir « Le Module Post Content : comment l’utiliser au sein d’une template de thème ? » sur mon site de test.
J’ai quelques premières remarques :
J’ai cherché le module « Post content » et j’ai pris par inadvertance le module « Titre de Post » car je ne voyais pas du tout en bas le module « Post content » comme sur vos images écrans…. même après une sélection Choix « Post »
Le résultat est que tout le texte de mes pages n’est plus apparu…
J’ai insisté, et j’ai noté l’icône à côté de « Post Content » sur votre image écran.
J’ai cherché le module qui correspondait à cette icône, et finalement sur ma version DIVI (la dernière 4.0.6), cela correspondait à « Publier un contenu » !
Et là, j’ai bien retrouvé le texte dynamique dans l’image en paragraphe 3 !
Par contre, je n’ai pas encore trouvé la bonne manipulation pour copier le layout de mes pages et le copier dans le template de thème.
Ce serait dommage de partir de zéro dans le template.
A suivre.
Bonsoir Christophe et merci pour votre confiance. Ce tuto date de la semaine dernière et entre temps, ils ont dû modifier quelques traductions je suppose ?
Concernant le layout le vos pages, si vous parlez du contenu lui-même, il sera « retranscrit » par défaut grâce au module Post Content (qui a apparemment changé de nom 😉 )
Normalement, vous n’avez rien à faire car ce fameux module fait appel au contenu de vos pages ou articles, tout dépend sur quel type de template vous l’utilisez.
Donc pour récapituler : vous créez une template de page ou article, par exemple, via le thème builder et vous ajoutez le module « Post Content » ou « Publier un contenu » … et c’est tout. Le reste du boulot se passe au sein de votre page (ou article) avec ou sans le Visual Builder. Donc, le contenu de vos pages (ou articles) continu de se créer au sein de celles-ci.
Je ne sais pas si je suis assez claire ? 😉
Bonjour Lycia,
Je n’ai pas le module « Publier un contenu » dans ma version de Divi.
Je n’ai pas non plus les modules ci-dessous que tu sites ici https://astucesdivi.com/liste-modules-divi/
Module Carte en Plein Écran
Module Code en Pleine Largeur
Module Curseur de défilement des Posts pleine largeur
Module Curseur défilement pleine largeur
Module Entête Plein Écran
Module Image en Pleine Largeur
Module Menu Plein Écran
Module Portefeuille Plein Écran
Module Titre du Post en plein écran
Je rectifie ma question car j’ai trouvé une partie de la réponse. En fait, les modules 38 à 46 ne sont utilisables que pour les sections pleine écran.
Par contre, toujours pas de trace du module « Publier un contenu » 🙁
Salut Jean Luc ça va ? Alors, mon article explique bien que certains modules sont disponibles dans certaines sections uniquement. C’est bien le cas et c’est noté que les modules 38 à 46 sont uniquement dans les sections violettes. Donc tu as trouvé finalement 😉 Concernant le module Publier un contenu il n’est pas disponible dans le Divi Builder. C’est un module spécifique du Thème Builder … tu ne le trouves qu’à cet endroit. Un article spécial est dédié à ce module : https://astucesdivi.com/module-post-content/
Voilà, j’espère t’avoir éclairé 😉
Bonjour Lycia et merci pour tous ces tutos très appréciables pour la très très débutante que je suis.
J’essaie de créer mon blog de cuisine avec wordpress et divi.
Dans le thème builder de divi, j’ai bien compris qu’il fallait installer le module « publier un contenu » dans le « corps personnalisé » et je l’ai fait.
En dessous j’ai créé tout ce que je désire dans le corps de tous mes articles, c’est à dire une rangée verte avec à l’intérieur un module noir avec trois images puis une autre rangée verte avec à l’intérieur un module noir de texte puis une autre rangée verte avec à l’intérieur un module noir de deux images etc …
Sauf que quand je vais dans la création de mon article j’ai toute cette mise en page deux fois et j’ai essayé plein de solutions pour rectifier et rien n’y fait, je suppose donc que quelque chose m’échappe et je viens vous demander de l’aide s’il vous plaît.
Je vous remercie beaucoup d’avance.
Pardonnez mon manque de vocabulaire informatique, j’espère que vous me comprendrez tout de même 🙂
Bonsoir Glao. Est-ce que vous avez aussi créer un footer personnalisé ? Car si vous mettez ces éléments dans la template d’article et dans la template du footer ils apparaissent deux fois. Est-ce votre cas ? Sinon, est-ce qu’une fois l’article publié le double contenu est toujours présent ? C’est un peu bizarre…
Bonsoir Lycia,
Je ne sais pas comment répondre à votre réponse alors je crée un nouveau commentaire 🙂
Tout d’abord merci beaucoup pour votre réponse rapide.
Je viens de repasser un grand moment et je n’y arrive toujours pas, quelque chose m’échappe c’est certain …
J’y reviendrai et je finirai bien par trouver mon erreur mais là, ce soir, à force de faire et refaire, je ne comprends même plus ce que je fais alors il est préférable de m’arrêter.
Je reviendrai vous dire quand j’aurai trouvé comment faire, bonne soirée à vous et merci encore.
Bonjour Lycia,
Je me demande s’il est possible avec le thème Extra d’ajouter du contenu personnalisé avant et après le corps de l’article ? Il y a après l’article une boîte pour présenter l’auteur par exemple…
Merci par avance.
Je suis perdu dans toutes les nouvelles fonctionnalités proposées par Elegant Themes.
Salut Adrien.
Je n’utilise pas le thème Extra mais j’imagine que, comme tout thème WordPress, tu peux créer un thème enfant et coder la page single.php ou singular.php qui sont les fichiers-modèles utilisés pour les articles, afin d’y ajouter ton contenu.
Sinon, si Extra permet aussi de créer des templates de thème avec le thème Builder (comme Divi), dans ce cas, tu peux simplement créer une template d’article et y afficher le contenu où tu veux, directement depuis ton back-office, sans coder. Le tuto est ici : https://astucesdivi.com/template-article-divi/
Bonsoir Lycia et merci beaucoup pour ce post et tous tes posts en général
Je me sens un peu idiot… toute la partie template est ok (enfin je pense) mon soucis… je ne trouve pas ni sais comment arriver á l’appliquer á mes nouveaux articles
J’utilise Divi Builder et qd je crée un nouvel article, j’ai juste le titre qui apparait (ajouter article avec son nom j’imagine) Ensuite mon article et vide et je dois rajouter des sections et des lignes avant les modules.. est ce normal
Je pensais seulement devoir remplir le template qui apparaitrai a chaque nouvel article. Est ce que je me trompe
Merci pour ton support
Bonjour Jean Pierre. Je ne comprends pas trop ta question. Mais pour être sûre : as-tu placé dans ta template le module Publier un contenu ???? Car c’est grâce à lui que le contenu de tes articles s’affiche.
Bonjour et merci pour ton retour très rapide.
J’ai bien placé le Publier un coutenu dans le template, je vais essayer de mieux tourner ma questions 🙂
Comment éditer un nouvel article, créer un nouveau contenu avce le template? Quand j’ajoute un nouvel article, actuellement je peux juste ajouter les paramétres tels que le titre du poste et la photo avec l’éditeur WP je pense… et j’amerai pouvoir ajouter le corps de mon contenu en respectant les caractéristiques (format, couleur, taille,…) dans le builder.
Une vue rapide du dernier article crée actuellement : https://www.mondeshumidificateur.fr/babymoov-hygroplus/ . Dans cette article si je veux éditer le corps du contenu, je dois de nouveau ajouter des sections, des lignes et des modules. Est ce normal?
Merci pour ton retour
Salut Jean Pierre,
La template n’est qu’un cadre qui défini les styles pour l’ensemble d’un type de poste. Après tu dois créer ton contenu dans chaque article, cela ne change pas. Tu peux écrire ton article avec Gutenberg ou avec le Visual Builder.
J’ai un gros de problème avec le module blog. Aidez-moi svp.
J’essaie de modifier la taille et la couleurs des sous-titres. Mais ça ne change pas lorsque je charge les pages !
J’ai désactivé tout les plugins mais ça ne marche pas. Ça reste bloqué sur une modification d’il y’a 1 mois ou un peu plus.
J’ai les balises H2 et H3 qui se ressemblent vraiment beaucoup, je me suis dit que les lecteurs vont peut-être trouver des difficultés à lire mon blog.
J’ai voulu alors changer les H3 sur le modèle relatif aux catégories dans le thème Builder, pour voir les modifications appliquées à tout les articles.
Mais oups dans le résultat final lorsque je charge la page, la police des sous-titres ne se modifie pas !
Meme si je vois le résultat comme souhaité lorsque je souhaite modifier l’un de mes articles dans le thème Builder.
Salut Samir, je ne comprend pas tout. Tu as peut-être un problème de mise en cache ?
Bonjour.
Je vous remercie tout d’abord pour votre réponse.
Mais dîtes-moi svp.
Le fait de changer la police des sous-titres Hn dans le thème builder en modifiant le module blog, change la police des sous-titres de tout les articles déjà créés ? C’est à dire pas la peine de modifier la police des sous-titres de chaque article ? C’est ça ?
Moi j’ai dû changer la police des sous-titres article par article.
Salut Samir, normalement, tu dois créer un modèle (template) pour tes articles avec le Theme Builder et en stylisant le module Publier un Contenu, tous tes articles auront la même présentation, le même style de titre, etc.
Bonjour.
Oui c’est ce que j’ai fait.
Mes les articles publiés avant la modification de la police des sous-titres dans le module « Publier un Contenu », n’ont pas été changé automatiquement. Bizarre.
Je vous remercie beaucoup en tout cas.
Bizarre
Le module post content n’est nul part
Bonjour Helene,
Ce module s’appelle « publier un contenu » (« post content » c’est en anglais) et il est disponible uniquement dans le Theme Builder et non le Divi Builder, comme bien indiqué dans mon article.
Salut Lycia et déjà merci pour cet article qui m’a été très utile !
Cependant je suis bloqué. Comment puis-je faire pour supprimer les espaces natifs de part et d’autre du contenu ? (notamment à gauche et droite). J’ai beau essayer des modifications dans les parties « Dimensionnement » et « Espacement » mais ça n’y fait rien. J’espère que tu pourras m’aider.
Merci d’avance !
Salut Yann. Dans dimensionnement tu dois mettre 100% et tu dois aussi mettre le curseur suivant sur 2500px. Et tu verras que là ça fonctionne.
Bonsoir, je voudrais savoir comment rendre visible le contenu de ma page? Je sais pas ce que j’ai fait mais je voit le contenu que sur smartphone pour je vais dans paramètre visibilité mais rien n’est désactiver. Merci d’avance.
Salut Yaya, as-tu retrouvé ta page ? Car si rien n’est coché dans Avancé > Visibilité, c’est bizarre quand même !
Bonjour Lycia et merci pour ce site très complet 🙂
J’avance pas à pas pour créer ma boutique woocommerce. Je ne trouve pas comment personnaliser les boutons de la page panier avec le module post content. J’ai un thème enfant DIVI mais je ne connais rien en CSS.
Merci de ton aide.
j’ai oublié de préciser que j’ai utilisé le layout proposé sur cette page : https://www.markhendriksen.com/divi-woocommerce-free-layout-pack/ et je souhaite changer les options de couleur des 3 boutons (code prom, appliquer la promo et valider le panier). Merci
Tu as raison, il n’y a pas d’option pour les boutons, tu dois les paramétrer de manière globale dans l’onglet Apparence > Personnaliser.
Bonjour Lycia, merci pour ces tutos. J’ai intégrer le module « publier un contenu » ainsi que le module « titre du poste », sur les deux modules j’ai déterminé le h1 qui représente le titre de mon article. Du coup j’ai deux fois le titre de mon article qui apparait dans mes pages, l’un grâce au module du « titre du post », l’autre grâce au h1 du module « publier un contenu », avez-vous une idée de comment faire pour que le h1 du « publier le contenu » ne soit pas pris en compte, je souhaite garder mon titre de post. Merci
Salut Jennyfer : si tu places ton titre H1 au sein de ton conetnu en plus du titre de la page, c’est normal qu’il y soit 2 fois. En gros, quand tu crées ta page, tu renseigne son titre puis au sein du contenu tu ne le renseigne pas et là tu n’auras qu’un seul H1 et non 2.
Hello Lydia, je ne sais pas si tu réponds toujours aux commentaires… tout d’abord merci pour ce tuto que j’ai essayé d’appliquer. Seulement à présent, j’ai des blocs qui sont complètement de travers, je te laisse jeter un oeil car je ne sais pas comment résoudre le problème… Merci ! : https://emmanuelle-wiesemes.com/clientele-type-reseaux-sociaux/
Hello Emmanuelle… alors sur Mobile tout me parait bon, il faut que je regarde sur ordinateur. En fait, j’ai des soucis ces derniers temps qui ressemble à ce que tu décris, chez moi c’est WPRocket qui fout le boxon. As-tu ce type de plugin de cache ? As-tu essayé de les désactiver ?
Bonjour Lycia,
Merci pour cet article : comme tous ceux que j’ai déjà lus sur ton site, il est très clair et instructif !
Deux questions, cependant, que je n’arrive pas à démêler, malgré ma lecture attentive de cet article et de ses commentaires :
1) J’aimerais créer un modèle pour tous les produits que je souhaite vendre via mon site. J’ai pour cela créé un « corps personnalisé » pour via le « Thème Builder ».
Or, lorsque je retourne sur un produit, on me revoie un message stipulant qu’il faut utiliser le module « Publier un contenu ». Soit. Mais je ne comprends pas, car lorsque je te lis, j’ai l’impression qu’au contraire, ce module est inutile, je te cite, pour « toutes les pages produits » sauf pour « la description longue ». Du coup, dois-je utiliser ce module ou non ?
2) En imaginant qu’il faille utiliser ce module afin de ne plus recevoir de message d’erreur, ce que je choisis de faire, donc, ma question est : OÙ l’insérer ? Suffit-il de l’ajouter, un peu n’importe où, dans le « corps personnalisé » qu’on a créé dans le « Thème Builder » ? C’est ce que j’ai fait, en créant, à la fin de mon modèle de « corps personnalisé », un nouvelle « Section », en y ajoutant une ‘ »ligne » puis en y insérant le module « Publier un contenu ».
Ça a l’air de marcher, mais quelque chose m’échappe dans la logique du truc… Le module « Publier un contenu » pourrait donc s’insérer n’importe où, avec le même rendu final ?
Merci beaucoup, par avance, pour tout éclairage que tu pourras m’apporter !
Bien à toi,
Emilie
PS : j’ai déjà tenté de soumettre un commentaire la semaine dernière, avec les deux mêmes questions, mais peut-être ai-je fait une erreur de manip’, il me semble qu’il a disparu des radars !
Hello Emilie, désolée, c’est moi le problème 😉 je suis sous l’eau en ce moment et j’ai pris du retard dans mes réponses aux commentaires. Écoute, je pense que tu devrais jeter un œil à ce tutoriel (https://astucesdivi.com/modele-fiche-produit-woocommerce/) qui explique comment personnaliser tes fiches produits. Peut-être que tu es passée à côté d’un « truc » qui fait que ce message apparaît. Je l’ai déjà vu ce message, je vois bien de quoi tu parles, et je crois que j’explique cela ici https://astucesdivi.com/divi-theme-builder/#lwptoc3 … j’imagine qu’il y a un truc que tu as oublié de faire. Peux-tu reprendre pas à pas la procédure, ça devrait marcher. Tiens-moi au courant.
Bonjour, merci pour cet article ! Cela crée une feuille de style CSS finalement ?
C’est un peu ça oui.
Bonjour, Lycia
J’ai tout fait comme tu dis mais je n’arrive toujours pas à comprendre pourquoi on peut aussi utiliser les réglages du visual builder, ils contredisent ceux du thème builder, et les préréglages par défaut.
Il semble qu’un constructeur de page ne permet pas de comprendre ce qu’il fait lorsque l’on a jamais programmé un site en langage htlm + css.
Comme on est obligé d’écrire les articles dans le visual buider la mise en page n’est pas celle enregistrée avec le théme buider.
Ce qui fait perdre tout l’intérêt d’utiliser Divi ?
En bref : comment empêcher divi appliquer les thémes de plus basse priorité ?
Quelque chose m’a t’il échapper ?
Salut Sam, j’avoue ne pas trop comprendre ta question. Tout ce que tu fais depuis le thème builder est le « par défaut » finalement et tu peux intervenir avec les options du Divi Builder au cas par cas, ce qui aura la priorité sur le « par défaut ». Par exemple, avec le module Publier un contenu, tu peux définir tes H2 en 30px par exemple, mais si au sein d’une publication, tu les veux en 60px, tu peux les définir à l’aide du visual builder, ce qui prendra le dessus. Est-ce plus clair ?